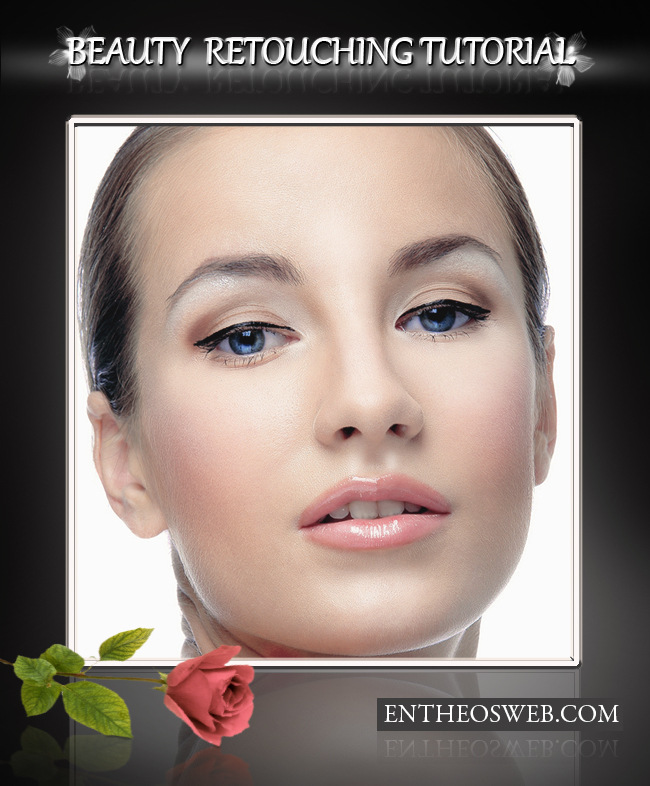
In this tutorial we’ll show you how to make a glamour retouch for a model portrait in Photoshop. You’ll learn a new method to create a great look for natural skin without using any extra plugins.
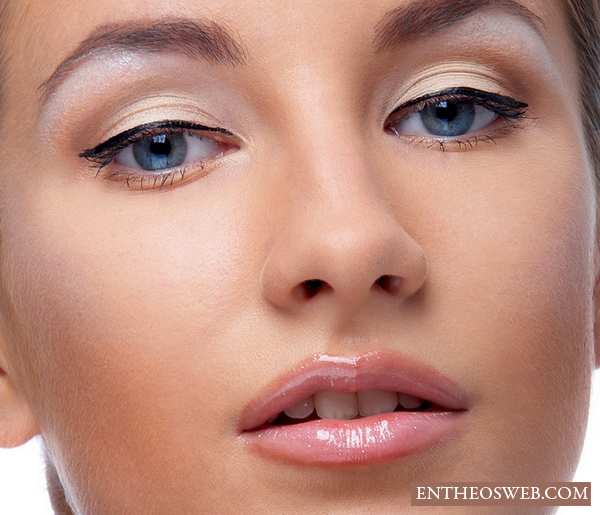
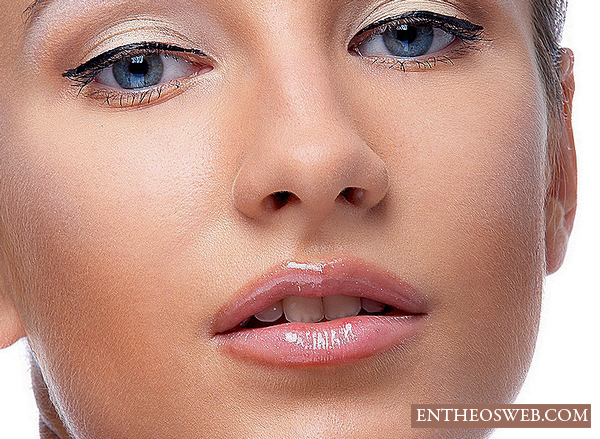
Final Image Preview
This is what we’ll be creating:
Tutorial Details
Program: Adobe Photoshop CS2+
Difficulty: Beginner
Estimated Completion Time: 10 -15 minutes
Tutorial Assets
The following assets were used during the production of this tutorial.
Step 1
Open your model picture. Remember that not all of girl ( woman) picture can be suitable for this retouching style. And you should choose a picture with high quality and your model skin is not too smooth( made up) or blurred, at least the pores should be visible. You can take a look at my model for reference:

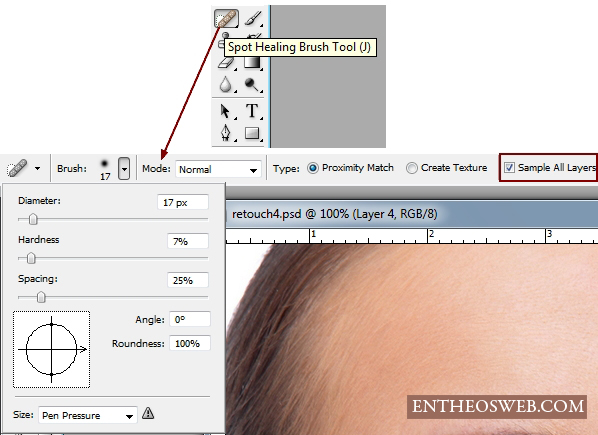
Create a new layer above the background ( press Cmd/Ctrl+Shift+N) to do it), hit J to active Spot Healing Brush Tool and make sure that “Sample All Layers” is checked on property bar. By this way we can edit the skin without affecting all the rest of picture and can go back anytime to adjust it.Make a settings for this brush as shown below:
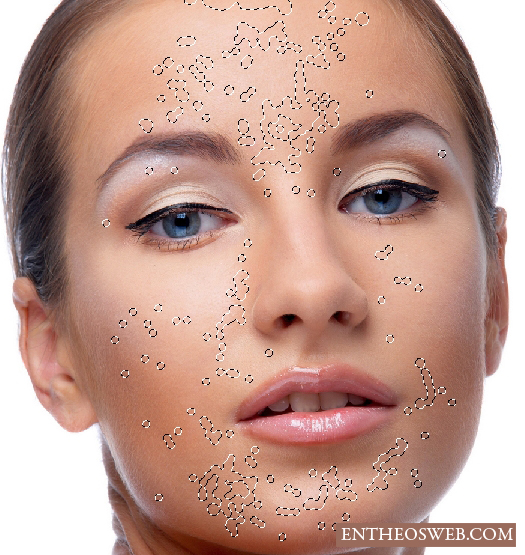
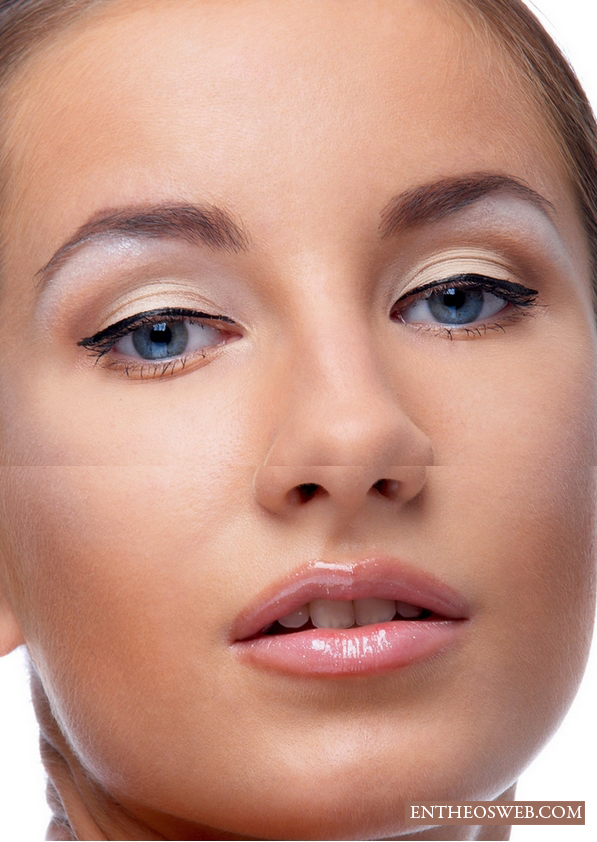
Click once on any blemishes you want to remove. Depending on the size of the blemishes you can vary brush diameter. Remember that not all blemishes can be removed successfully with this tool so pay attention to your process. You can use another tools ( Clone, Patch tool..) to fix them later. With the model who does not have complex blemishes and wrinkles like ours, Spot Healing brush tool is enough. Don’t need to get a perfect skin after this step but cleaned one. You can see how I apply this tool on her face below:
Step 2
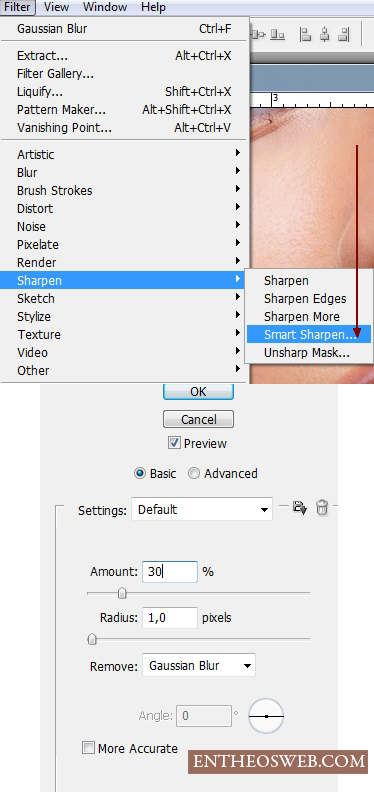
Hold Cmd/Ctrl+Shift+Alt+E to merge all layers and we have a new layer on the top. Go to Filter-Sharpen-Smart Sharpen:
We have result:
This step is optional and depends on the sharpness of your model skin. If it looks too rough you may want to soften it before doing next step.
Step 3
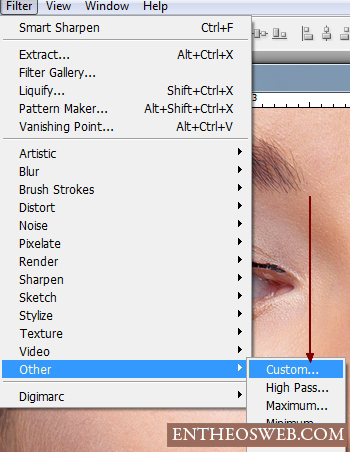
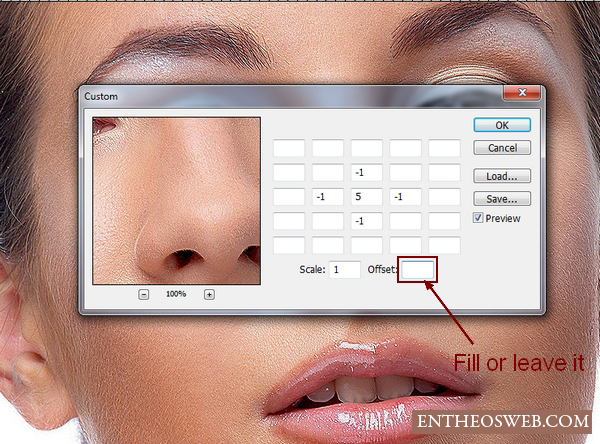
Merge all layers again. Now I’ll use a method you may never use before to make a great look for skin. Make sure that all skin parts are cleaned otherwise it will look terrible using this step. Choose Filter-Other-Custom:
If you want to brighten your picture you can fill value for Offset or leave it blank like me:
We have result:
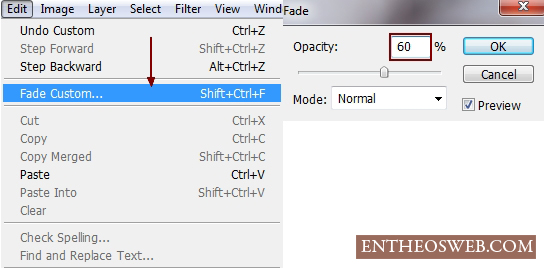
As you see the picture is much sharpener and I want to reduce this effect. Go to Edit-Fade Custom:
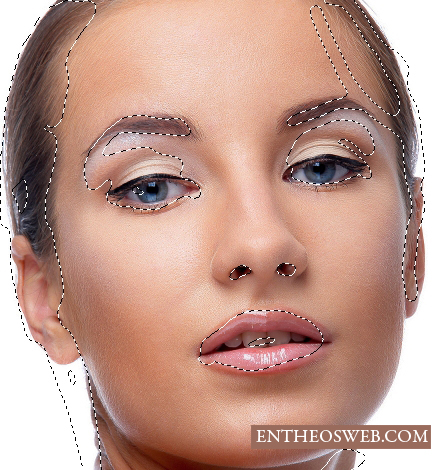
Add layer mask to remove sharpness on hair, eyes, eyelids lips, teeth:
Step 4
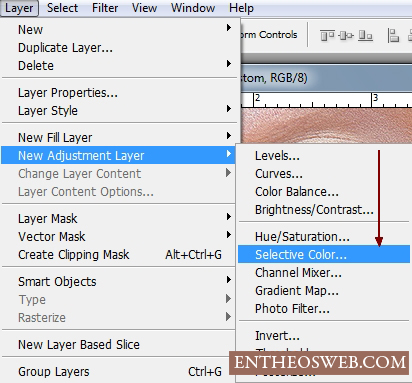
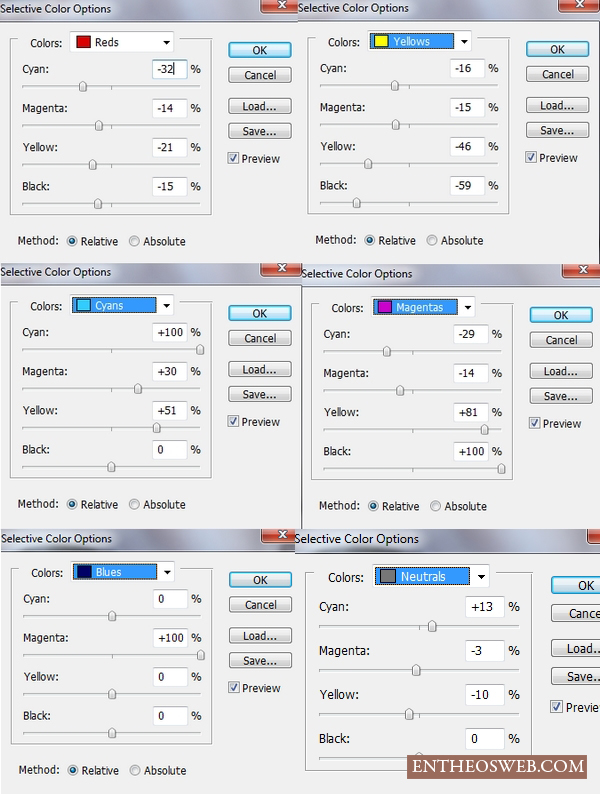
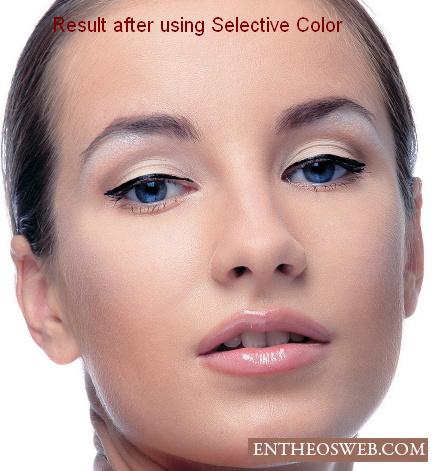
I’ll use some adjustment layers to change color of skin to make it look much better. Create a Selective Color layer ( Layer-New adjustment layer-Selective Color):
Step 5
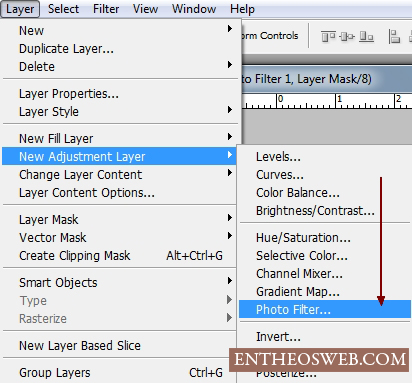
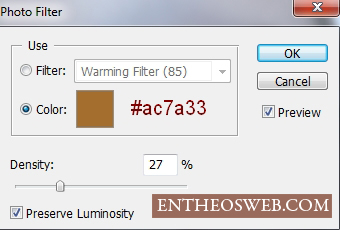
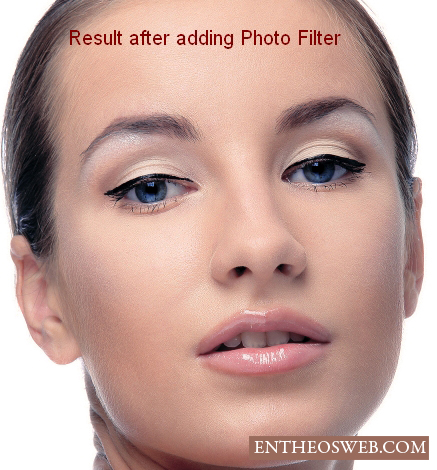
Add a Photo Filter layer:
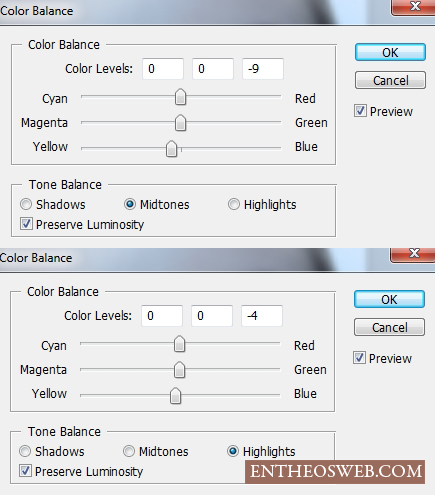
Step 6
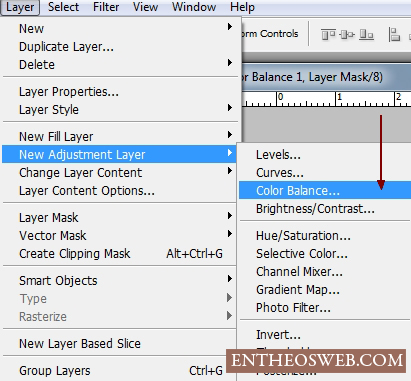
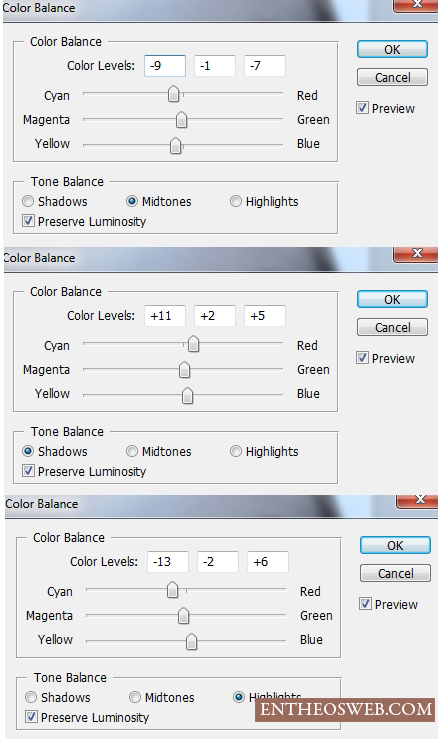
Two Color Balance layers:

Step 7
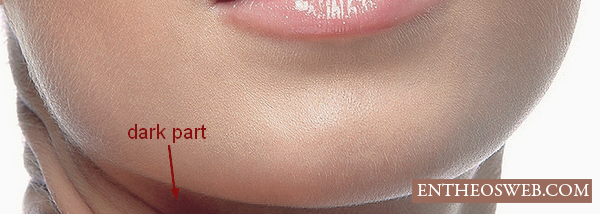
You still can use adjustment layers to change color or brightness/darkness on your own model.
Now we’ll fix the dark part on model neck. Make a new layer on the top of layers, use white brush( hit B to active it) to paint on it and change the mode to Soft light 100%:

Step 8
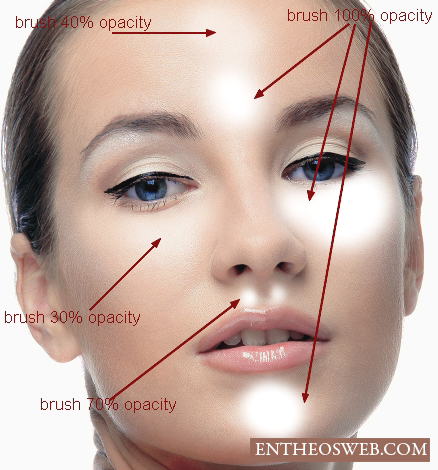
In this step we will make some highlights for model face. Create a new layer and use soft white brush painting on T-shaped face ( forehead, under eyes, under nose, chin) as the image below shows. Remember that I vary brush opacity for different parts of the face:
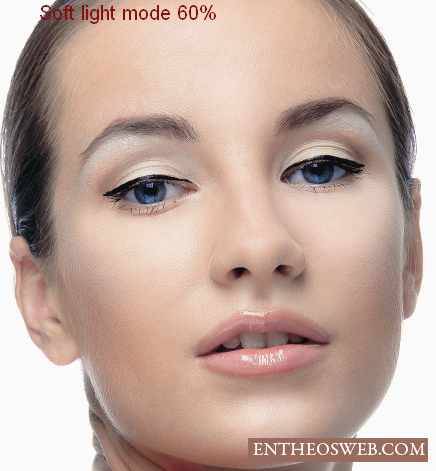
Change the mode to Soft light 60%:
Step 9
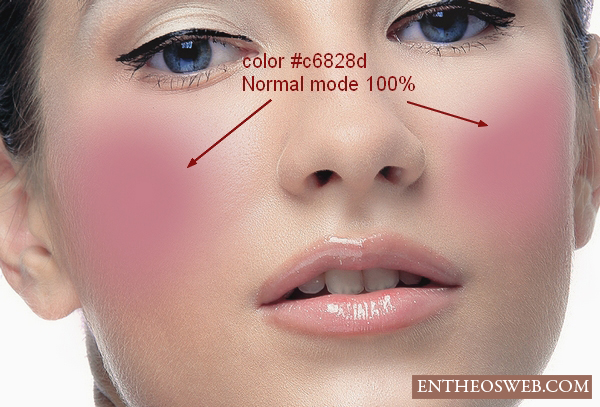
Make a new layer and use soft brush with color #c6828d. Paint along her cheeks and set the mode to Soft light 100%:

Step 10
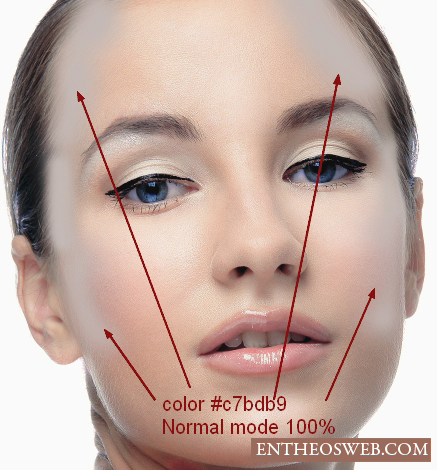
To make some shadows for model face, I use color #c7bdb9 for brush on a new layer. Paint the edges of forehead, cheeks and change the mode to Multipy 30%:

Step 11
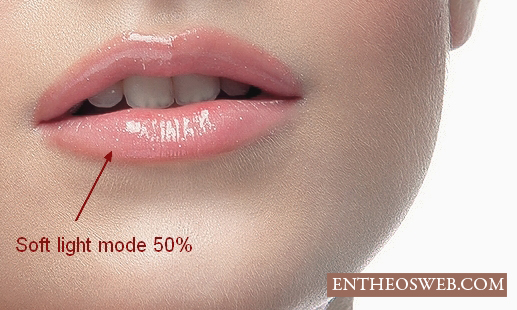
To make lips look better I create a new layer and paint on them with brush with color #b45f6d and put the mode of this layer to Soft light 50%:

Step 12
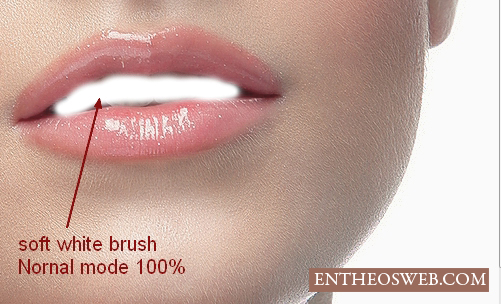
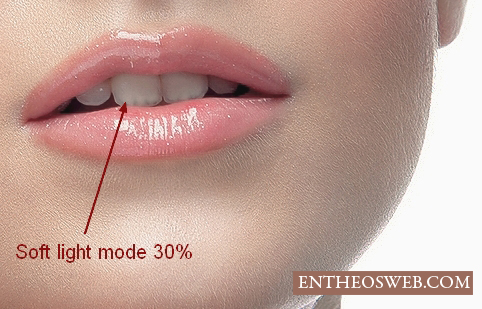
To brighten the teeth I use soft white brush on a new layer and with Soft light mode 30%:
Step 13
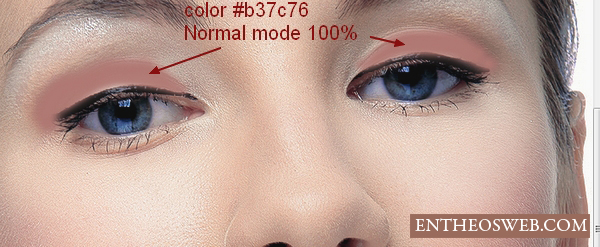
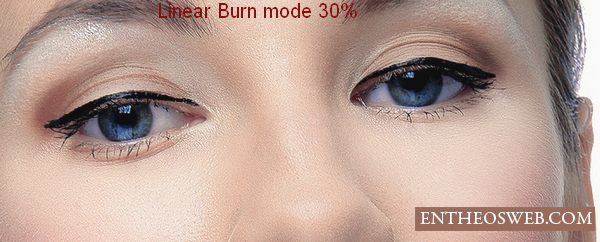
Make a new layer on the top, I use brush and color #b37c76. Painting on eyelids and set the mode to Linear Burn 30%:
Step 14
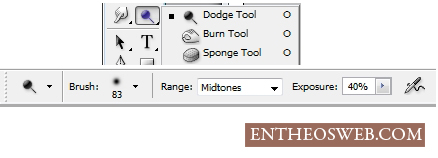
In final step, make a new layer, set to Overlay 100% and fill with 50% gray:
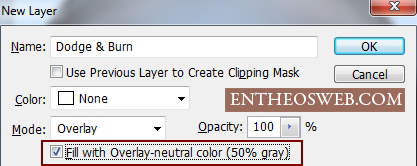
Take Dodge and Burn Tool with Midtones Range and medium Exposure ( 40-50%) and paint over model face to determine facial features. In general, Dodge Tool for brightening nose bridge, chin, forehead, skin under and above the eye, skin under nose, sclera ( if it has lots of redness), Burn Tool for nose side, iris, eyelid, eyelashes, especially the end of eyelid. But it depends on the light and shadow from original picture, you can choose to brighten or darken face parts to be fit it. You can see how I use this tool with Normal mode ( bright parts-Dodge Tool, dark parts – Burn Tool) and Overlay mode (result) on my model:
Final Result

Close-up
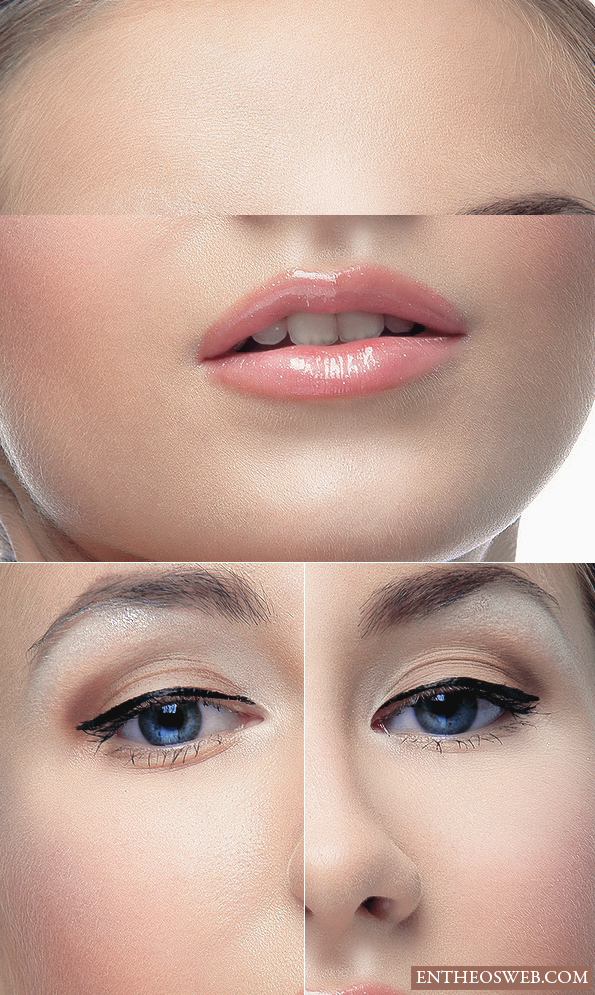
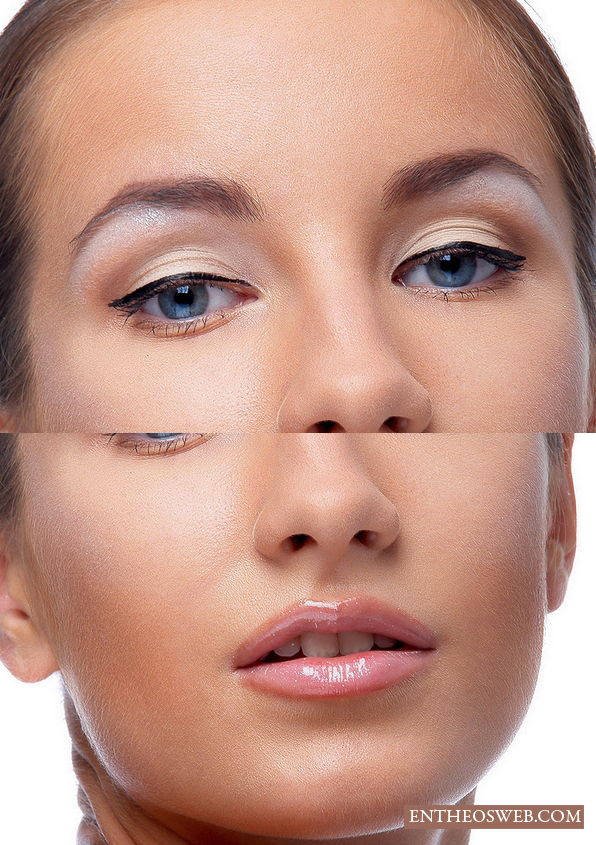
Before/After

Hope you enjoyed this tutorial on retouching a photo to create flawlessly natural skin, do you use the comments section below to let us know what you think!