FancyBox is a tool that offers an elegant way to add zooming functionality for images, html content and multi-media on your webpages in a Mac-style “lightbox” that floats over the top of the web page. It is built on the top of the popular JavaScript framework jQuery and is both easy to implement and a snap to customize.
It can display images, HTML elements, SWF movies, iFrames, Ajax requests and is customizable through settings and CSS. Support fancy transitions by using the easing plugin.
Check out this tutorial and learn how to set up the gallery using FancyBox!

Creating a Gallery using the FancyBox Plugin in Dreamweaver CS6
Note: On Demo, click on the images to view the fancyBox gallery.Step 1: Let’s open the website which we have created already. Click here to download our simple HTML5 website using HTML5 and CSS code from our tutorial.
Here we can see how to implement the fancyBox plugin and create a gallery with the present images in the website template in Adobe Dreamweaver CS6.

Step 2: First let’s download the fancyBox plugin version 2.1.5. You need to scroll down the webpage to find the download button.

Note: fancyBox is free to use for your personal or non-profit website projects.
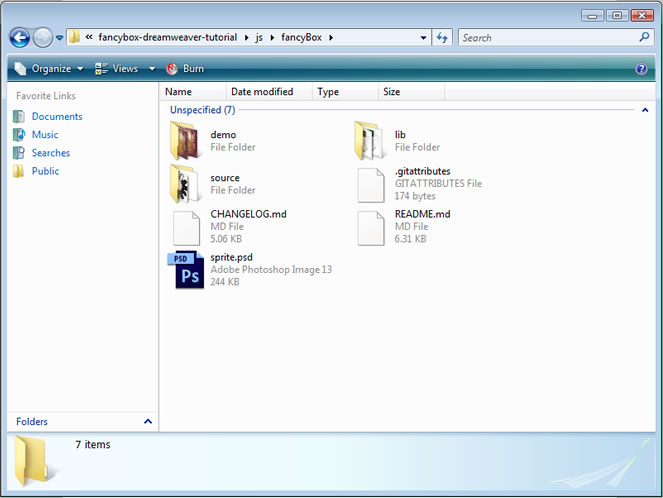
Step 3: Download the plugin, unzip it, copy files and include the fancyBox script and stylesheet in your document.
Step 4: Create a folder named “js” in Dreamweaver CS6 and save the entire “fancyBox” folder with all the files on it without changing any name. Hence we have imported the fancyBox plugin into our dreamweaver website.
We still need to do another 4 simple steps to activate the fancyBox plugin in our website page and to specify which image should be open through it when the fancyBox code function has been called.
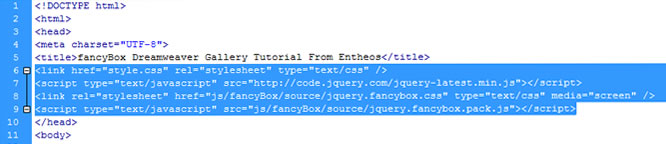
Step 5: Before using any jQuery or jQuery Plugin, we need to link the latest version of the jQuery into our website by adding the below script above the closing head tag </head>.
<script type=”text/javascript” src=”https://code.jquery.com/jquery-latest.min.js”></script>

Step 6: Next, link the fancyBox CSS file to our stylesheet. Add the following code in our website.
<link rel=”stylesheet” href=”js/fancyBox/source/jquery.fancyBox.css” type=”text/css” media=”screen” />
The above code will visually style the fancyBox images with zoom, popup and more. It will load in jQuery and also enable the fancyBox to work.

Step 7: Here let’s load the jquery.fancybox.pack.js file in the source folder.
<script type=”text/javascript” src=”js/fancyBox/source/jquery.fancyBox.pack.js”></script>
Step 8: Next, we tell our HTML document that when it’s ready and loads up the jQuery, it will go head and execute the “fancyBox” function on any HTML element with the class “.fancybox” on it.
<script type=”text/javascript”>
$(document).ready(function() {
$(“.fancyBox”).fancyBox();
});
</script>
Always place this code before our closing tag </body>.

Step 9: We can create a fancyBox element with the class “.fancybox” on our first image(i.e, img1.jpg).
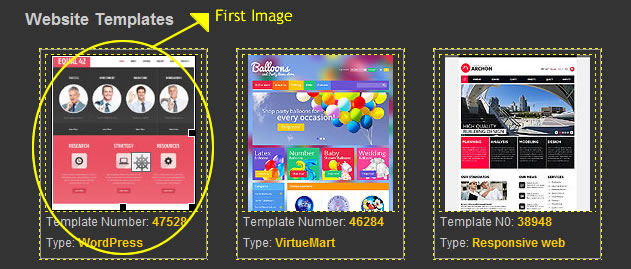
Now select the smaller image and check the code.

<a href=”https://www.entheosweb.com/wp-content/uploads/2014/01/pic1.jpg”><img src=”https://www.entheosweb.com/wp-content/uploads/2014/01/img1.jpg” alt=”Template 47528 – Equal 42 Responsive WordPress Theme”/></a>
Step 10: It has been specified that on clicking on the smaller image, it will simply open the bigger image (i.e, pic1) of that particular image without any fancyBox.

It’s time to structure our fancyBox plugin to make it work. Whatever element we link with the class fancybox, gets completely wrapped into the fancyBox frame or gallery or wrapper.
Step 11: With our image selected, we now create a link to the image, load it in the fancyBox and then set the class of “fancybox” on that link.
Step 12: Let’s go ahead and create the class=”fancybox” for our img1.jpg. Here in between the anchor tag, after a and before href, add the code class=”fancybox”. Our link will now look like the below code.

Step 13: In the same way, we can set the class to our other 6 images too and load them in the fancyBox.
Step 14: Press “F12” to test how our fancyBox works. On the preview, the images will load on the fancyBox, but they don’t form a gallery. They are not linked together.

Note: On the preview, there won’t be any arrow button present on the right and left side of the image.
Step 15: To form a fancyBox gallery, just add the code rel=”Template Gallery” after our “class=”fancybox”. In the “rel” attribute code you can use any name you wish. Here I have used “Template Gallery”.

Step 16: As long as all the images have the same “rel” name, they will be within the same gallery. Now copy the “rel” attribute code to the other images to group them into a gallery.
Step 17: That’s it! now press “F12” and check the fancyBox gallery. Wow! The fancybox gallery works great with the “Previous” and “Next” buttons.

I hope you have enjoyed this tutorial on creating a fancyBox gallery. Now go ahead and experiment with making fancyBox galleries of your own in Dreamweaver 6.