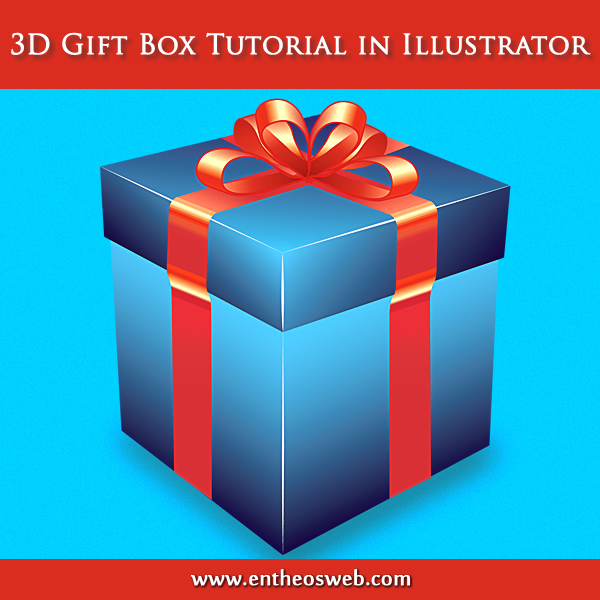
In this tutorial, we will learn how to create a 3D gift box in Adobe Illustrator using Extrude and Bevel effects, gradients and expand object elements.
Tutorial Details
Program: Illustrator CS5
Estimated Completion Time: 40-45 Minutes
Step 1
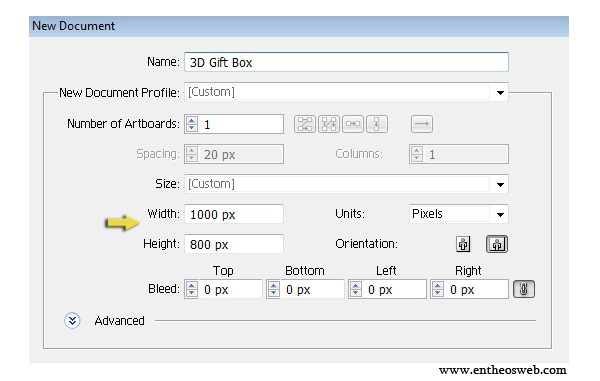
Create a new document with width 1000px and height 800px.
Step 2
Select the ‘rectangle tool’ to draw a rectangle of 200px width and 200px height.

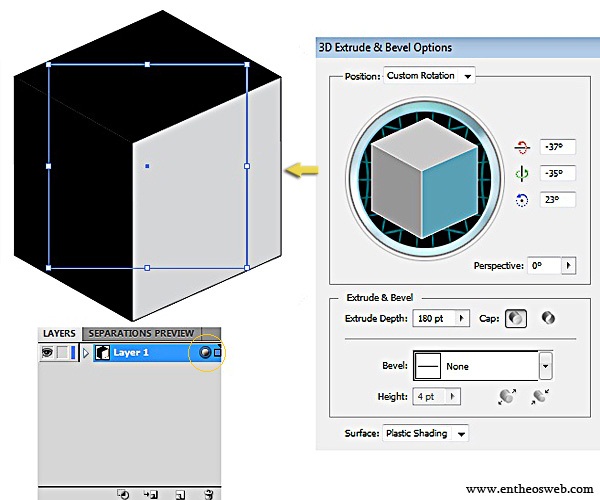
Now click on ‘circular ring’ on the layer to select box and go to Effect > 3D > Extrude and Bevel. Apply the given settings here to give the box 3D look.
Step 3
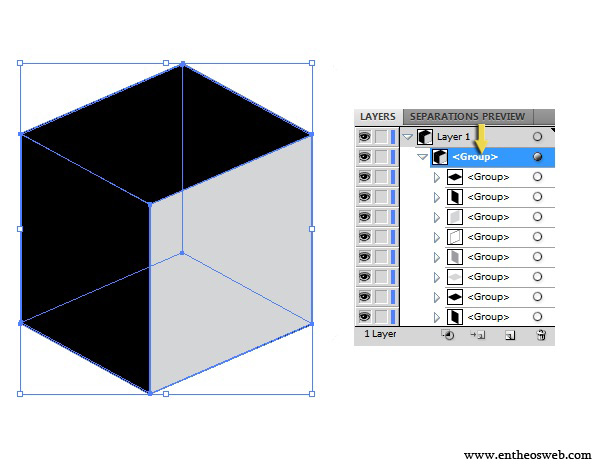
Now we will separate different parts forming this 3D box. Select the box layer and go to Object > Expand appearance. For creating 3D Gift Box, we only need to modify 2 surfaces on this box.
Select ‘1’ surface layer by clicking on the ring shape on its layer and select ‘direct selection tool’. Click on the anchor point encircled in the image below and drag it a bit inward and upward to give box the look we want.
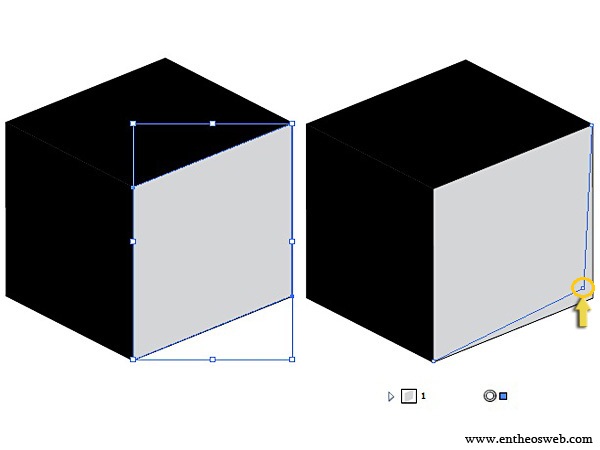
Similarly, click on ‘2’ surface layer and drag encircled anchor point inward and upward. Hide the inside surfaces of the box, which have become visible after dragging the anchor points as shown below.

Step 4
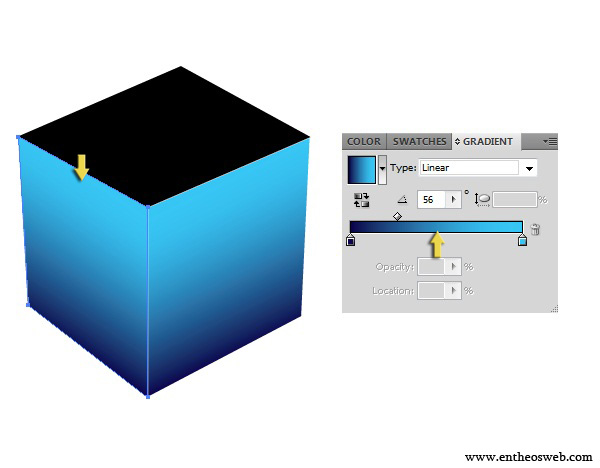
Next, we’ll apply ‘gradient’ on 1 and 2 surfaces. Select surface ‘1’ and ‘gradient tool’. Use the given settings.

Apply the same settings for the surface 2.
Step 5
Now we will create the box lid in the same way. Create a new layer by clicking on the ‘icon’ present at the bottom of the layers panel. Draw a rectangle on this new layer with width 202px and height 202px and apply the given settings for ‘Extrude and Bevel’.
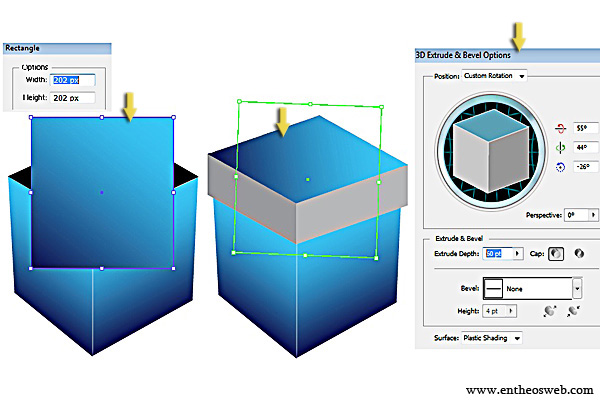
Separate each part forming the lid by going to Object > Expand appearance.

Step 6
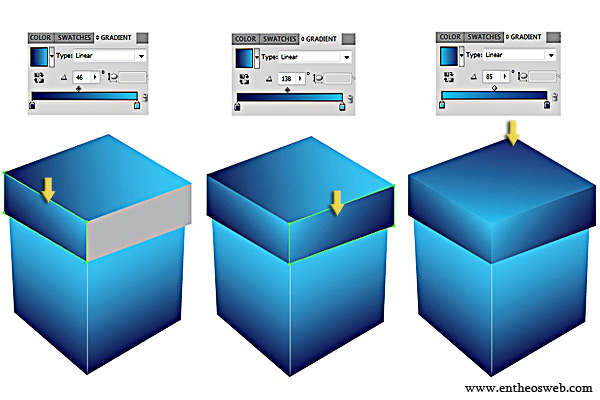
Next, apply gradient on the lid surfaces as shown below.
Step 7
Now we’ll highlight the borders making the box. Create a new layer at top and draw a thin vertical highlight with ‘pen tool’ using # B8FFFF color on the lid. Draw other highlights in the same way.
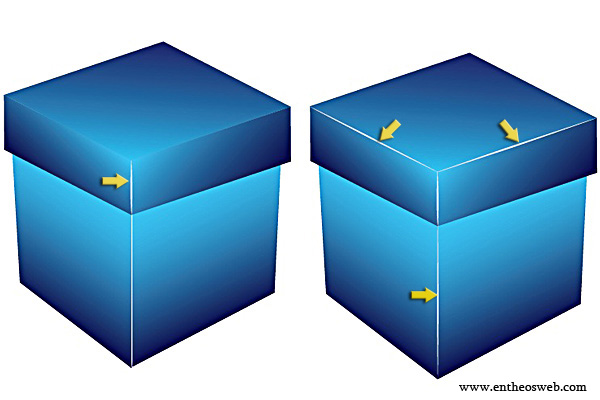
To adjust lid shape, select the different lid surface layers one by one and drag the anchor points in the direction shown below.

Step 8
Next, we’ll create ribbon to wrap up the gift. Create a new layer and draw the shape as shown below using ‘pen tool’. You can use any color for now as we will change the color later on. Now select this newly created layer and go to Effect > 3D > Extrude and Bevel. Use the given settings for it.
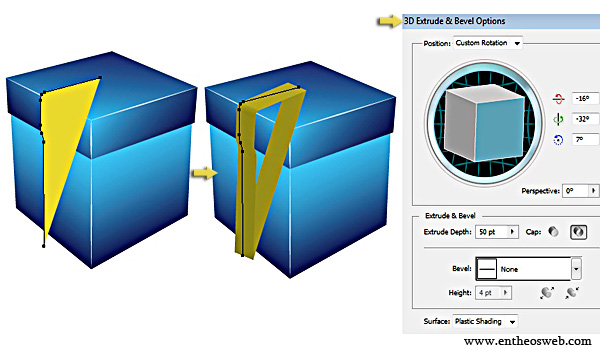
Now go to Object > Expand appearance to separate the ribbon shape into different parts. Hide the right sided shape. Select layer of lower part of the ribbon and box surface 2 on which ribbon is placed. Then select the ‘shape builder tool’. You will see an arrow head with sign of ‘+’. Take that arrow to the part of ribbon which is outside the box and press ‘Alt’ key. By pressing ‘Alt’ key the ‘+’ sign will turns to ‘-‘. It means now if you click the ‘shape builder tool’, it would delete highlighted shape.

Step 9
Apply gradient on different parts of the ribbon as shown below.
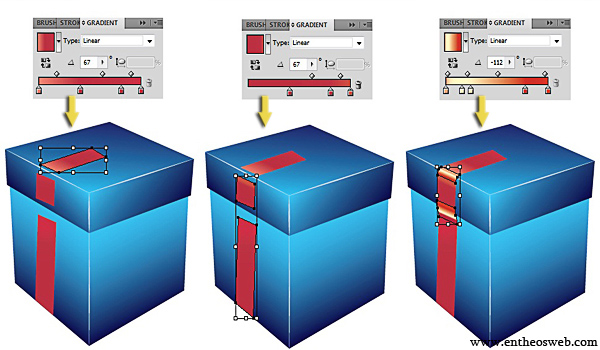
Now duplicate the ribbon layer and go to Object > Transform > Flip vertical. Arrange the ribbon on box.

Step 10
Next, we’ll create the bow of ribbon. Create a new layer at top and draw the shapes as shown below. You can use any color for now.
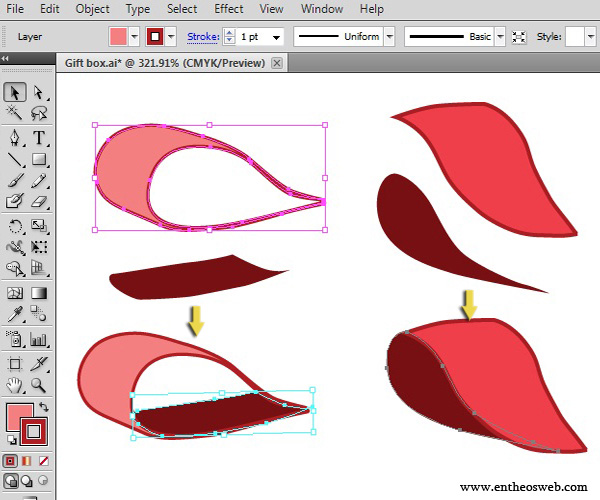
Step 11
Now apply gradient on each part of bow as shown below.
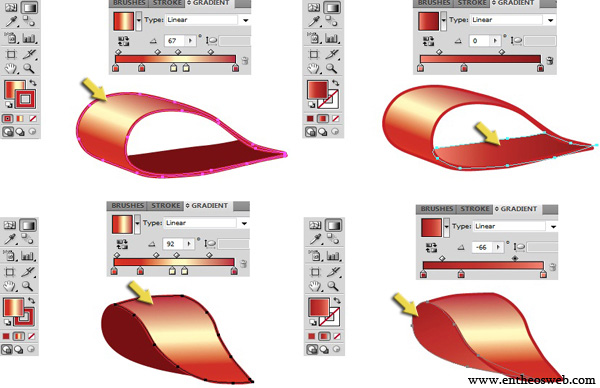
Arrange these shapes over the box lid. After that, duplicate these 2 shapes few times, reflect them vertically 90 degree to form opposite side loops and arrange them on the lid as shown below.
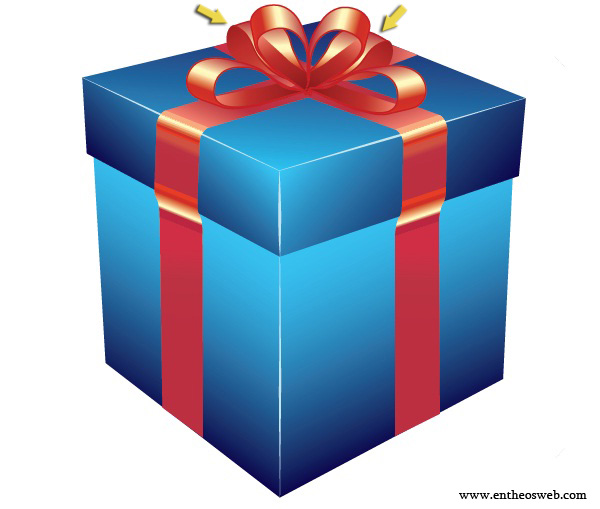
Step 12
Create a new layer, place it below rest of layers, after that go to Effect > Stylize > Drop shadow. Use the given settings here.
That’s it guys. Hope you enjoyed the creation of this gorgeous 3D gift box. We’ll be waiting for your feedback.
Illustrator Tutorials & Resources
