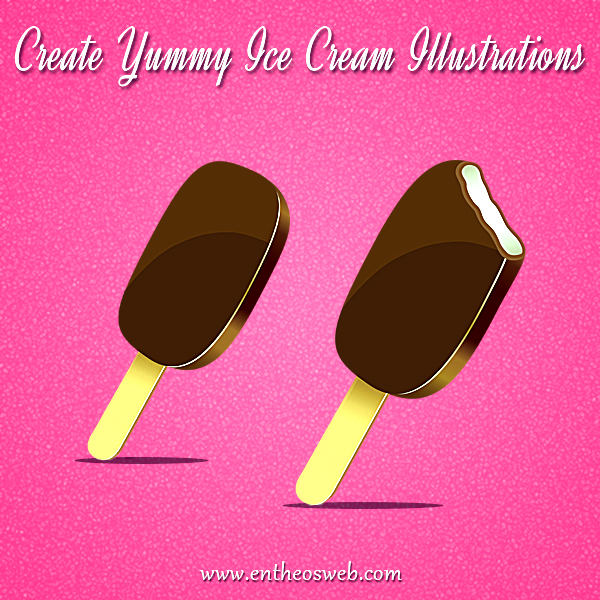
In this tutorial, we will learn how to create yummy ice cream illustrations in Adobe Illustrator.
Tutorial Details
Program: Illustrator CS5
Estimated Completion Time: 40-45 Minutes
Step 1
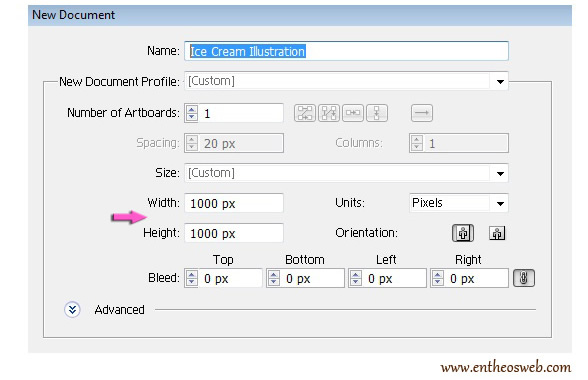
Create a new document with width 1000px and height 1000px in adobe illustrator.
Step 2
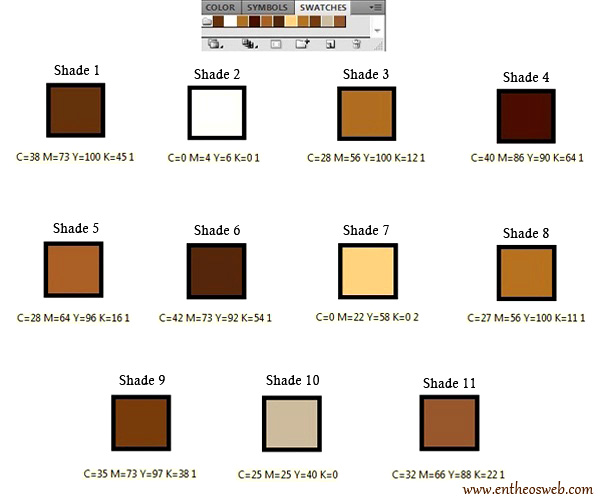
Create a new color swatch for this tutorial with the following shades.
Step 3
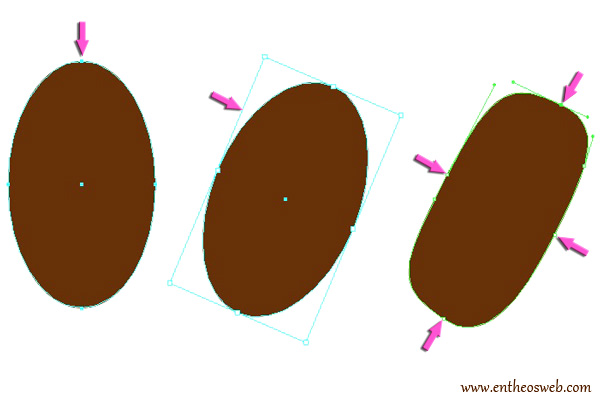
First of all, select the ‘shade 1’ as your foreground color and select the ‘ellipse tool’ to draw a circle on layer 1. Label it as ‘shape 1’. Now with the help of ‘selection tool’ rotate it a bit. After that, pick the ‘direct selection tool’ and drag the anchor points and their handles as shown below.
Step 4
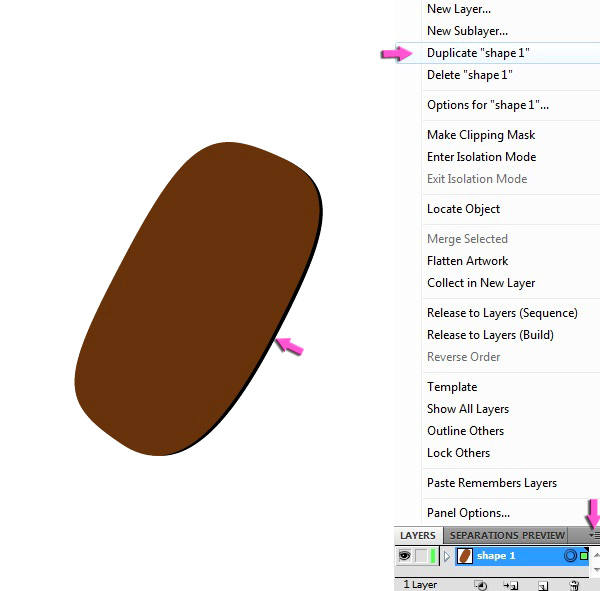
Now click on the ‘ring’ shape target on ‘shape 1’ layer to select it. Then click on the options menu present at the right top corner of layers pallete and select the option of ‘duplicate shape 1’. Place the duplicated layer below original layer and drag it a bit downward using ‘selection tool’.
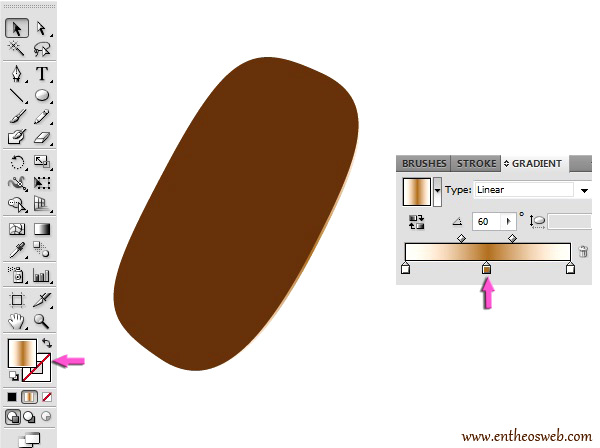
Now we’ll apply lighter color gradient on it as this will serve as highlight. Click on the target on this layer to select it and then select the gradient tool. Use shade 2 and 3 for this gradient.
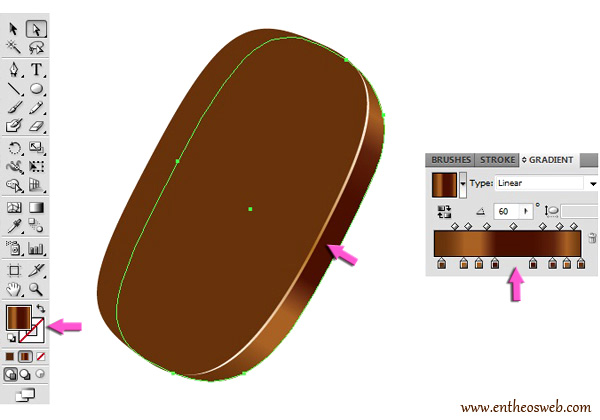
Step 5
Once again duplicate ‘shape 1’ layer and drag this copy below the highlight layer. Drag it downward to give 3D look. We need to adjust its shape a bit. Use the ‘pen tool’ to add two anchor points, then position the anchor points and their handles using ‘direct selection tool’.
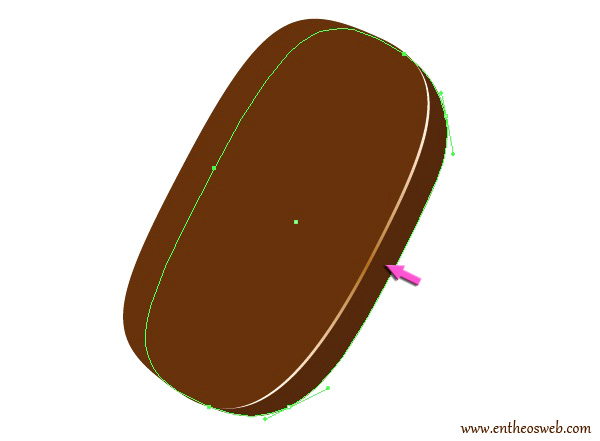
Now apply the gradient on it as shown below. Use shade 3, 4 and 5 for this gradient.
Step 6
Create a new layer at top of rest of the layers. Select ‘shade 6’ as foreground color. Now draw an ellipse on this new layer. Select the ‘ellipse’ and ‘shape 1’ layers by pressing ‘Shift’ key and clicking the target on both these layers. After that, select the ‘Shape builder tool’ and press ‘Alt’ key when the arrow is over the part of ellipse outside the shape 1. Click to delete that part.
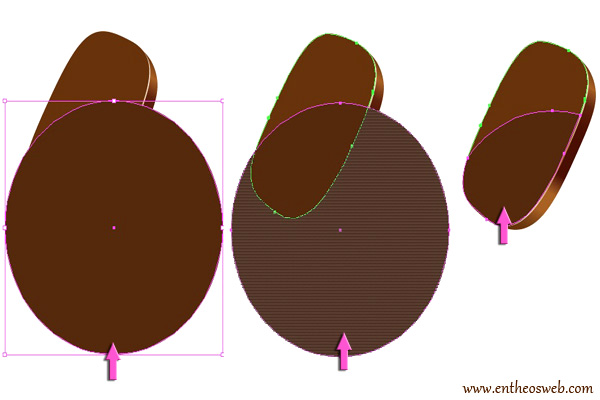
You can adjust the curve of this shape using ‘direct selection tool’.

Step 7
Create the stick using ‘pen tool’ on a new layer. Keep stroke 1pt white and apply gradient as below. Use shade 7 and 8 for this gradient.
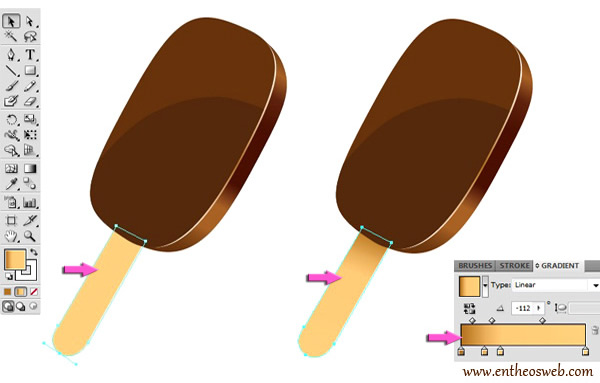
Duplicate stick layer and place this copy below the original stick layer. Color this with shade 9 and drag it downward a bit.
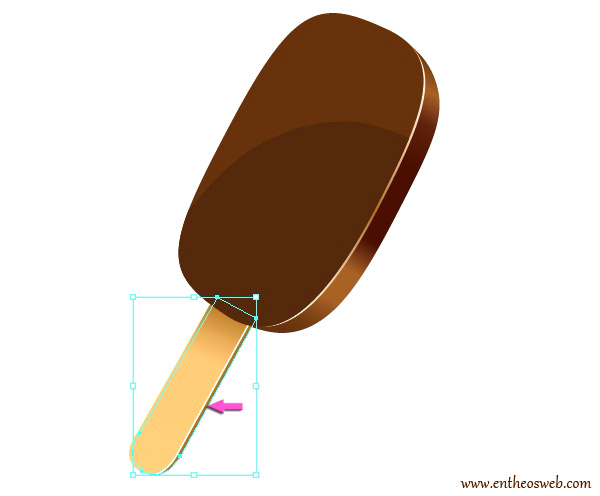
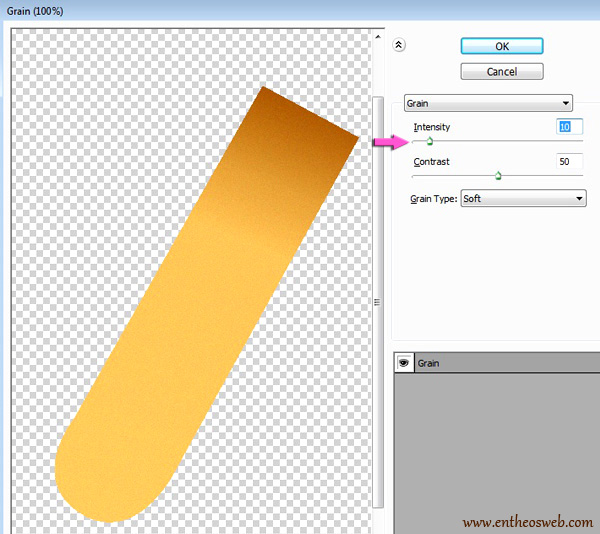
Step 8
Duplicate stick layer, place this copy above the original stick layer. Reduce its size a little bit using ‘selection tool’. After that, go to Effects > Texture > Grain. Use the given settings.

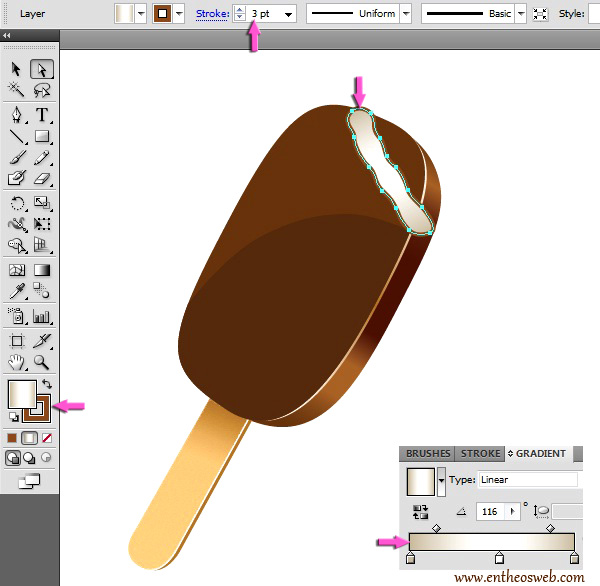
Step 9
So far we are done with the chocolaty ice cream. We can enhance it further by creating the effect that a bite has been taken. Create a new layer and draw the shape using ‘pen tool’. Apply the given gradient on it and 3pt stroke of shade 11.
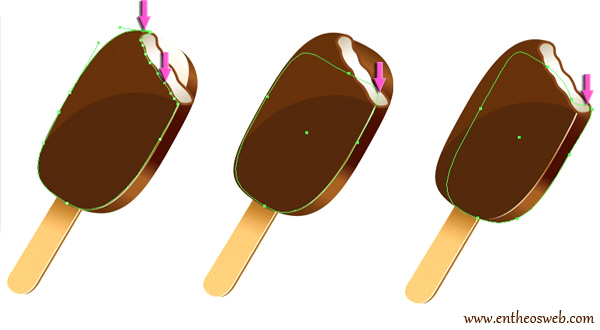
Adjust shape 1, highlight and 3D layers of the ice cream according to the bite area using ‘direct selection tool’.
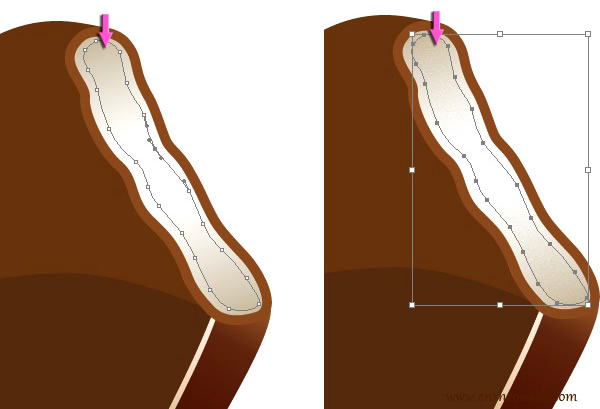
Step 10
Draw another shape inside the bite area on a new layer using ‘pen tool’ and apply the same white and gray gradient on it. After that, go to Effects > Texture > Grain. Use the same settings as applied in step 8.
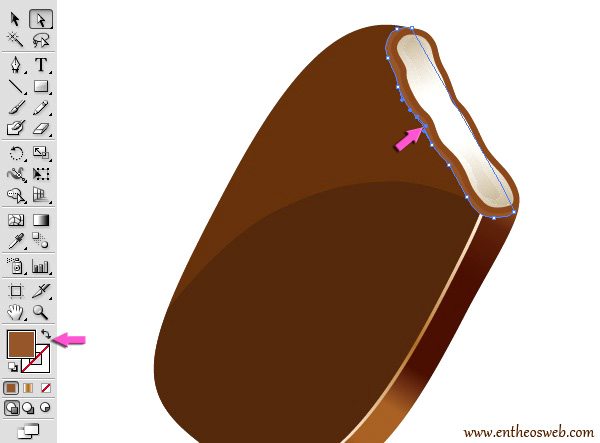
Step 11
Create a new layer, place it behind the bite shape layer, select the ‘pen tool’ and draw the outline of bite. Use shade 3 for it.
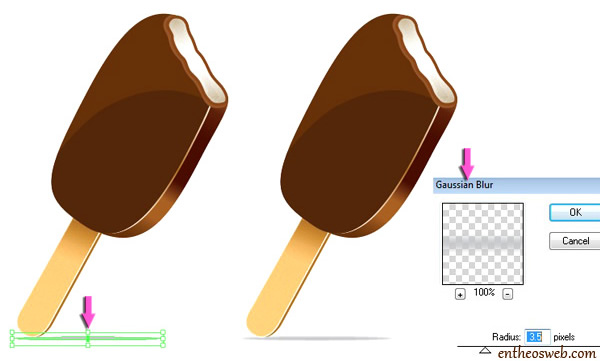
Step 12
Now to add shadow, create a new layer, place it below all layers, select shade 10 as foreground color and draw a thin ellipse. After that, go to Effects > Blur > Gaussian blur. Use the given values for it.
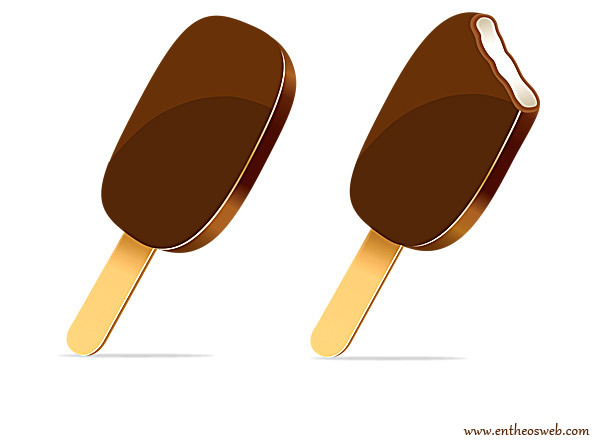
That’s it. Hope you enjoyed the creation of these yummy ice cream illustrations. Don’t forget to share your thoughts.
Illustrator Tutorials & Resources