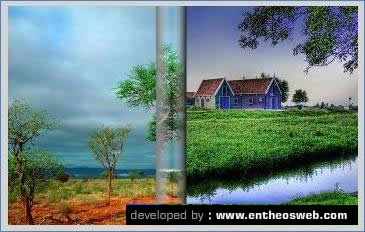
In this tutorial you will learn how to create a gorgeous page roll image transition effect using masking in Adobe Flash.
Tutorial Details Program: Flash CS5
Estimated Completion Time: 40 hr
Tutorial FLA File – Source File.fla

Let’s get started!
Open a new flash document with action script 2.0.

Step 1: Setting Up Document Properties
Now Select Modify from the menu bar and select Document or You directly can press ctrl + J to open the document properties.

Now change the stage dimensions as 700×438, FPS = 30, and Background Color = Black as shown in the Figure below. To start with the tutorials download the source.zip file that will provide you with the necessary files to be used in the tutorial.

Step 2: Importing necessary images
First import the downloaded used images from the source. To do that, Go to the File menu > Select Import > Select Import to Library.

Step 3: Positioning images on to the stage
Before starting we already have layer 1, now name the layer as 1. Drag the img1 image from the library on to the stage.

Align the image to the center of the stage using the align panel. Keep in mind that to align any item to the center of the stage, check on the “Align to stage” check box.

Step 4: Creating Transition1
Press Ctrl + F8 to create a new symbol. Type the name Transition1 and select type to Movie Clip.

You will enter the Transition1 movie clip and rename the layer as img1. Then select the image and Press F8.

Drag image img2 from library and Press F8 to create a new symbol. Name this symbol as img2. But do not retain this symbol on the stage as of now. Keep this in library.
Step 5: Creating Transition1 – Arranging elements
Insert a new layer and name it as img1_mask.

Now create a rectangle with the dimension are as follow.
Open the propertied panel. To open the properties panel, Go to the Window menu > Select the properties.
W = 40
H = 450
X = -390
Y = -225

Now insert a new layer again and name it as img1_flip.

Now copy img1 image by pressing ctrl + C and Paste on img1_flip layer using ctrl + shift + V. Then go to the modify menu > Transform > Flip horizontal.

Now move the flipped image to left till it comes out from the stage. Do not leave single pixel space between both the images as given in the reference image below.

Now insert a new layer and name it as img1_flip_mask.

Now create a rectangle with the dimension are as follow.
Open the propertied panel. To open the properties panel, Go to the Window menu > Select the properties.
W = 61
H = 438
X = -411
Y = -219

Now copy this rectangle by pressing ctrl + C and insert a new layer and name it as gradient_effect. Then paste the copied image by pressing ctrl + shift + V.
Now apply gradient color to the rectangle. To do that, go to the window menu > color or press alt + shift + F9 to open the color panel.

After applying gradient, select the left color bucket and type 7E7E7E in the color code box highlighted in the color panel as given below.

Now press between the both buckets and type #FFFFFF in the color code box highlighted in the color panel. Then set alpha to 0%.

Step 6: Creating Transition1 – Applying Shape and Classic Tween
Now select frame 99 of all the layers except of img1 layer as given in the reference below. Then press f6 to insert key frame. After that select frame 100 of img1 layer only and press f5 to insert frame.

Now apply animation. To do that, select any frame between frames 1 to 99 and do right click and select Create Shape Tween.Apply shape tween on; gradient_effect layer, img1_flip_mask layer, and img1_mask layer.

Now select any frame between the frame 1 and 99 of img1_flip layer and create Classic Tween. To do that, right click > select Create Classic Tween.

Step 7: Creating Transition1 – Creating animation
Now Select the gradient_effect layer, img1_flip_mask layer, and img1_flip layer elements and left alight each of them by pressing the highlighted button given in the reference image below.

Then move them to the right till it comes out from the stage as given in the reference image below.

Select the rectangle placed on img1_mask layer and then increase the width of the rectangle using free transform tool to cover the image.

Step 8: Creating Transition1 – Applying Mask
Now Select the img1_mask layer and do Right click, then select mask. Do the same with img1_flip_mask layer.

Step 9: Preparing transition on main timeline
Click on the Scene to come out from the transition1 movie clip.

Now go to the properties panel and select the Graphic as given in the reference image below.

Then come down in the properties panel and select the Play Once from the LOOPING as given in the reference image below.

Now insert a new layer and name it as 2. Then select the frame 225 of both layers and press F5 to insert frame.

Now copy the transition1 from layer1 by pressing ctrl + C. Insert a new keyframe by pressing F6 and then paste the copied transition1 by pressing ctrl + shift + V. Select the clip and do right click and then select Duplicate Symbol…

Type name Transition2.

Now double click on the transition2 to enter into the clip.
Now go to the properties panel and select the image on the first frame and then press swap.

A swap symbol box will appear then select img2 and press ok. It will replace the img1 symbol to img2 symbol.
Do this Method on each img1 symbol to replace that with img2.

Press ctrl + enter. You will see the effect something like this.
