Learn how to make a royal red and gold flyer template in Corel Draw. This kind of design works well for vintage or classic usage, as it has a elegant, classic & royal look. You will learn to design the flyer body, ribbon and logo header.
This tutorial is a series of the Classic Logo tutorial, you have to read the Classic Logo Tutorial before you go into this tutorial, because this tutorial requires some elements from the previous tutorial.
Program: CorelDraw 11 – X5
Difficulty: All
Estimated Completion Time: 30 Minutes
First of all you have to use CorelDraw with version 11+. In this tutorial I use CorelDraw X5.
Okay lets get started. Let’s take a look at the basic elements used to create our design :
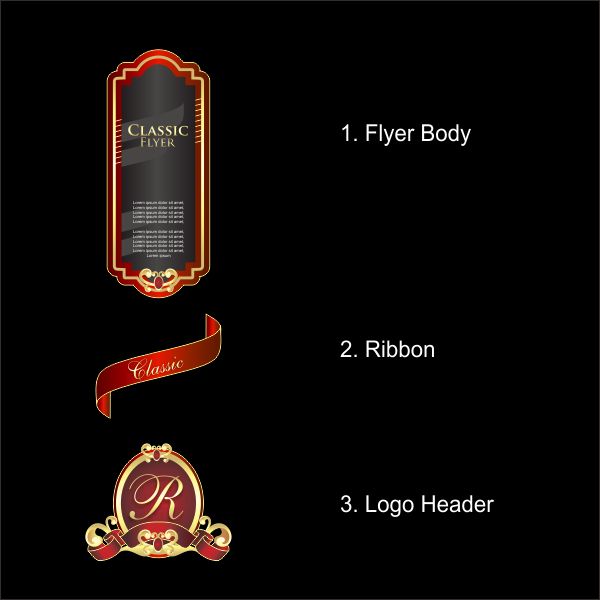
This also will be our steps to create the design.
Okay, now that you know the steps and elements, we will begin.
First of all open your CorelDraw program. Now create a new file and set the paper size to A4.

Now that we have our worksheet set, now we will begin to create the Flyer Body.
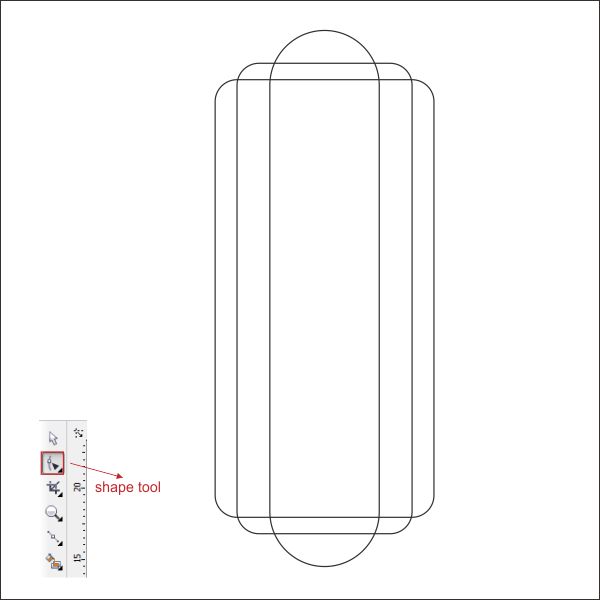
Go to the “Rectangle Tool “, you can found it on the left toolbar,
make a box shape and then make the box shape resized into 10 x 20 cm.
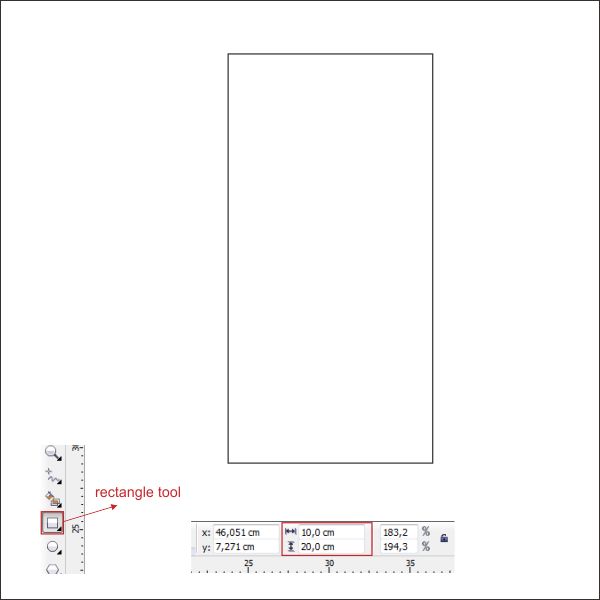
Create second box on top of the first box using “Rectangle Tool “,
resized the second boxinto 8 x 21,5 cm.
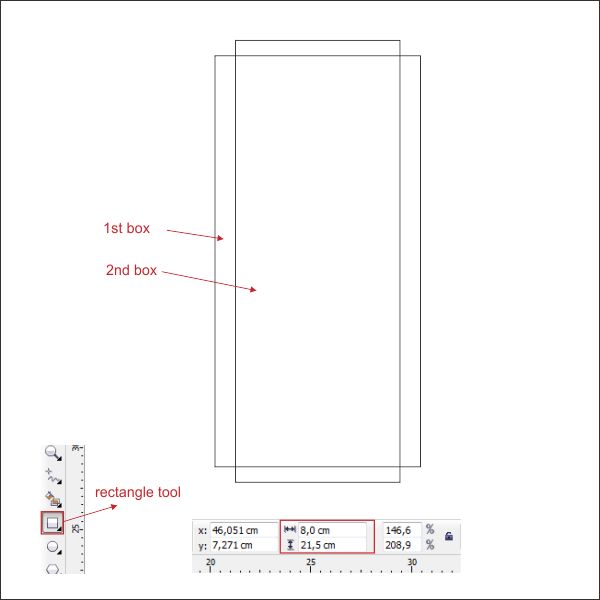
Create third box on top of the first & second box using ” Ellipse Tool “,
resized the third box into 5 x 24,5 cm.
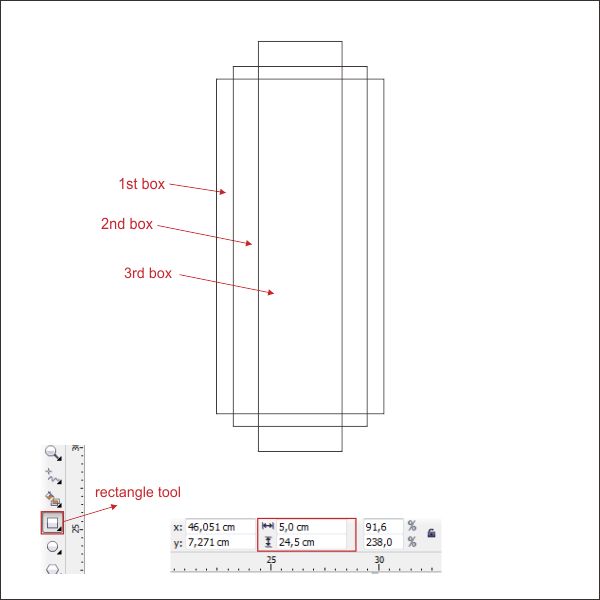
Now we are going to make the corner rounded, go to the ” Shape Tool “,
then left click on the first box and go to the upper right toolbar, there you will see a corner radius
dialog box.
Press the lock icon button, so the corner will be set together, then set the value to 1.

Apply it the same to the Second box and for the Third Box, set the value to 2,5.
if you are doing it right it will look like this.
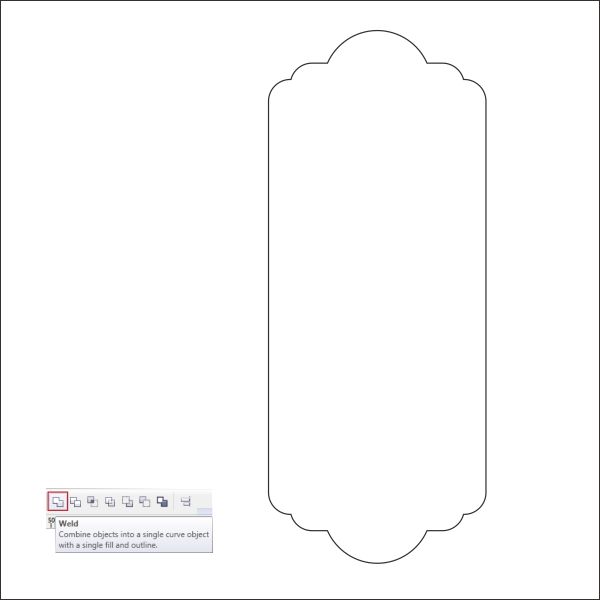
After that select all the box and go to the right upper toolbar,
there you will see ” Weld, Trim, Intersect ” toolbar, press ” Weld ” to welding it together
Tips :
To accurately centering multiple object, select all the object and press ” C ” and ” E “, this will make
multiple object to centered horizontal and vertical.
Now let’s put color in the Flyer Body,
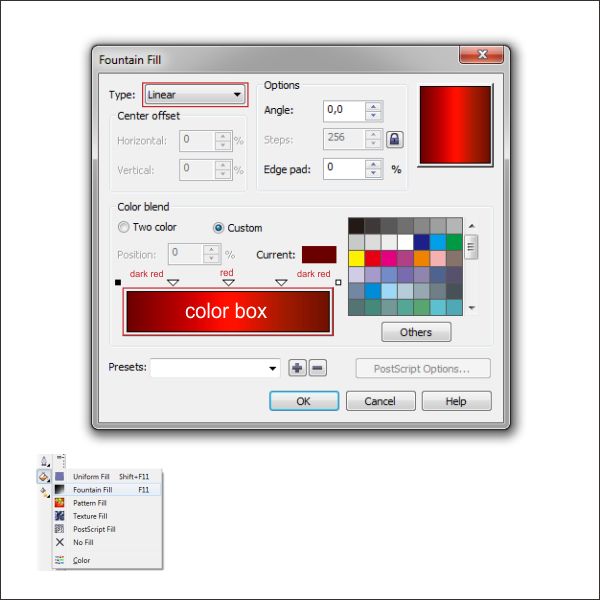
Select the Flyer. Go to the ” Fountain Fill Tool “, which is in the left bottom toolbar.
Choose Custom fill on the color blend and make the type Linear.
Now you will see a color box. You can change the color by left-clicking it,
fill the color with Dark Red on the left, Red in the middle and Dark Red on the right.

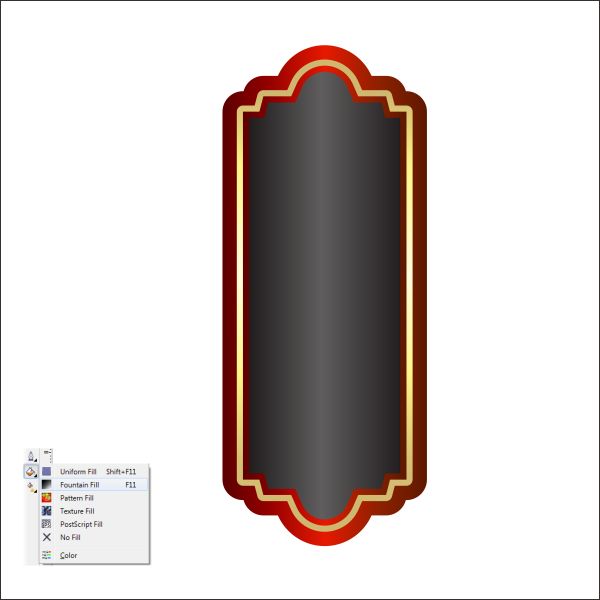
Now that we have our Flyer Body colorized, lets make another frame inside using ” Contour Tool “
Go to the left toolbar and find ” Contour Tool “, in the Contour Tool, go to the right upper toolbar,
there you will see the properties box, Set the type into Inside Contour, and set the Contour Offset
into 0,7 cm.

After that separate the contour inside and the Flyer Body by pressing ” Ctrl+K “, that will make them
separate.
Now select the contour shape which is the shape inside the Flyer Body,
and Go to the ” Fountain Fill Tool “, which is in the left bottom toolbar.
Choose Custom fill on the color blend and make the type Linear.
Now you will see a color box. You can change the color by left-clicking it,
apply the value as if in picture below.


After that we are going to make another shape inside the Gold shape.
Go to the left toolbar and find ” Contour Tool “, in the Contour Tool, go to the right upper toolbar,
there you will see the properties box, Set the type into Inside Contour, set the Contour Step into 2
and set the Contour Offset into 0,3 cm.

After that separate the contour inside by pressing ” Ctrl+K “, that will make them separate.
Now select the first contour shape inside the Golden shape and put color in it.
Go to the ” Fountain Fill Tool “, which is in the left bottom toolbar.
Choose Custom fill on the color blend and make the type Linear.
Now you will see a color box. You can change the color by left-clicking it,
fill the color with Dark Red on the left, Red in the middle and Dark Red on the right.


Okay after that, lets put color in the third contour,
Select it and go to the ” Fountain Fill Tool “, which is in the left bottom toolbar.
Choose Custom fill on the color blend and make the type Linear.
Now you will see a color box. You can change the color by left-clicking it,
fill the color with Black on the left, 80% Black in the middle and Black on the right.

Okay now lets put some background into the Black Shape,
Go into the ” Rectangle Tool ” its in the left toolbar, and create 3 boxes on top of our Flyer Body.

Put 80% black color in it, by going to the color palette in the right toolbar.
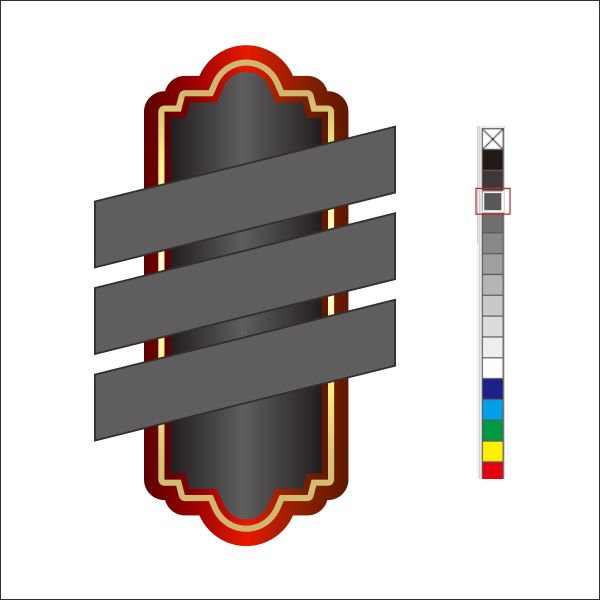
Now select all three boxes,
and go to the top toolbar find “Effect > PowerClip > Place Inside Container “.
You will now see your cursor turning intoa black arrow, click the Black Shape.
Now you will see that the Boxes are inside Black Shape.

You can go “inside” or “outside” the container by holding Ctrl while double-clicking anywhere on screen.
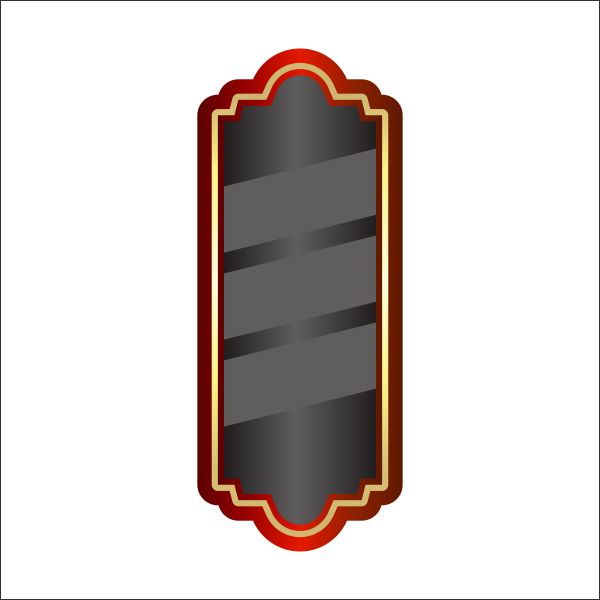
We are going to create the ribbon by using ” Bezier Tool “,
Go to the ” Bezier Tool ” its in the left toolbar, draw a box shape by point & left click
to create a box shape like in the picture below.
Make sure that the last click is connected with the first click or else you cannot put color on the shape.

Now we are going to shape it by using ” Shape Tool “,
Go to the shape tool, then right click at the top lines box shape,
and find “convert to curves ” in the top toolbar.

Now left click at the start and end of the lines and there will be two dotted arrow,
left click and drag them in order to shape the box.

Apply it to all the lines, in order to shape it like picture below.

Now draw two triangle in both upper right and bottom left corner using ” Bezier Tool “

Shape the triangle using ” Shape Tool ” until it looks like picture below ,
and send both triangle to the back by pressing ” Ctrl + PageDown “


We are going to put color in the Ribbon,
Select all the ribbon and go to the Fountain Fill Tool, which is in the left bottom toolbar.
Choose Custom fill on the color blend and make the type Linear.
Now you will see a color box. You can change the color by left-clicking it,
fill the color with Dark Red on the left, Red in the middle and Dark Red on the right.

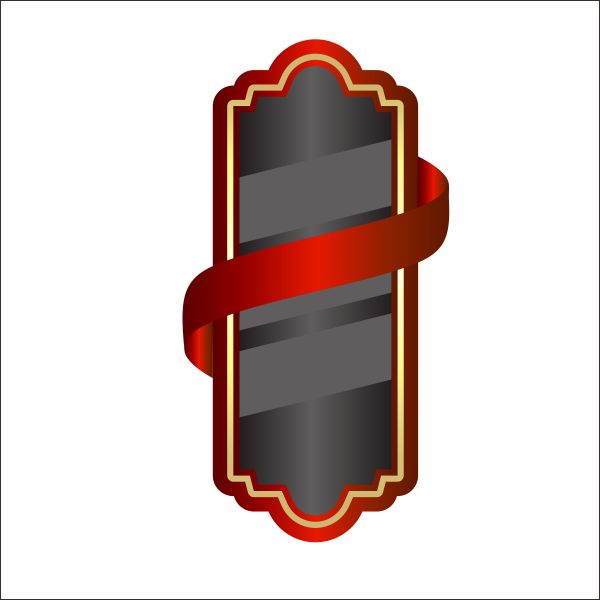
Now that we have all the major elements, copy the Classic Logo from previous tutorial into our worksheet.
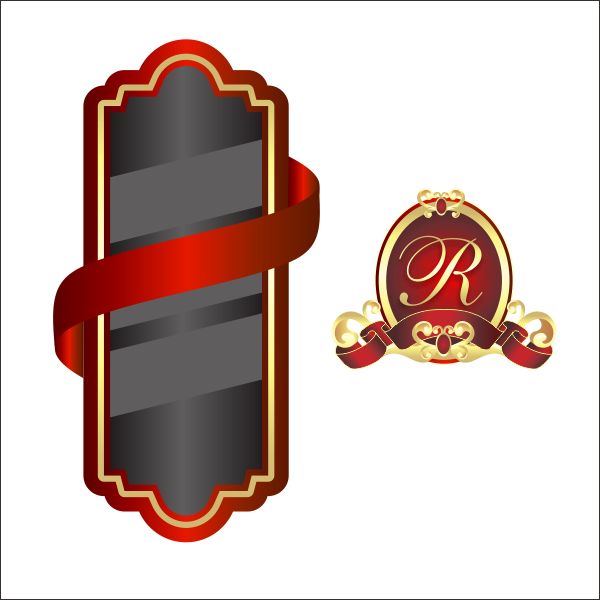
Arrange it into top of our Flyer Body
And we are done, you can make it more exciting by adding more lines, background or text like the final image below

Flyer & Poster Design Resources
Flyer & Poster Design Templates/ Ideas
Coreldraw Tutorials & Resources
