In this tutorial, we will learn how to create a dynamic party flyer in Photoshop.
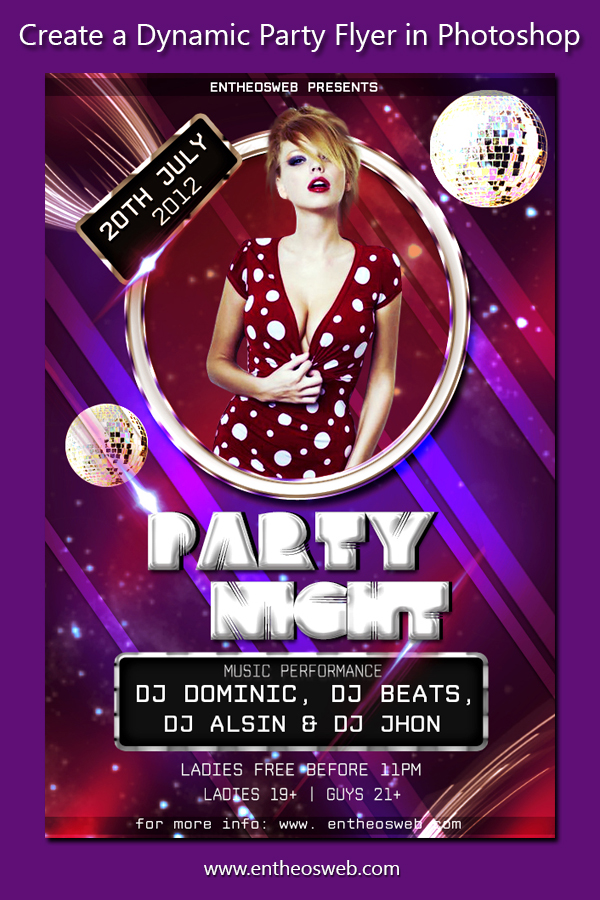
Program: Photoshop CS6
Estimated Completion Time: 50-60 Minutes
The following assets were used in the creation of this tutorial.
* Star Brushes By JonasKr
* Abstract Glow Brushes By Edelihu
* Model’s Image By missonline
* Disco Ball By majikcamera
* CPMono_v07 Font
* Clutchee font
Step 1
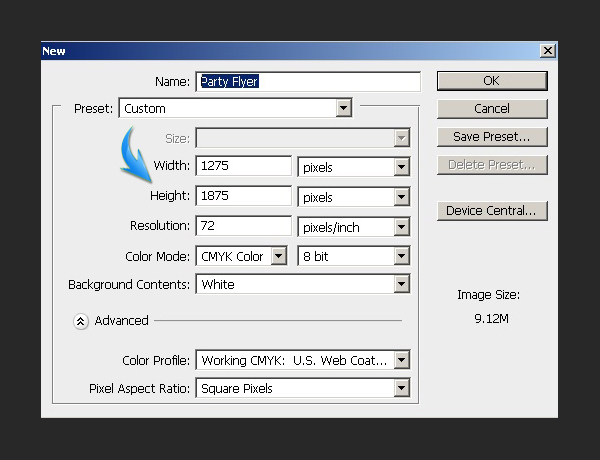
Create a new document with 1275px width and 1875px height in adobe Photoshop.
Step 2
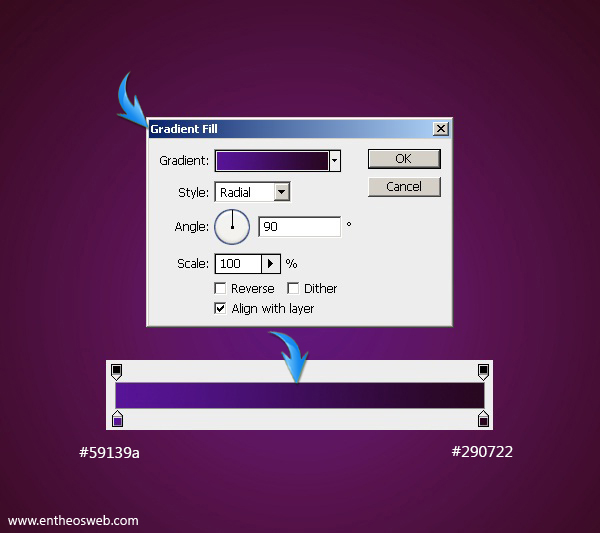
Now we’ll apply gradient on the background. Click on the icon of ‘Create new fill or adjustment layer’ which is present at the bottom of the layers palette and choose the option of ‘Gradient’. Use the given settings here.
Step 3
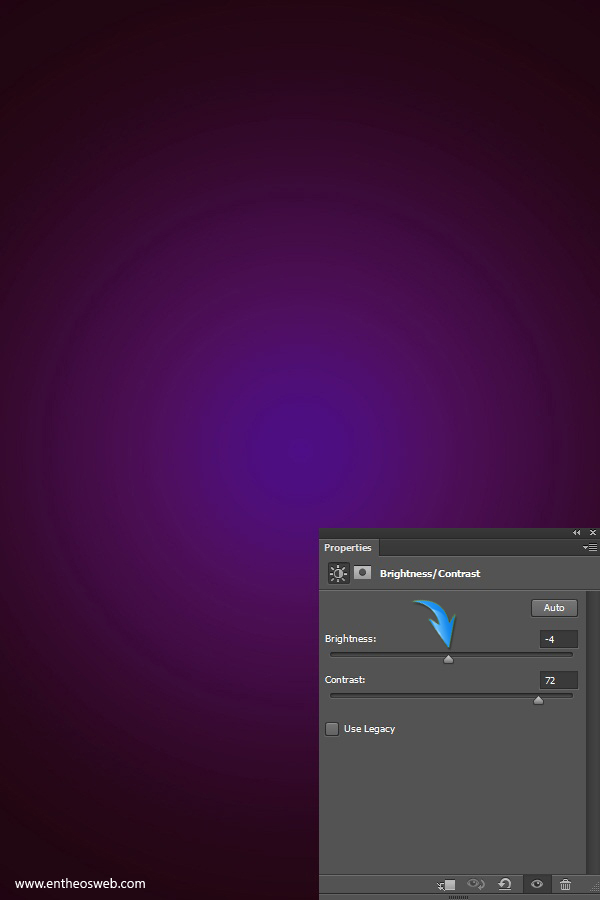
Once again, click on the icon of ‘Create new fill or adjustment layer’ and open another adjustment layer for Brightness/Contrast. Use the following values here.
Step 4
Next, we’ll add sparkling dust to our canvas. Open the ‘Star Brushes’ in Photoshop and select the ‘Brush tool’, pick ‘Stars 6’ brush and apply it on a new layer in white color.

Open the Hue/ Saturation adjustment layer just above this sparkling dust layer and use the given settings to give blue glow to the sparkles.

Step 5
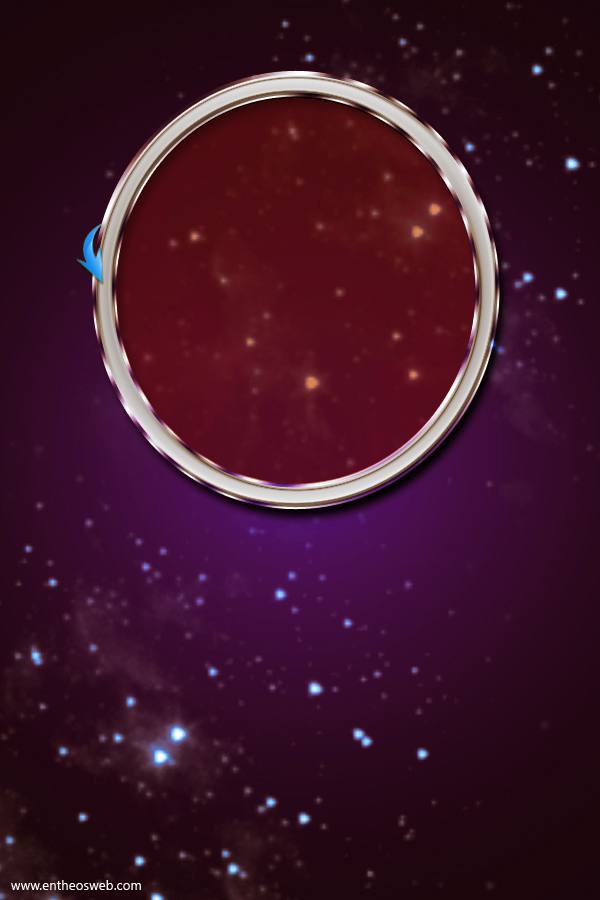
Now select the ‘Ellipse tool’ to draw a larger ellipse on a new layer. Duplicate this layer, reduce the size of duplicated ellipse a bit using ‘Free transform tool (Ctrl+ T)’. Change the color of this smaller ellipse to # 730000.
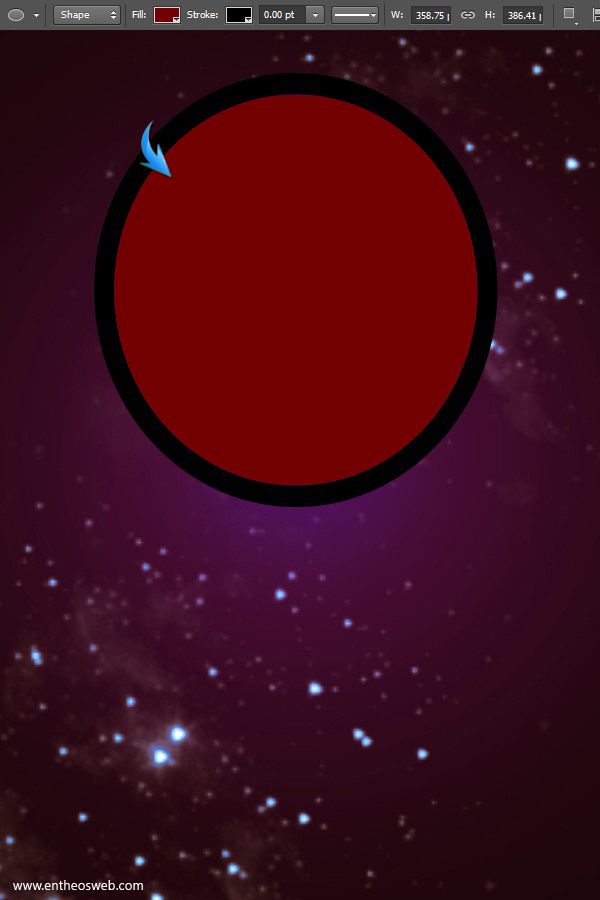
Press Ctrl+ click on the smaller ellipse layer to make selection around it, then right click on the larger ellipse layer and select the option of ‘Rasterize layer’. After that, go to Edit > Clear. In this way, you’ll get a nice ring as shown below. Reduce the opacity of red ellipse layer to 50%.

Step 6
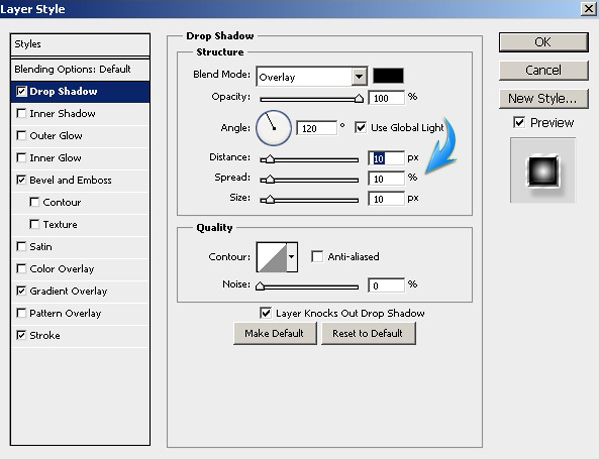
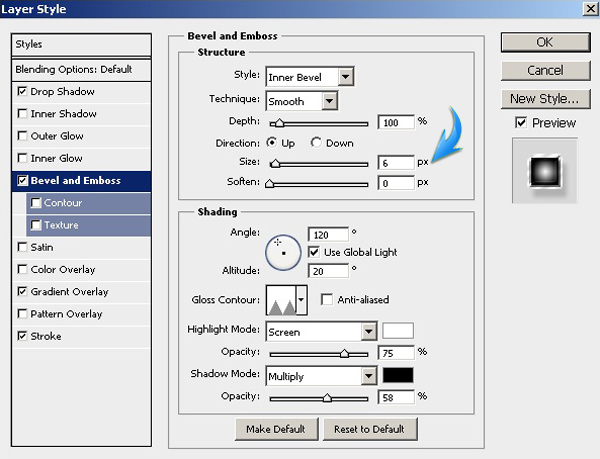
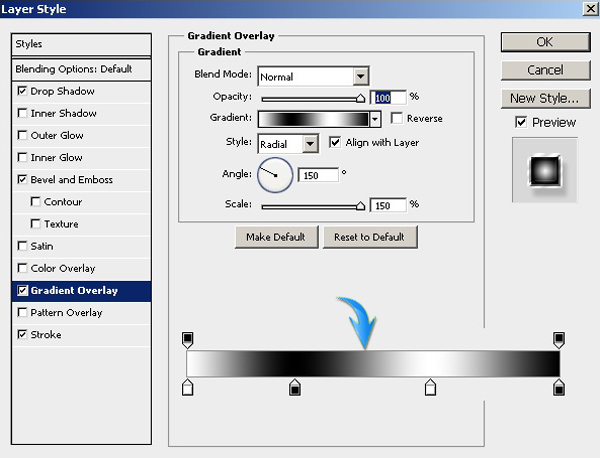
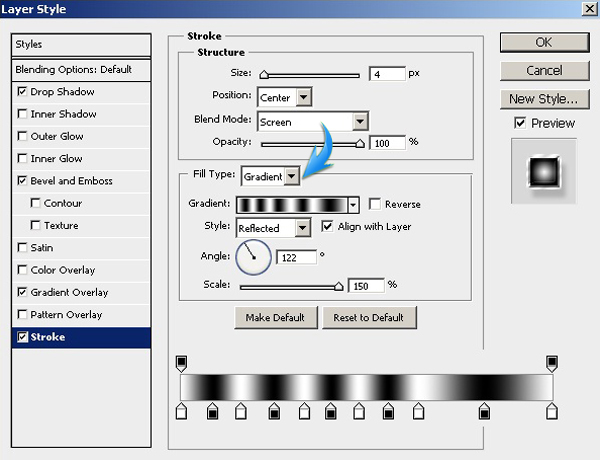
Double click on ring layer to open the Layer style window. Apply the given settings to form a silver frame.
Step 7
Select the ‘Rectangle tool’ to draw a thin rectangle on a new layer, place this layer below the frame layers. After that, rotate this rectangle using ‘Free transform tool (Ctrl+ T)’ as below.
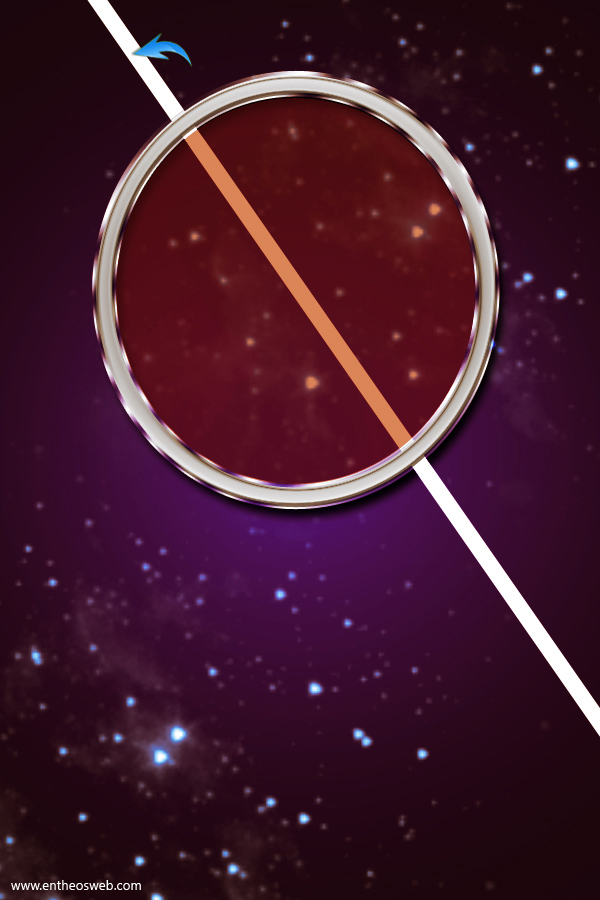
Double click on this rectangle layer and use the given settings to add Drop shadow.

Change the Blending mode of this layer to ‘Overlay’.

Step 8
Next, duplicate this rectangle few times and arrange them as you like. I used two different sized rectangles to get the result as below.

Step 9
Open the model image in Photoshop, select the ‘Pen tool’ and choose ‘Paths’ from top options bar. Now trace the body of model nicely. Make sure not to include thin hair strands while tracing. Once you are done, right click and choose the option of ‘Make selection’.

Now press Ctrl+ C to copy the selection and then press Ctrl+ V to paste the selection on a new layer.
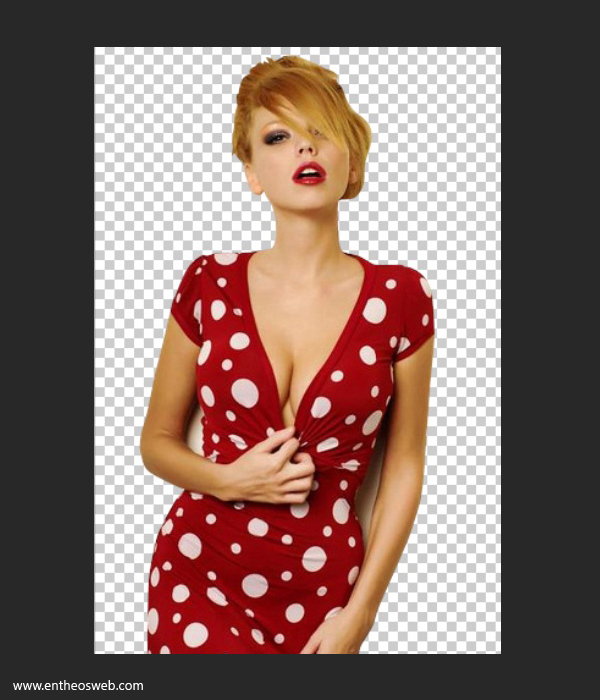
Next, trace the area between the body and the arm in the same way, make selection and go to Edit > Clear, to get rid of it.

Step 10
Now change the Blending mode of this cropped image layer to ‘Difference’, just to differentiate it from the original image. Now select the ‘Smudge tool’ 1-4px size and use it to form thin hair strands, which are not covered with Pen tool.

Once you are done, change the Blending mode to ‘Normal’ again, copy and paste the image to your flyer document at top of rest of the layers. Adjust its size with the help of ‘Free transform tool’. Erase the lower part of model using ‘Hard round eraser tool’ to fit it in the frame.

Step 11
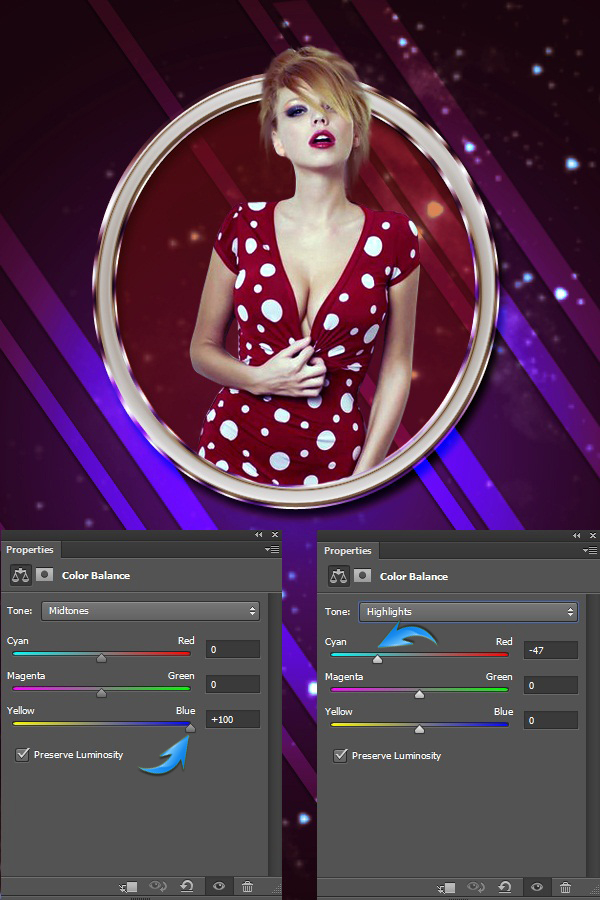
Now press Ctrl+ click on the thumbnail of model layer to make selection around it. After that, create ‘Color Balance’ adjustment layer and use given settings to adjust the tone of the image according to the background.
Step 12
Next, set # fb0991 as your foreground color and select the ‘Soft round brush’. Apply the brush randomly on a new layer above the background layers.
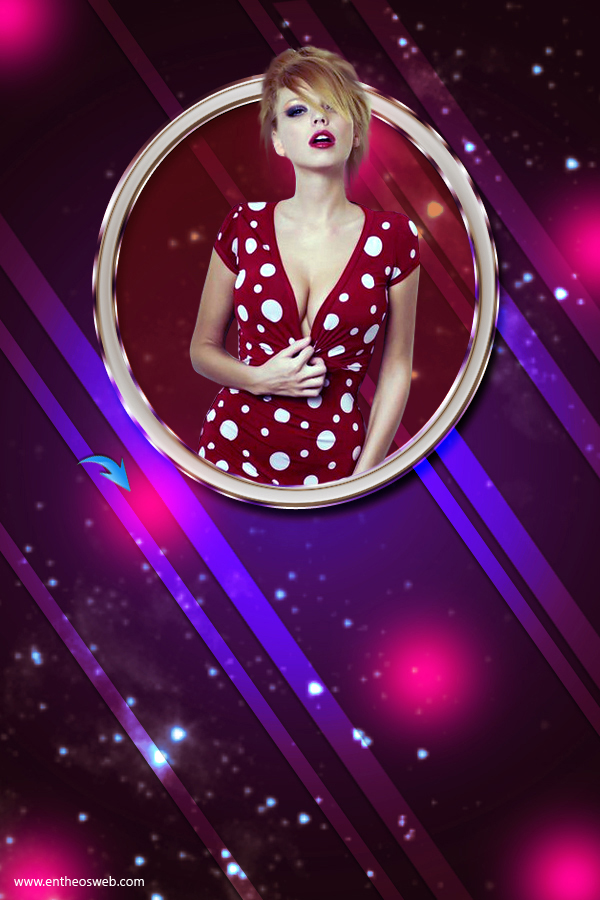
Now go to Filter > Blur > Motion blur. Use the given values here.
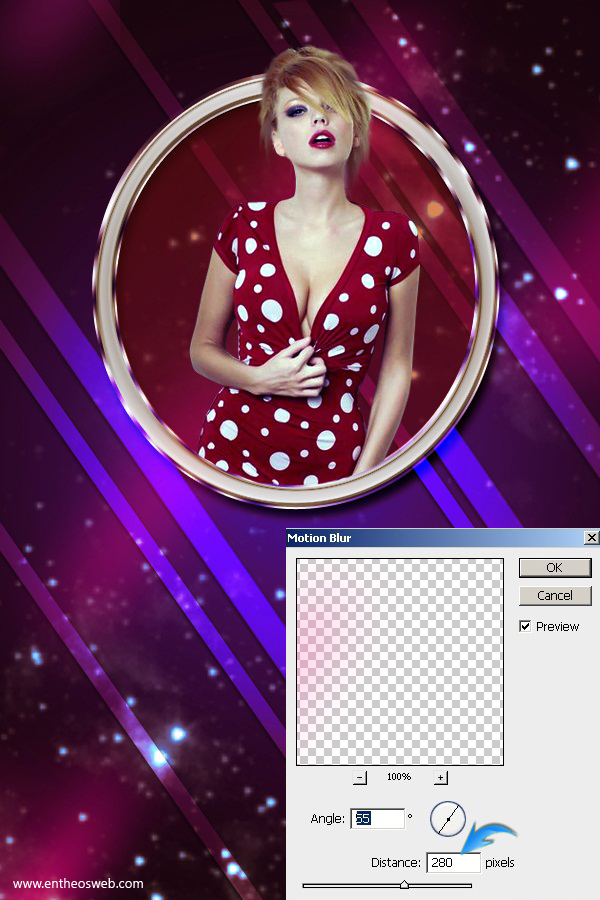
Repeat the same technique but use # 3e0583 color this time to form soft round spots on a new layer, then apply same motion blur filter settings but at -55.

Step 13
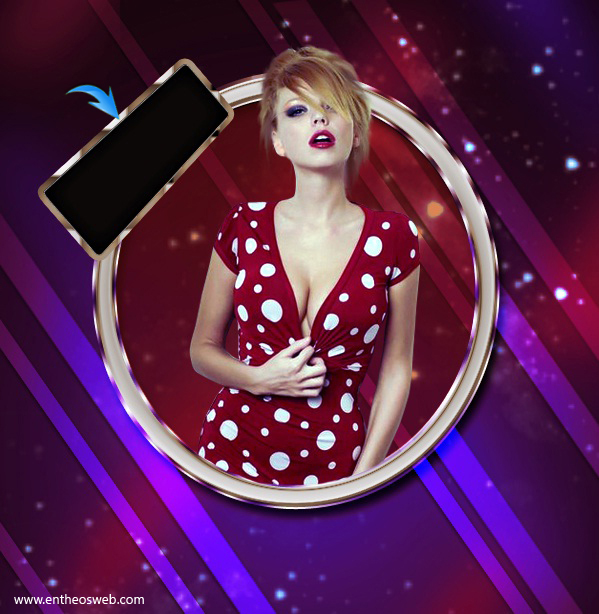
Set # 0a0a0a as your foreground color; select the ‘Rounded rectangle tool’ to form a small rectangle. Arrange it at an angle at the corner of circular frame. Then go to Edit > Transform > Distort to give it shape as below.
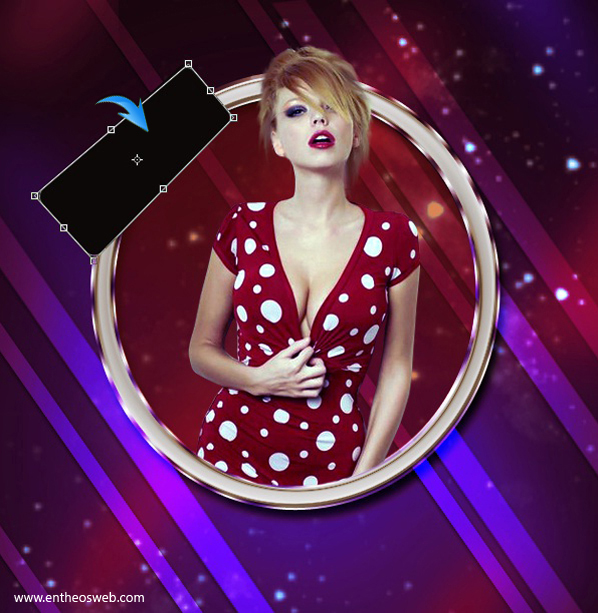
Step 14
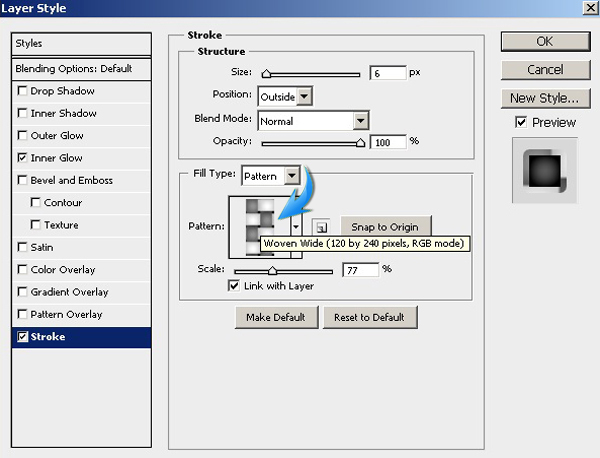
Double click on the rectangle layer and apply the following layer style settings.
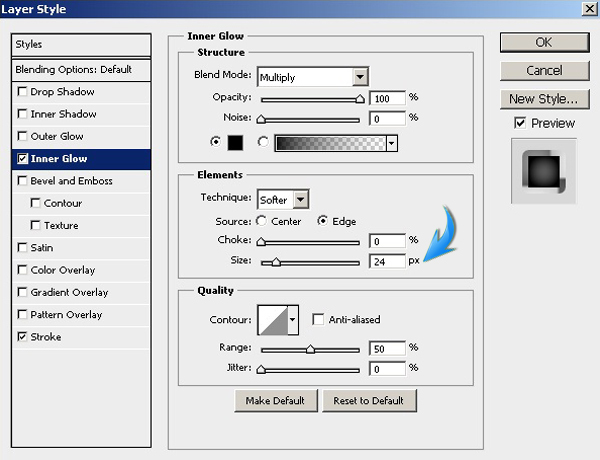
Step 15
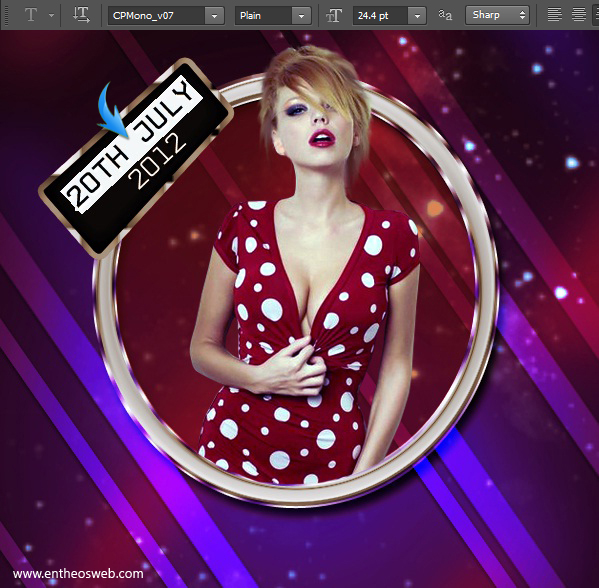
Now write down the text on a new layer just above the rectangle. We’ll be using ‘CPMono_v07’ font here in # ffffff color.
Step 16
Next, we’ll add title. Use ‘Clutchee’ font for this.

Step 17
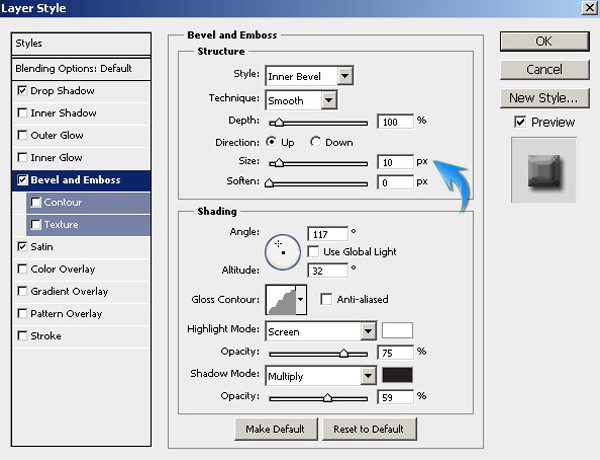
Apply the following layer style settings on the title text.



Step 18
Duplicate the title text layers, delete the effects of duplicated layers and change their color to black. Place these layers below the original text and drag them a bit to the right as below.

Step 19
Now add rest of the text below the title in ‘CPMono_v07’ font.

Select the Rounded rectangle tool to draw a rectangle below the text layers. Copy the layer style settings of the distorted rectangle above and paste it over here to apply the same effects on this rectangle.
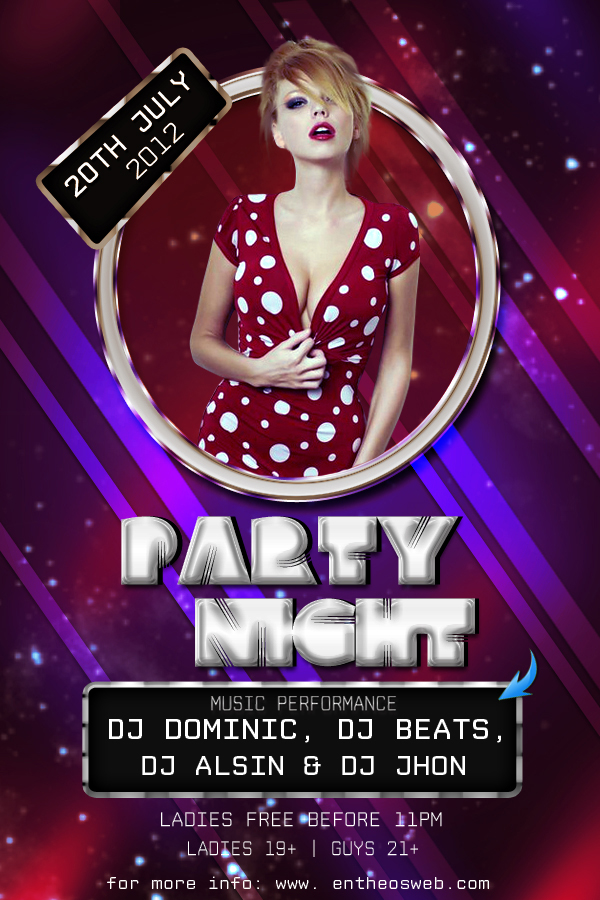
Step 20
Draw the shape as shown below using ‘Pen tool’.

Now go to Filter > Blur > Motion blur. Use the given settings here.

Duplicate this layer few times and arrange them as below. Change the blending mode of duplicated layers to ‘Overlay’.
Draw another shape in the center of the sparkling ray.

Apply the given settings for ‘Outer Glow’ on this glowing center.


Collect all the layers forming the sparkling ray in a group, duplicate it few times and arrange them at different angles as below.

Step 21
Now select the ‘Rectangle tool’ to draw two thin rectangles near the top and bottom of the flyer and reduce their opacity to 40%. You can add more text over it.

Step 22
Open disco ball image, you can select it with the help of ‘Elliptical marquee tool’. Now copy and paste it in your document. Adjust its size and position it as you like.

Step 23
Open the ‘Abstract glow brushes’ in Photoshop and apply it at corners as below.

Step 24
Lastly, create ‘Levels’ adjustment layer at top of rest of the layers and use the given settings for it.


That’s it guys. Hope you enjoyed the tutorial and learned something useful. Do share your thoughts.
Flyer & Poster Design Resources
Flyer & Poster Design Templates/ Ideas
