In this tutorial, you’ll learn how to design an Exploding Techno Flyer with Corel Draw. You will learn how to create a cool sunburst effect. This kind of Flyer works well for a Musical, Night club, Techno or Party oriented event, as it has a Techno feel.

The following assets were used during the production of this tutorial.
First of all you have to use CorelDraw with version 11+. In this tutorial I use CorelDraw X5.
Okay lets get started. Let’s take a look at the basic elements used to create our design :
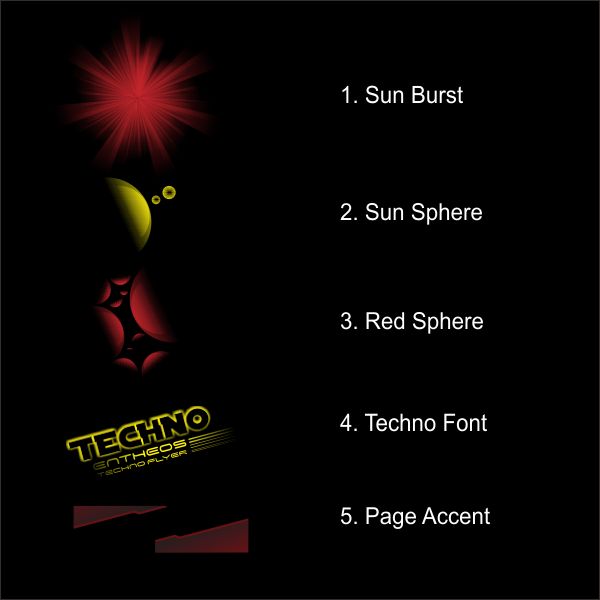
This also will be our steps to create the design.
Okay, now that you know the steps and elements, we will begin.
First of all open your CorelDraw program. Now create a new file and set the paper size to A5 ( 14,8 x 21 cm ).

Now that we have our worksheet set, now we will begin to create the Flyer Frame, using “Rectangle Tool “.
This will be our Basic Frame for the Flyer.
Go to the “Rectangle Tool “, make a rectangle shape and then make the rectangle shape resized into the same size
as our worksheet which is A5 ( 14,8 x 21 cm )

Now that you have the Basic Frame for our Flyer, make it center page by selecting the Rectangle Shape, and press ” P “.
Colorize the Rectangle Shape into Black.
Okay now we are going to make the Sun Burst,
First of all go to the “Polygon Tool” in the left toolbar, after you click it find the “Point or Sides” to determine how much corner
in the polygon shape, fill it with “3” in order to make it triangle.
After that, left click & drag from bottom to top, to create similar triangle as picture below.

Now that we have the triangle, put a color in it you can have any color that you like, but in this tutorial
Let’s make it Red.

Click the Triangle and go to Interactive Transparency Tools, it’s in the left bottom toolbar.
Now you see that in the cursor there is a little glass, Left Click & Drag the cursor, from bottom to top,
so the transparency will make it linear to top.

Okay now that we have the triangle look transparent, we need to copy and duplicate it.
Double left click the triangle, now you see a little circle in the center that is “Rotating Point”.
Move the Rotating Point into the bottom of triangle.

After that, go the right upper corner of the triangle hold & drag it to the right, while holding
“Left + Right mouse ” and release it in order to copy.

Repeat the steps above, copy and duplicate again by Hold & Drag ” Left + Right mouse “.
Tips : The more you randomize the size and position of the duplicate triangle, the more vibrant will be.

Repeat it again until you have a full rotation.

Okay now that you have the full rotation sun burst, group it by selecting all of them and press “Ctrl+G”
We are going to Rotate, Duplicate and copy it one more time, using the steps above untill you have it similar like picture below.
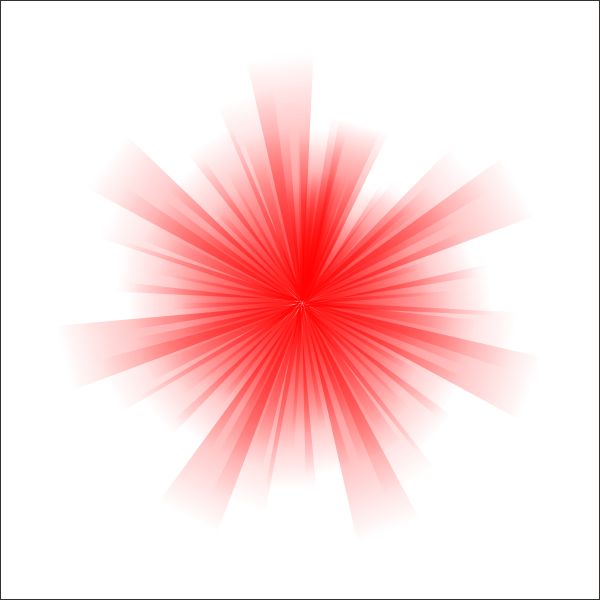
Tips :
The more you randomize the size and position of the duplicate triangle, the more vibrant will be.
Lets now begin to make the Sun Sphere,
Go to the “Ellipse Tool” and create a circle.

Put a yellow color in it

Now that you already know how to work with Transparency,
go to Interactive Transparency Tools, it’s in the left bottom toolbar.
Now you see that in the cursor there is a little glass, Left Click & Drag the cursor,
from right upper corner to the middle.

Copy and duplicate the circle, by Hold & Drag ” Left+Right mouse”, make the duplicate smaller
than the original.

Now make another two circle with “Ellipse Tool”
make two circle smaller then the sun sphere.

Put yellow color in it, and go to the ” Interactive Transparency Tool”, in the Interactive Transparancy Tool
go to the top toolbar and find ” Transparency Type ” set it to ” Radial “.

Select the both circle and arrange it close to the sun burst.

Actually the Red Sphere is a copy of the sun burst but is colored in red,which will making this easy.
Select the Sun Sphere, put Red color in it.

Rotate, Duplicate, Copy & Resize it using steps 6, arrange it similar as picture below.
and dont forget to group it by selecting all of them and press ” Ctrl+G “.

Tips :
Try making the sun sphere a center point of the red sphere, this will make it look as it have zoom in effect.
Now that we have our major elements, lets arrange them into the position.
Select each of the elements, ( Sun Burst, Sun Sphere, Red Sphere )
and place it on top of the Black basic frame that we have already create.

Group the elements that already arranged by selecting each of the elements and press ” Ctrl+G “

Now we are going to use the ” Powerclip Tool ” to insert the Grouped elements into the Black Frame
Left-click the Grouped elements, and then go to the top toolbar and find Effect > Powerclip > Place Inside Container.
Then you will see a black arrow, Left-click it to the Black Frame,
and now you will see that the Grouped elements is inside the Black Frame.
You can go “inside” or “outside” the container by holding “Ctrl” while double-clicking it.

Now that we have the frame filled with beautiful background, lets put a nice techno font in it.
In this tutorial i use ” SF Distant Galaxy ” you can download it with the source file in this web,
or you can have any font that you like.
Go to the ” Text Tool ” its in the left toolbar, click it anywhere on the screen and type ” Techno “
Change the font type into ” SF Distant Galaxy ” font.

Make another one by Go to the ” Text Tool ” its in the left toolbar, and type ” Entheos Techno Flyer “
Change the font type into ” Space Age ” you can download it also in this website,
arrange it to the position below the ” Techno “, and make it smaller than the “Techno” Font.
Break the font into object by selecting all of the font and press ” Ctrl+K”,
this will change the font into object and make it easier to manipulate.

On the right side of the “Entheos” font create two straight horizontal lines using “Bezier Tool”

Copy down the horizontal lines by pressing ” Left + Right mouse “

Change the two first horizontal lines outline width to 4 points, then the second to 2 points, and the third into 1 points

if you do it right it will look like this

Put yellow color on the font and lines,
Then move it to the top of the Black Frame.

Select the Techno Font by left click in it, and go to the “Drop Shadow Tool” in the left toolbar.
In the “Drop Shadow Tool” go to the upper toolbar, there you can find the Drop Shadow Properties
Set the Opacity into 100, and feathering into 10, Shadow type Normal , and Shadow Color into yellow.

After that break the shadow and the techno font by pressing “Ctrl+K”,
this will make the Techno Font and the Shadow separate.
After it separated, select both Shadow and the Tehcno font, then go to the right upper tollbar.
There you will see ” Weld, Trim and Intersect ” toolbar, press the Trim button in order to cut the Shadow.
After that Delete the Techno font.

Now copy and paste the Techno font by pressing “Ctrl+C” & “Ctrl+V”
this will make the Techno Font effect thicker.

We are going to make the Entheos font and the Lines a little transparent,
select the Entheos font and go to Interactive Transparency Tools, it’s in the left bottom toolbar.
Now you see that in the cursor there is a little glass, Left Click & Drag the cursor,
from middle to left.

Apply the steps above on the Lines and you will have similar like below

Group the Techno, Entheos and Lines together, then Place it inside the Black Frame using “PowerClip”
go to the top toolbar and find Effect > Powerclip > Place Inside Container.
Then you will see a black arrow, Left-click it to the Black Shape,

We are going to create the Page Accent using “Bezier Tool”
Go to the “Bezier Tool” its in the left toolbar, draw a shape point & left click to create a shape like in the picture below.
Make sure that the last click is connected with the first click or else you cannot put color on the shape.

Tip :
Press “Ctrl” while point and click, to make straight lines with bezier tool.
Copy down the shape in order to duplicate it by holding ” Left+Right” Click together.

Put Red color on the Bottom shape and Black on the Upper Shape.

Group both of the shape by selecting it and press ” Ctrl+G”,and now we are going to make the Shape a little transparent,select the Shape and go to Interactive Transparency Tools, it’s in the left bottom toolbar.
Now you see that in the cursor there is a little glass, Left Click & Drag the cursor, from up to right bottom.

Copy Duplicate and Flip the Shape by pressing “Left+Right” mouse then flip it up.
This will be our upper Page Accent

Now put both of the Bottom and Upper Accent on top of the Black Frame.

Group both of the Shape that already arranged, and place it inside the Black Frame by using ” PowerClip” go to the top toolbar and find Effect > Powerclip > Place Inside Container.
Then you will see a black arrow, Left-click it to the Black Frame,
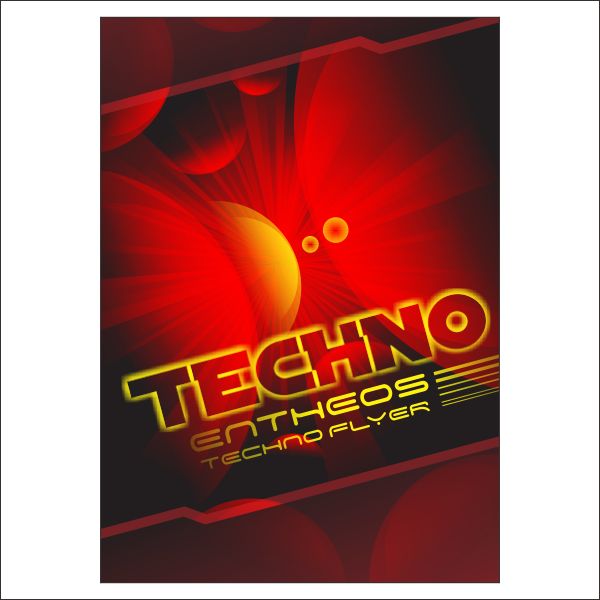
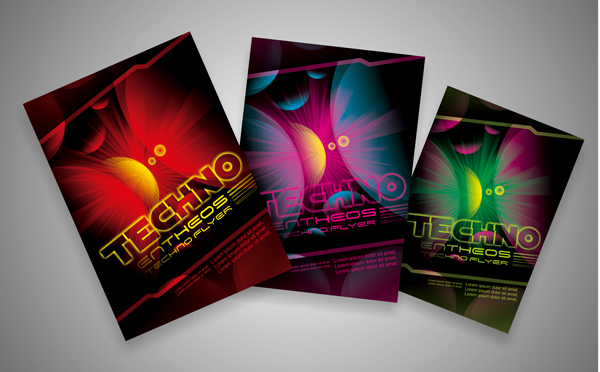
And we are done, you can make it more interesting by adding more text or customize the color the final image below
Coreldraw Tutorials & Resources
No portion of these materials may be reproduced in any manner whatsoever, without the express written consent of Entheos. Any unauthorized use, sharing, reproduction or distribution of these materials by any means, electronic, mechanical, or otherwise is strictly prohibited.
Flyer & Poster Design Resources
Flyer & Poster Design Templates/ Ideas
Coreldraw Tutorials & Resources
