In this tutorial we’ll learn how to create a Fantasy Photo Manipulation using various techniques in Photoshop. We will be covering image adjustments to make the photos more vibrant, learn how to cut or crop an image from the background using vector masks, quick selection tool, eraser tool and layer masks, use dodge and burn tools to brighten or darken an area in an image and using photo filters to improve the color and contrast of the image.

Images used in this tutorial
The following images were used during the production of this tutorial.
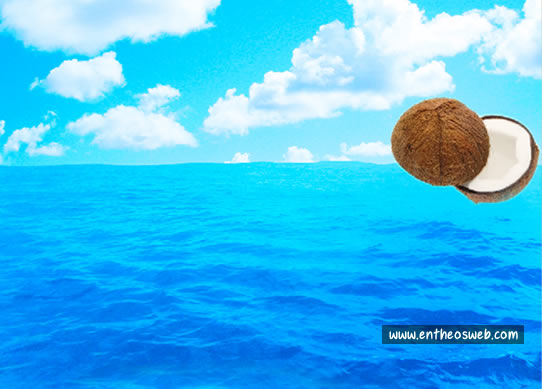
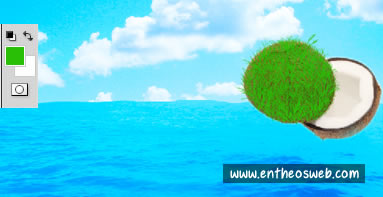
Dolphins, Coconut, Blue Water, Rock, Sky, Yellow Balloon, Color Balloon, Blue Balloon, Boat, Tree, Grass Path, Spider, Ladybird, Jewel Beetle, Snail, Scorpion, Deer, Giraffe, Grass Brush, Waterfalls Brush
Background Remover – You can use this online Background Remover tool to remove backgrounds and create amazing fantasy photo manipulations
Let’s get started!
Step 1 : Create a new document of 1000 px Width and 910 px Height at 300 Resolutions with “Transparent” Background in Photoshop.

Step 2 : Now open the “Blue Water” image and place it on the document. Go to File > Place and resize it using CTRL+T.


Step 3 : First we can crop the blue water image according to our need. Select the blue water layer to which you want to add a vector mask. Next we can use the Pen Tool (P) to select and edit specific confined areas you want to edit or fade within your top layer mask. Now start tracing the entire object around and connect your last point to your first one to create an enclosed object.
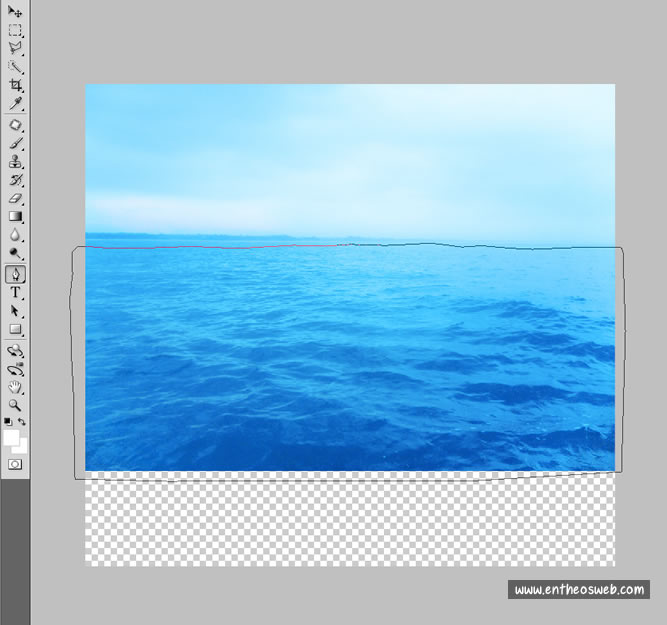
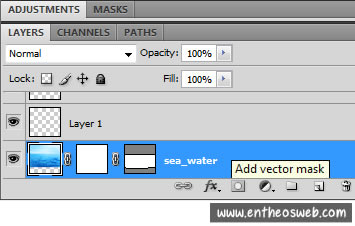
Step 4 : Choose Layer > Add Vector Mask > Current Path to create a Vector Mask from your current Work Path. Your active work path will become a Vector mask, and remove the background from your object.
By clicking on the vector mask path thumbnail, we can deselect the pen tool path.

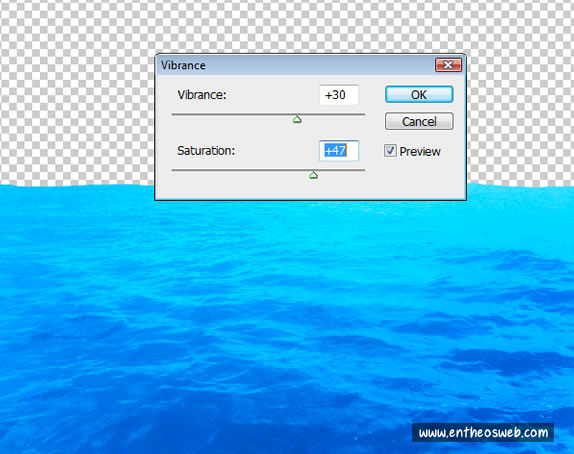
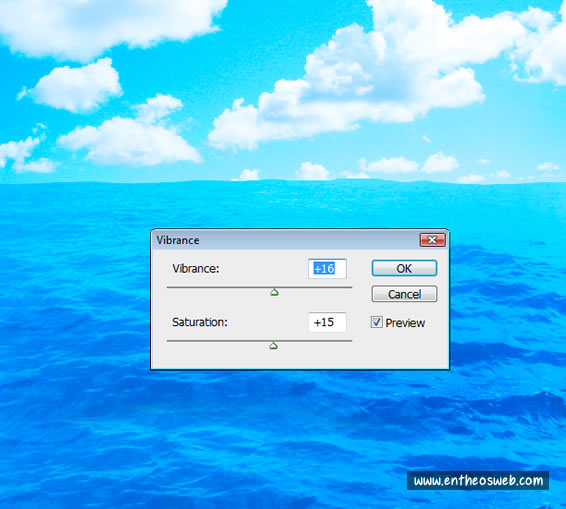
Step 5 : Go to Image > Adjustments > Vibrance

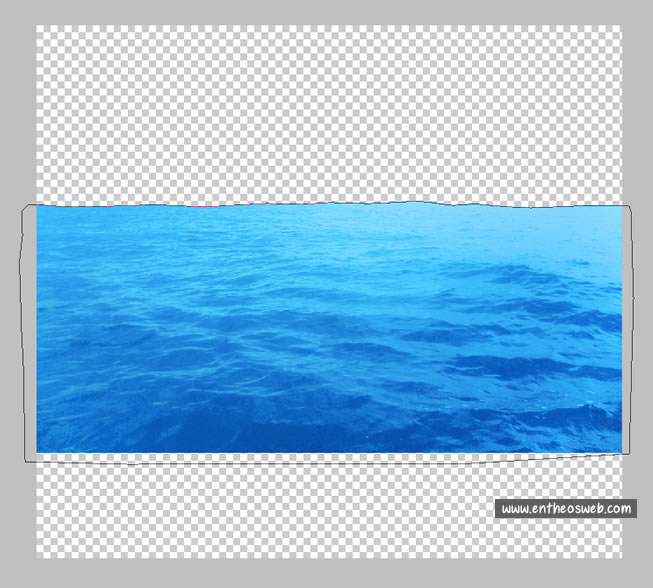
And apply the below values, to make the water color as vibrant. Then duplicate the water image and remove the bottom edges of the image using the rubber tool, so that it will not look as a patch. The water effect has been successfully done.
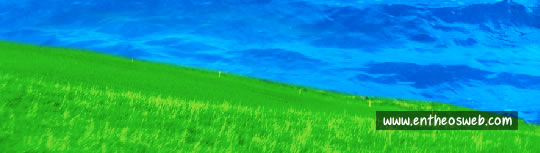
Step 6 : Now open the “Sky” image, resize using the Transform tool or Ctrl + T and do the same way as explained in the above steps to crop.
Go to Image > Adjustments > Vibrance.
And also apply the below given values to make the color of the sky more brighter.
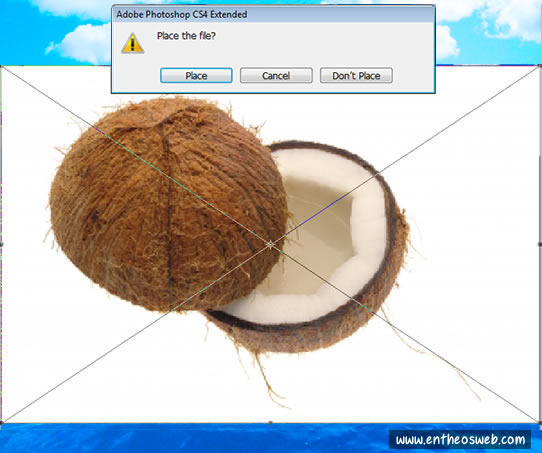
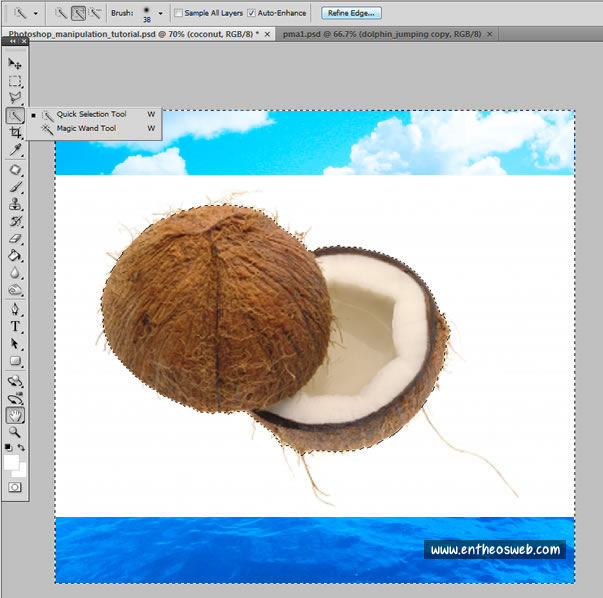
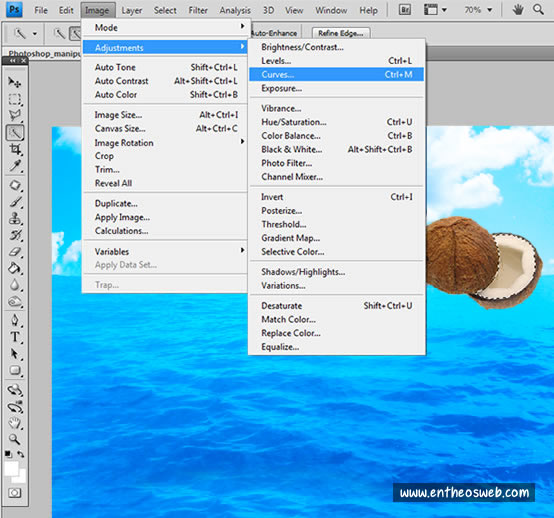
Step 7 : Place the “Coconut” image above all the images, then crop and remove the background of the image using “Quick Selection Tool”.
The Quick Selection Tool makes selections by looking for areas that have a similar color, tonal range and textures.
Note: The Brush size should be 38 and select the Auto-Enhance box before Pressing the “Refine Edge“.
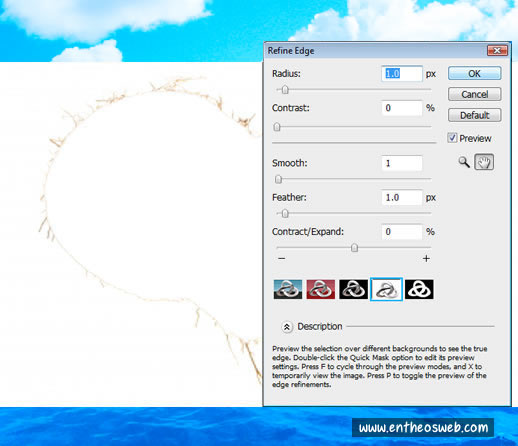
The “Refine Edge” should have the below values, to make the edges of the image smooth & feather.
Step 8 : Press Ctrl + T to freely transform the selected image into your needed size. Here I have reduced the size of the coconut image. Please see the below image.
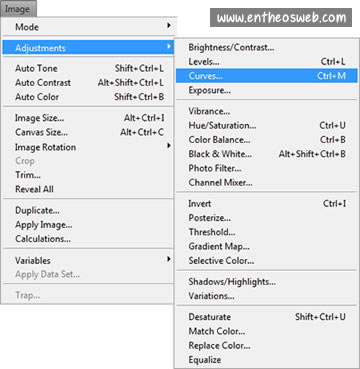
Step 9 : The coconut here is in yellowish color, so to change the color into more white. Select the white portion of the coconut using “Quick Selection Tool”, Then go to Images > Adjustments > Curves and set the values as below to increase the output levels.
Note: The Curves tool is a powerful way to redefine the tonal values of an image and it provides an extremely powerful way of manipulating color.
The curves can be applied to RGB values or on individual color channels as a powerful way of correcting color casts in specific tonal areas. Here we have selected the channel as “Blue”, such as the example shown below:
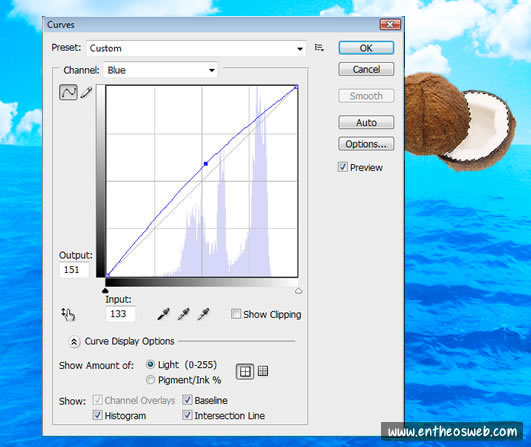
Hence we have made the coconut color into more white.
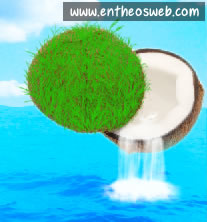
Step 10 : Lets create a grass land effect on above the mounted coconut. Select Brush tool with size : 32 and color : #098b03 and apply the grass effect over the mounted coconut region using the grass brush. The selected color for the grass should be in darker green and also the size of the grass brush should be small.
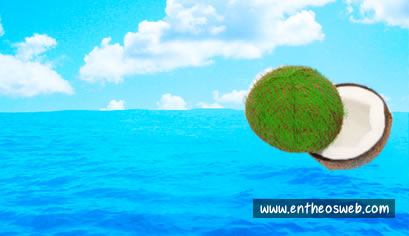

Then select lighter green color #28C005 and apply the grass effect over the mounted coconut region using the grass brush. Now the grass brush size should be slightly bigger than the previous one.
On the Layer window, change its option to Linear Burn.
After that duplicating the previous layer change its option to Normal. Hence we have created the grass land effect on the mounted coconut.
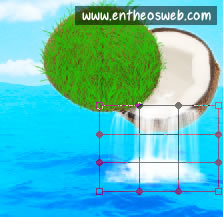
Step 11 : Next is to create the waterfall effect using the brush on the coconut.
Select Brush tool with size : 190 and color : white and apply it on above the open coconut. Here we can see the water fall effect is not proper, so lets use the wrap tool to make it effective.

Note: The wrap tool is used to warp images or text.
Step 12 : Choose Edit > Transform > Warp.

The warp mesh can be seen. Warp the handles as you wish so that the water falls flow blend in correct directions.


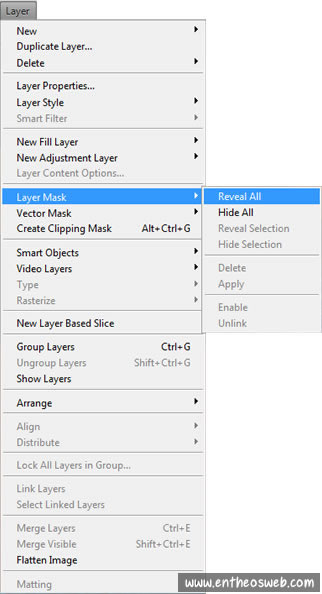
Step 13 : Now File > Place the rock image on the canvas. Here we are going to use Layer Mask Technique. This technique is added to a layer to reveal or hide an entire layer or certain portions of a layer.
You can go to Layer > Layer Masks > Reveal All or Hide All to apply the mask.
Thereafter choose the Brush Tool, and select a soft, round brush from the Brush Drop Down Menu. Choose Black as the Foreground Color and start to paint over the areas on the rock that you want to mask. You can resize it using the scale tool.
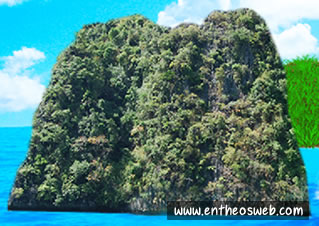
Now use the wrap tool to correct the directions of the rock. Choose Edit > Transform > Warp.

We need to create a reflection rock image on the water, so duplicate the rock image layer. Click Edit > Transform > Flip Vertical to flip the picture part upside down. To fit the edges together properly, we need the Warp Tool again to fit precisely the rock image into its place. Then make the value Opacity : 37%. Use the Eraser Tool to correct a little bit.


And here is our image after adding the water reflection of rock.

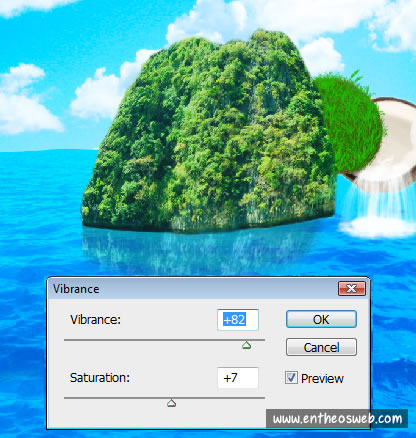
And adjust the color using “Vibrance” as per your need. Finally you will get the image as below.
Step 14 : Now paste your boat image into the middle of your canvas. Make a selection of the boat image with the Quick Selection Tool.
Go to Select > Refine Edge or Alt + Ctrl + R, Hence the Refine Edge dialogue box opens. The Refine Edge button allows you to refine your selection. Set the values as below.

Apply the below values for the “Curves” and “Vibrance” to make the color of the boat more brighter.
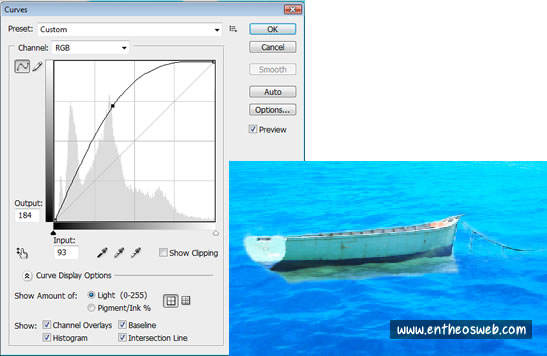

Now select the boat shadow area using “Quick Selection Tool”. Go to Images > Adjustments > Curves and give the below inputs. This will make the selected area color into more vibrant.

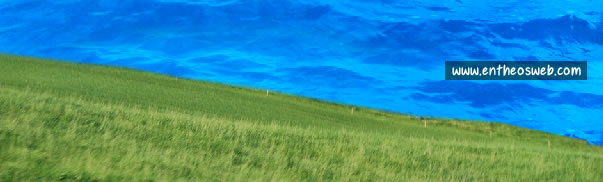
Step 15 : In this step, we would be creating the grass path on the side of the water. Place the grass image and Extract it as shown below.
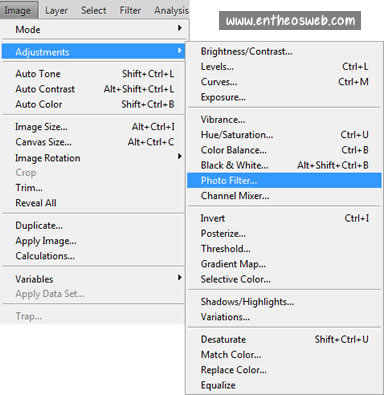
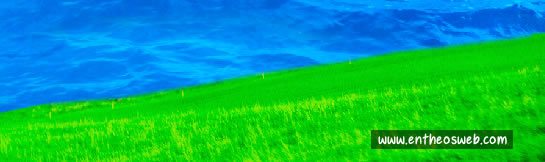
The Photo Filter command will help you to improve the color and contrast of the image.
Go to Image > Adjustments > Photo Filter
We applied the below values to the Photo Filter dialog box
Filter : Green
Density : 91%
Always check the “Preserve Luminosity” box.
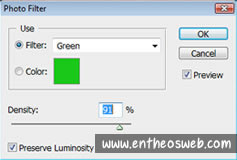
Click OK to exit the Photo Filter dialog, so the image will look as below.
Still we need to improve the grass contrast with the “Curves“. Select Image > Adjustments > Curves to open the Curves dialog box and set the below values. Then click OK to apply the effect.

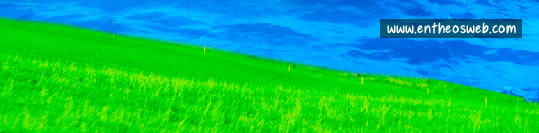
Step 16 : Go to Edit > Transform > Flip Horizontal, to flip the grass image horizontally.
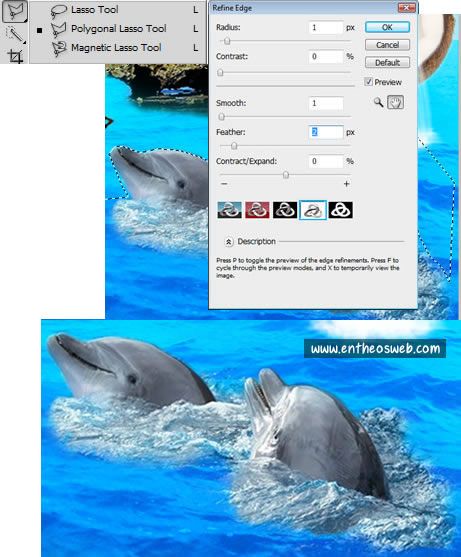
Step 17 : Select File > Place. Click Place to import the dolphin image into your Photoshop document, then rasterize the layer by right-clicking on the name of the Dolphin layer and choosing Rasterize Layer. You can resize the dolphins image according to your aspects by pressing Ctrl + T.
Go to “Eraser Tool” and change the brush size on the eraser options bar underneath the menus as below. Click and drag to start erasing with your mouse to remove the unwanted pixel of the dolphins image. Still some of the portions like dolphins head, mouth, etc were not blended properly, so we can use Polygonal Lasso Tool to make it perfect.

Step 18 : The Polygonal Lasso Tool (shortcut L) will draw straight lines from point to point as you continue to click the canvas. It allows you to draw both freehand and straight edge selections. Choosing feather option will soften the edges of the selection of the Polygonal lasso tools. The values of the feather and other options can be seen below.
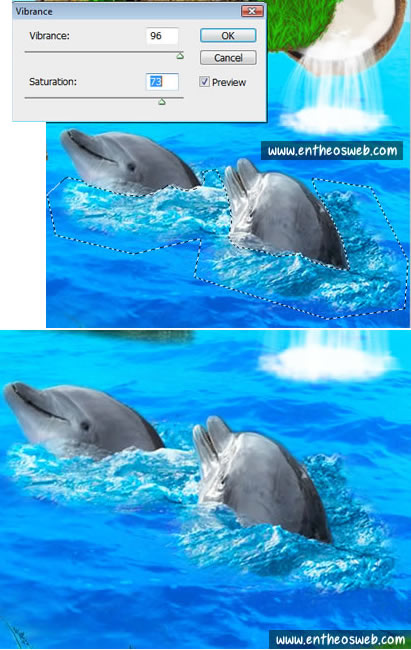
Hence the dolphins image has been blended very well with the background, but the water seems too dark comparing to the blue water. To overcome this problem select the water around the dolphins using “Quick Selection Tools” and go to Image > Adjustments > Vibrance.
When the Vibrance dialog box opens apply the below values and click OK. Now the water also blended perfectly with the background. so it looks more realistic.
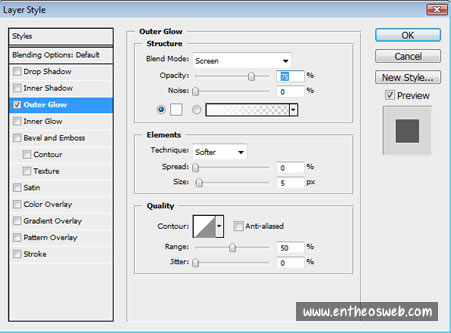
Step 19 : Next step is to add some insects, balloons, dolphins & animals on the scene as per your imagination. Open those source images and extract/crop them as explained above. After cropping them, scale the sizes and place them in the positions similar to the shown image or up to your creativity.
For the insects (i.e scorpion & snail) apply the outer glow option as below in the blending option to highlight them.

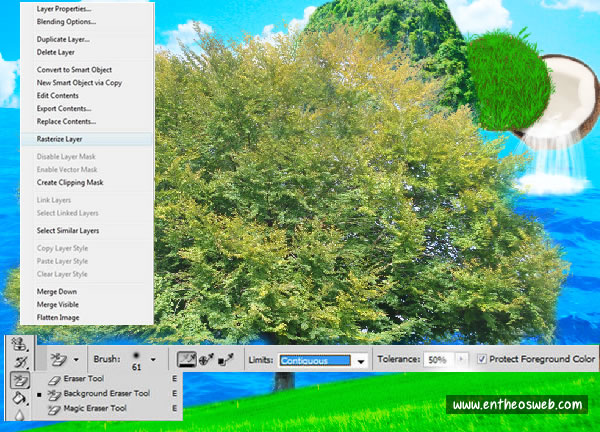
Step 20 : Lets place the below tree image. After placing the tree on the canvas, right click on the layer option to Rasterize the layer. Then click on the “Background Eraser Tool” to remove the background and unwanted items from the tree image. Apply the Brush settings as shown below to erase the background.
Step 21 : Now go to Layer > New Adjustment Layer > Curves. In my channels options, I choose “Green” to get the output as the greener image. Adjust the curve setting as below.

Step 22 : Just make sure that the tree image should look exactly like the original. Hence I am going to use both dodge tool & burn tool
The dodge tool lightens the area/pixels and the burn tool darkens the area/pixels.
In the Toolbox, select the Dodge Tool and choose brush size and hardness as shown in the image. Drag the Brush tool on the top of the tree to lighten & make it bright as if the sun light falls on them.
As you can see in this tree image, after dodging the top portion of the tree has been lightened.

Step 23 : Select the Burn Tool. Then brush it on the bottom of the tree to darken the edges and corners of the tree image, this makes the central part stand out as below.
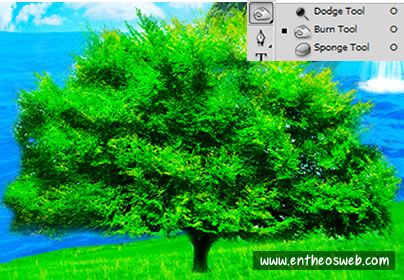
Step 24 : Lets improve the tree image color quality now, using Vibrance.
Vibrance improve the saturation of colors. To apply this fix, choose Image > Adjustments > Vibrance.
Note : Increase Vibrance to boost less saturated colors. Increase Saturation to boost all color.
Hence we have received the output as below.

Step 25 : Finally add the grass effect to the grass side path. Create a new layer, then select Brush Tool and select the grass brush & paint on the grass path side. We are done with making the grass. You can see the final result of the image I have created.
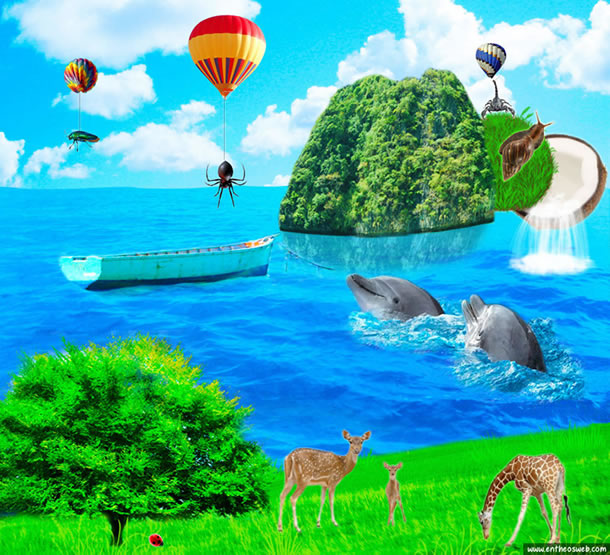
Click here to see the Fantasy Photo Manipulation image in larger version.
We hope you enjoyed this tutorial on Photoshop, please like and share this tutorial with others and do share your comments and tips below!