In this tutorial, you will learn how to create shiny text using some simple and interesting Photoshop techniques.

Program: Photoshop CS5
Estimated Completion Time: 20 Minutes
Now that we have everything we need, let’s start designing.
Step 1:- First, we’ll create a new file in Photoshop with 1000px Width and 800px Height.

Step 2:- Create a new layer, for this click on Layer> New> Layer. Now click on “Gradient Tool” and use it on our background with colors # 012222 and # 000102.

Step 3:- Now we’ll create a base for our text. So for this, create a new layer and then select the star brush and use it with colors # 3983b3 and # ffffff.

Step 4:- Select another star brush and use it with the color # 197b30.

Step 5:- Now change the foreground color to # ffffff and use a bigger brush randomly.

Step 6:- Now select the “Rectangle Tool” and create a small tilted rectangle on the side.

Step 7:- It’s time to add some inner shadow. So, for this, click on Layer> Layer Style> Inner Shadow. And change the inner shadow color to # 07f940.
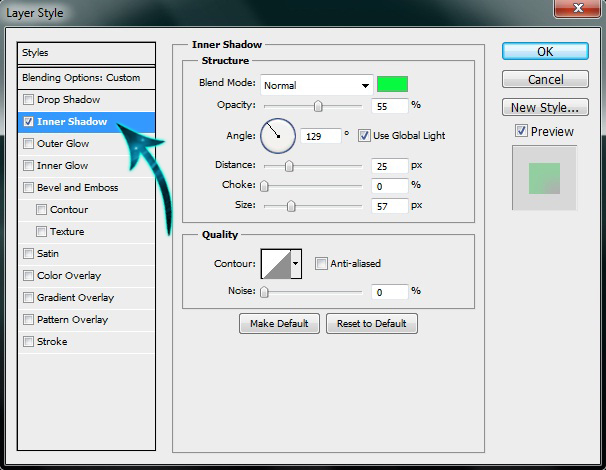
Step 8:- Now click on Layer> Layer style> Outer Glow. And add the glow with color # a0fff1.

Step 9:- Simply click on Layer> Layer style and select Color Overlay. Reduce the opacity to 65%.

Step 10:- Now select the Eraser Tool and remove everything except the right side of our rectangle. So we can have a nice light strip.

Step 11:- Simply duplicate the layer 3 few times and place them randomly. You can change the direction with CTRL/CMD+T.

Step 12:- Now select the “Text Tool” and add some text. You can write whatever you want. For this, I’m writing “Entheos”.

Step 13:- Now we need to add some style effects to our text, so let’s click on Layer> Layer style> Inner shadow.
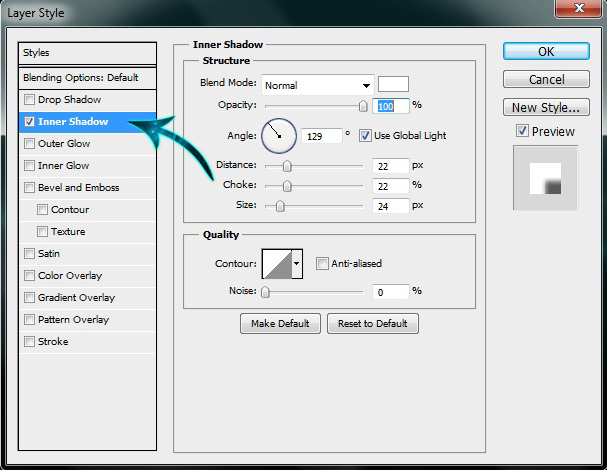
Step 14:- Click on Layer> Layer style> Outer Glow and add a glow with color # 30ef04.
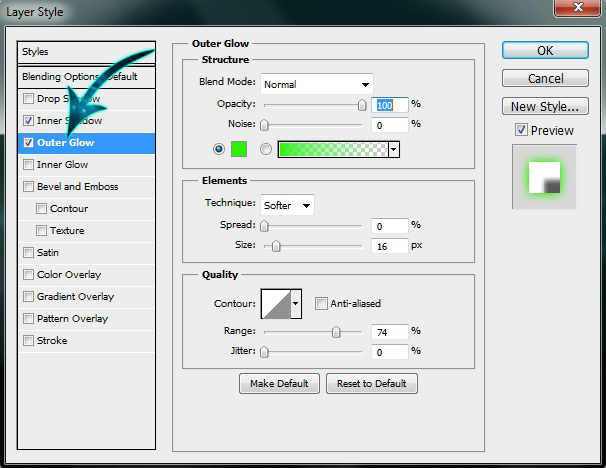
Step 15:- Click on Layer> Layer styles> Bevel and Emboss and keep the setting same as the image.

Step 16:- Now select “Color Overlay”. Reduce the opacity to 80% and change the color to # bdf0ef.
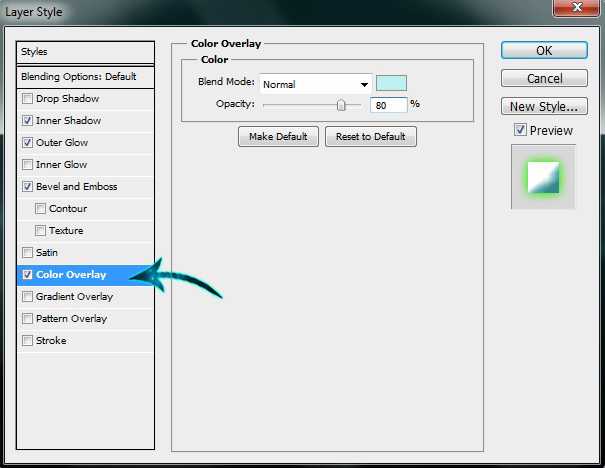
Step 17:- Now it’s time for some “Satin” effect. So, click on layer> Layer Style> Satin.

Step 18:- Open the leaf image and paste it on our file. Reduce the opacity to 30%. Now select the pen tool and create a path along the text. Then right click on the path and select “Make selection”.

Now copy the selected area and paste it.

Lastly, change the blending mode of the layer to “Overlay”.

Step 19:- Now select “Ellipse Tool” and create a small circle. Fill it with # ffffff. Now click on Layer> Layer style> Outer glow and add glow with # d7fcc0, blending mode “Linear dodge” and size 45px.

Step 20:- Now click on Filter> Blur> Gaussian Blur and blur the circle a bit. Simply duplicate it and place the glow on the edges of our letters. Then create a new layer and use a round brush over the text. Now change the blending mode to Overlay. And reduce the opacity to 70%.
You can try creating it in different colors as well. Like these:-
Blue:-

Red:-

Green:-

Finally, we are done. Our Glossy Text effect is ready. It wasn’t that hard right? We hope you guys enjoyed it, and learned something interesting.


