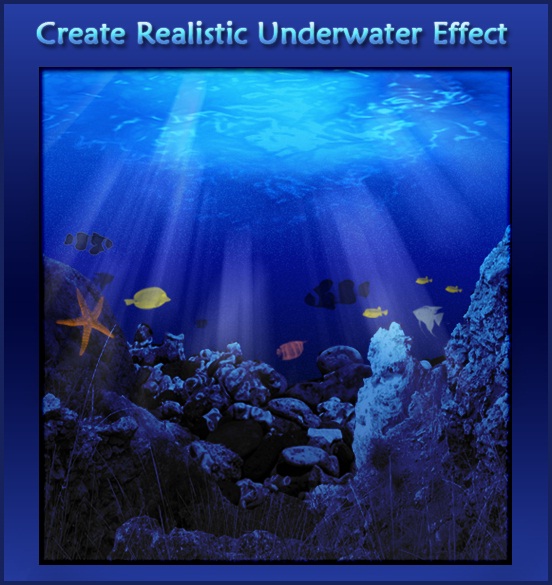
In this tutorial you will learn how to create a realistic underwater effect in Photoshop using various filters, lighting effects and blending techniques.
Program: Photoshop CS5
Estimated Completion Time: 45-50 Minutes
The following assets were used during the production of this tutorial.
Rocks Image
Stones image
Fish Brushes
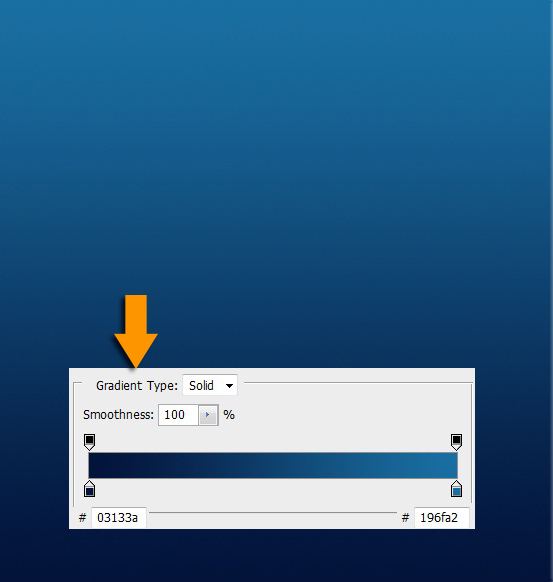
Create a new document with width 950px and height 1000px. Now pick the ‘gradient tool’ to give gradient to your background.
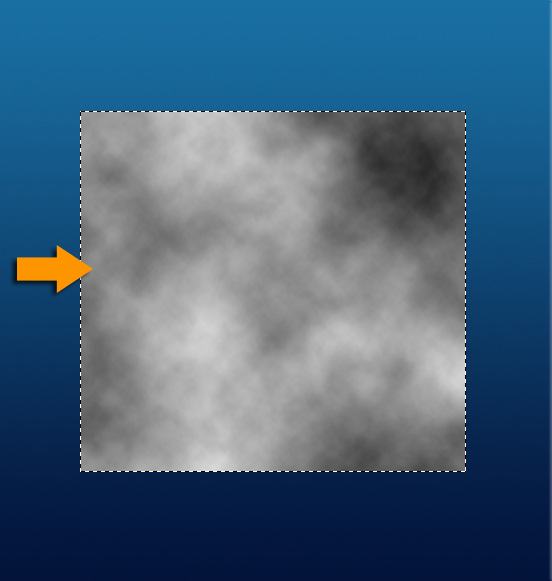
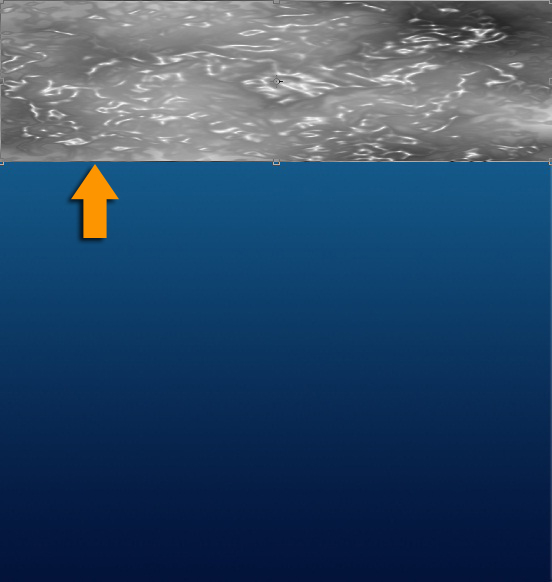
Create a new layer by going to Layer> New> Layer and label it as ‘surface’. Select some area on this layer using ‘rectangular marquee tool’. Use default colors, which are # 000000 as foreground and #ffffff as background and go to Filter> Render> Clouds.
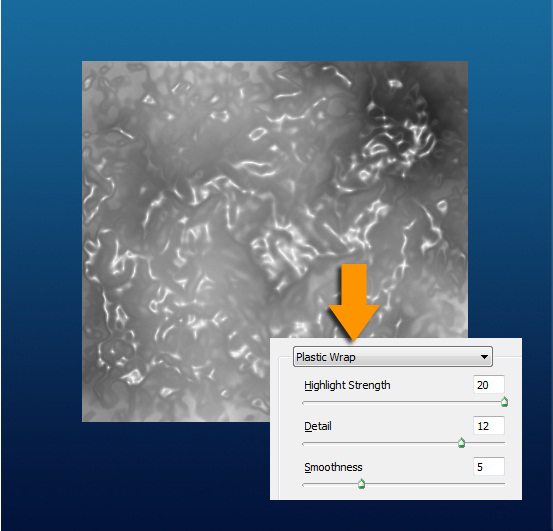
Keep this ‘surface’ layer selected and go to Filter> Artistic> Plastic wrap. Use the following values for plastic wrap.
Now press ‘Ctrl+T’ to resize this selected area and expand it to fit your canvas. Duplicate this ‘surface’ layer.

Press ‘Ctrl+T’ to resize and drag this textured layer to the top portion of your canvas as shown below.
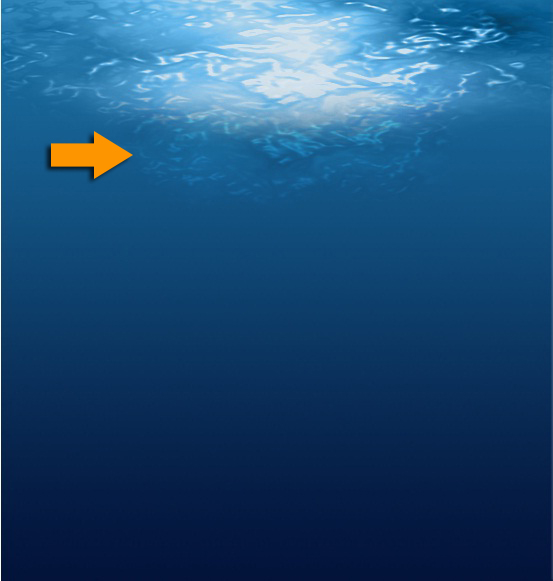
After that, we’ll add some lighting to the ‘surface’ layer. For this, go to Filter> Render> Lighting effects and use ‘omni’ to get nice effect.

In order to finish our surface portion, change the ‘blending mode’ to ‘Luminosity’ and reduce the opacity of this layer to 80%. Select the soft round eraser tool to erase the lower edges, so it can blend with the background.

Now select the duplicated surface layer and decrease its size a bit by pressing ‘Ctrl+T’. Drag it just below the original surface portion. Use ‘Overlay’ blending mode and 50% opacity and erase its edges to get the effect like this.
Next, we’ll create some residue in water. Create a new layer just above the gradient layer. Fill it with # 000000 color. Go to Filter> Noise> Add noise and use the following values.
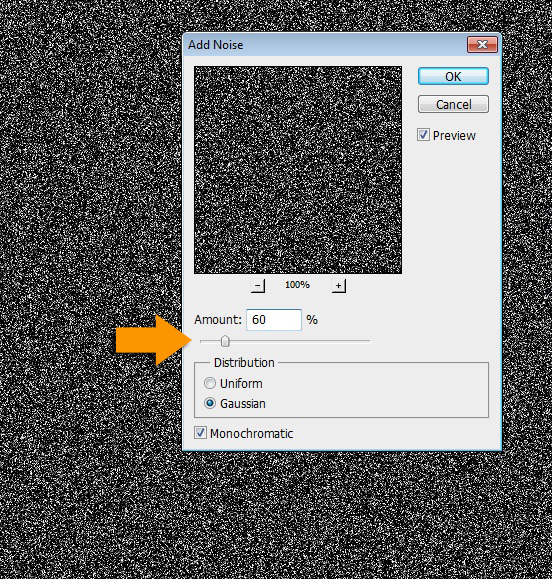
After that, change the blending mode of this noise layer to ‘screen’ and opacity to 15%.
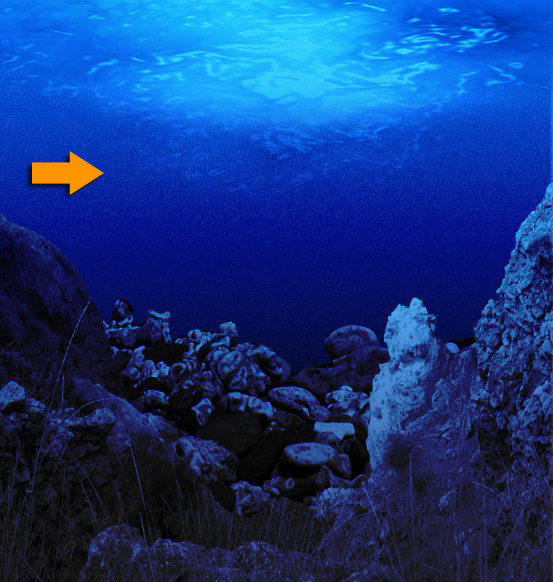
Next, we’ll create the bottom of our image. Open the ‘stones’ image and select its bottom part using ‘pen tool’ and click ‘Ctrl+U’ to open the ‘Hue and Saturation’ window and use the following values to extract colors.

Open the ‘rocks’ image now and select some portion of rocks using ‘pen tool’ and desaturate the image exactly as done in step 8. After this, adjust the position of both stones and rocks images to give realistic look.
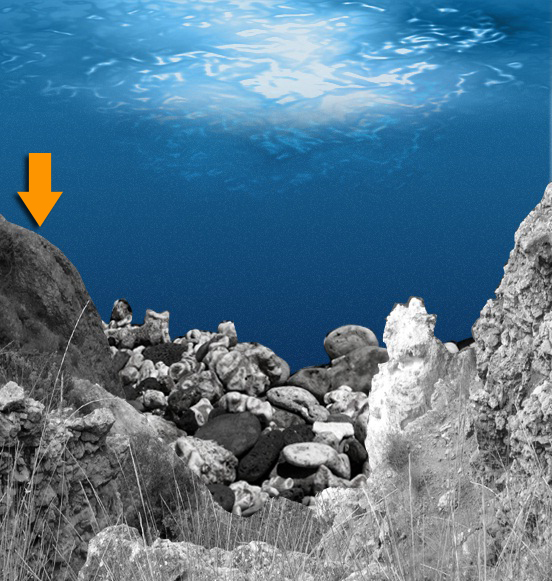
Duplicate the blue gradient layer and place its copy just above ‘rocks’ image layer. Change its blending mode to ‘Linear light’ and opacity to 80%.
Now we’ll create sunrays penetrating through the surface. Create a new layer, select a square about 80% of your canvas size, using ‘rectangular marquee tool’ and go to Filter> Render> Clouds. Then click on Image> Adjustments>Threshold and use the following values.

After this, go to Filter> Blur> Radial blur and use the given settings.
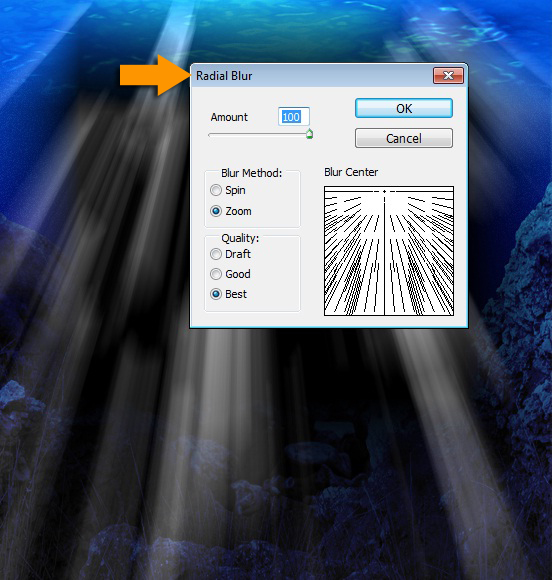
Change the blending mode to ‘Linear dodge’ and opacity to 50%.
At the end, we’ll add some fishes using fish brushes. Select the ‘brush tool’ and draw them of different sizes. I added color to few through ‘color overlay’ blending option. Collect all fishes in a new group and reduce its opacity to 75%.That’s it, we are all done.
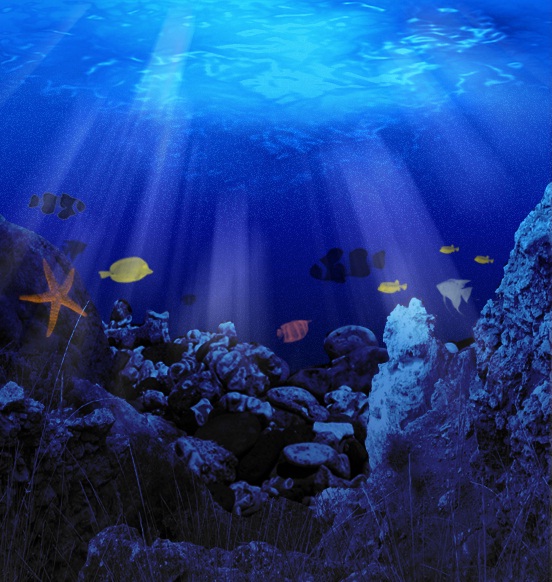
Hope you enjoyed learning this gorgeous underwater effect. Do share your thoughts.