Convert a dull image to a bright and vibrant image in Photoshop! Learn how to use Photoshop to enhance the color and vibrance of photos using curves, photo filter, vibrance and screen tools.
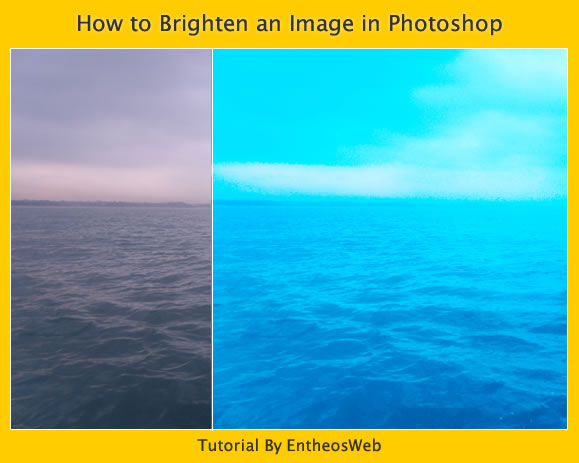
There are many techniques for making colors of the photo enhanced and vibrant. But here we have used only four photo editing techniques to improve the color quality of an image.
1. Vibrance – It works on dull colors the most to boost it’s levels and saturated colors the least. Vibrance protects the image color tones.
2. Curves – It’s a powerful way of correcting color casts in specific tonal areas. We can use curves for maximum control over lighting the photo.
3. Photo Filter – It is used to tint and enhance colors in an image.
4. Screen – It multiplies the inverse of the blend and base colors. The result color is always a lighter color.
Let’s start the tutorial.
Open a new document File > New and with the canvas size Width : 730 px and Height : 550 px.

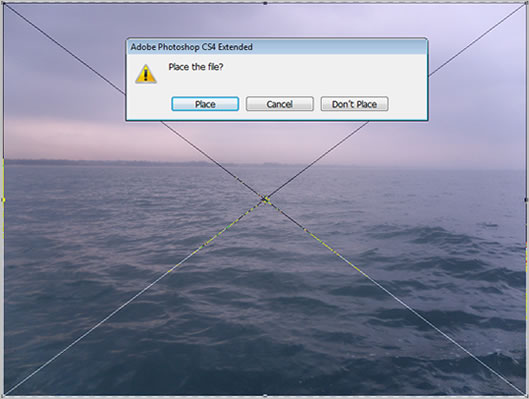
Choose the photo you want to improve the color in Photoshop. Here I have selected the sea water photo. Place the sea water photo into your document File > Place.

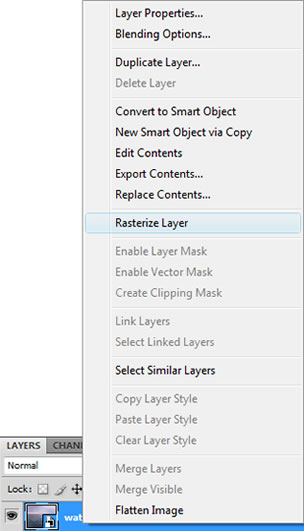
Now “Rasterize” the Layer. To rasterize the layer, right click on the sea water thumbnail layer then choose Rasterize Layer.
Choose Layer > New Adjustment Layer > Photo Filter. Click Ok in the New Layer dialog box.

This brings up the Photo Filter dialog box. There are several warming filters and several cooling filters. I have selected the Filter : Cooling Filter (82) and the Density : 55%.
Cooling Filter (82) makes the image cooler & bluer. Make sure the Preserve Luminosity option in the bottom left corner is checked so you’re not darkening the image. Click Ok. Now notice that the sea water photo looks a lot more cooler and bluish. Here’s my image at this point:

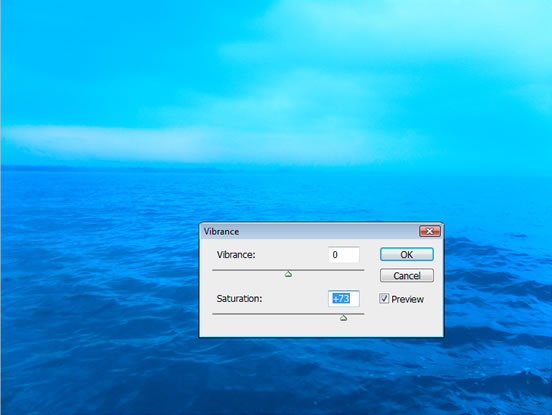
To boost the color I am going to use Vibrance. The vibrance works on dull colors the most and saturated colors the least. It can give you a smoother result.
Go to Image > Adjustments > Vibrance

We need to get more variance of color in the photo color tones to make it look more real. So, I have to use “Curves“. Go to Image > Adjustments > Curves
Note : Always perform curves on 16-bit images when possible.

So we open a Curves adjustment layer and change the Channels to RGB. You’ll see a graph like this:
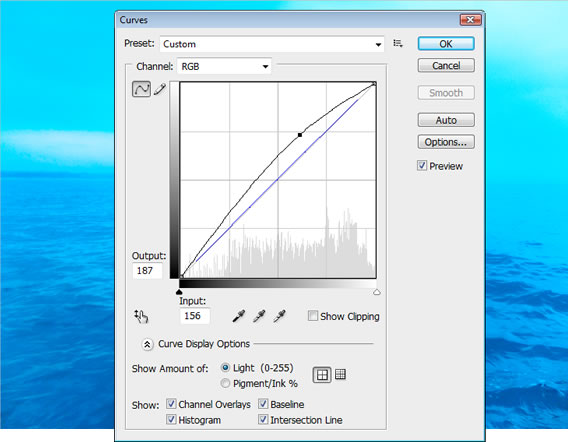
This is the Photoshop curves dialogue box. The first thing you notice is that there is no curve – just a nice straight line. The curves has three portions. Hence we can brighten the selective curve areas (i.e, Shadows, Midtones and Highlights) of the photo for the color enchancement.
1. Shadows – Bottom point of the curve
2. Midtones – Middle point of the curve
3. Highlights – Top point of the curve
Moving points on the curve changes the light and dark values in the image with all the color channels (e.g., RGB) selected for the adjustment. After applying the curves correcting color, your image will look like this.

Right click on your sea water layer and click duplicate layer or press Ctrl + J. This will allow you to make your brightness adjustments without altering the original image. Now change the blending mode for that layer from ‘Normal’ to ‘Screen‘ and Opacity 30% to this layer.
After this the contrast has been increased and the sea water is now a deeper, richer blue. Your image should now look considerably lighter.

The photo now looks considerably lighter and brighter. Below is my final result of the enhanced “sea water”.

The original photo is as below

And here is the final result after improving the colors of the photo.

Thus, we have improved the color of a dull photo into a brighter image using some photoshop techniques. Let us know what are other techniques you use to brighten the photos or images, please do share your thoughts.


