In this tutorial, we will learn how to create a gorgeous badge with ribbons and a stitch effect in Photoshop. We will use textures and various blending options to achieve this effect.

Program: Photoshop CS5
Estimated Completion Time: 30 Minutes
The following assets were used in this tutorial:
Step 1
Create a new document with width 1400px and height 1000px.

Step 2
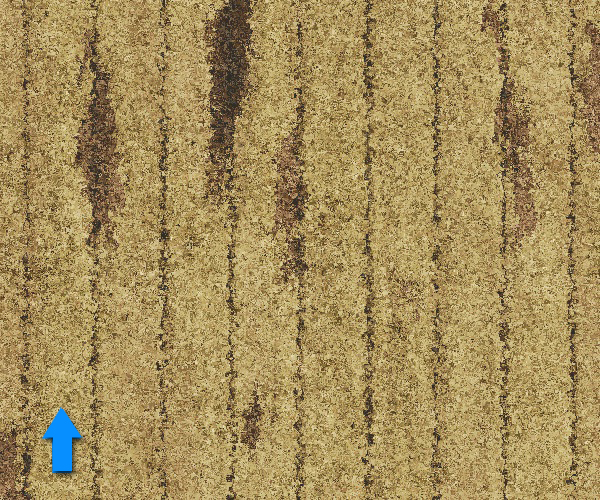
First of all, we’ll make our background. Create a new layer by going to Layer> New> Layer. Fill it with #bdb293 color using ‘paint bucket tool’. Now open ‘wood texture’, copy and paste it on a new layer. Set its blending mode to ‘Hard light’ and reduce opacity of this layer to ‘75%’. Go to Filter> Texture> Texturizer to add more character to this texture layer. Then click on Filter> Brush strokes> Spatter and we’ll get a nice background to move on.
Step 3
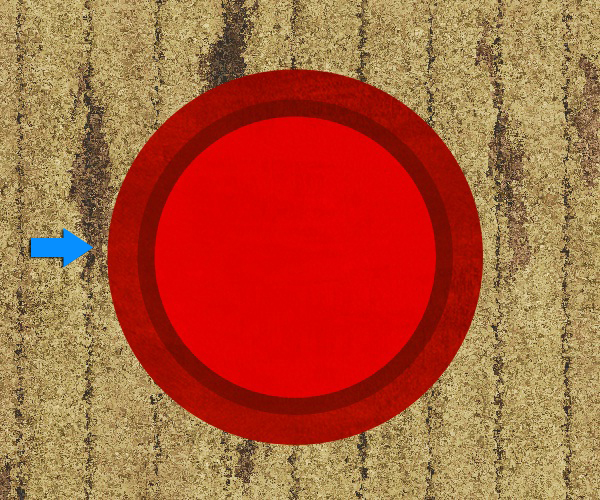
We’ll move ahead to draw the basic shape of our badge. For this, pick the ‘ellipse tool’ and draw 3 circles of different sizes, I labeled these as base circle, middle circle and front circle. Fill these with different shades of any color you want. You should get something like this till now.

Step 4:
Now we will add some texture to our badge. Open the grunge texture, copy and paste it on a new layer just above ‘base circle’ layer. Click on the texture layer and then click Ctrl + base circle layer. Then click ‘add layer mask’. In this way, texture would be confined to this base circle only. Now select the texture layer and set the blending mode to ‘overlay’ and reduce the fill of this texture layer to 80%. Repeat the same step to give texture to the middle and front circles.
Step 5
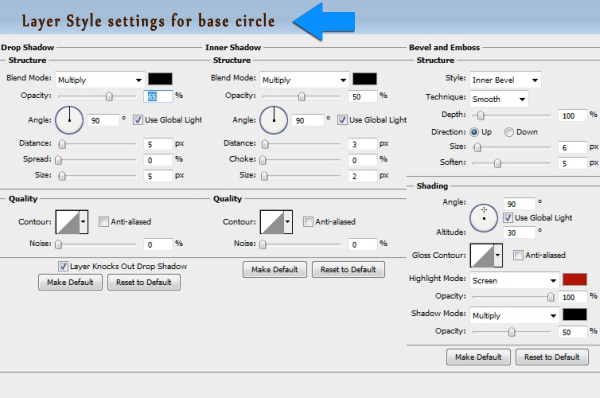
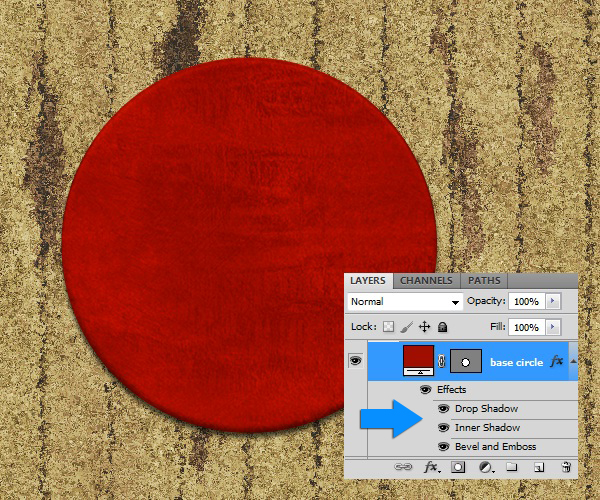
It’s time to style these circles to add more depth. For this select the base circle, go to Layer> Layer style> Blending options and use the following settings to get the effect as shown below.
Step 6
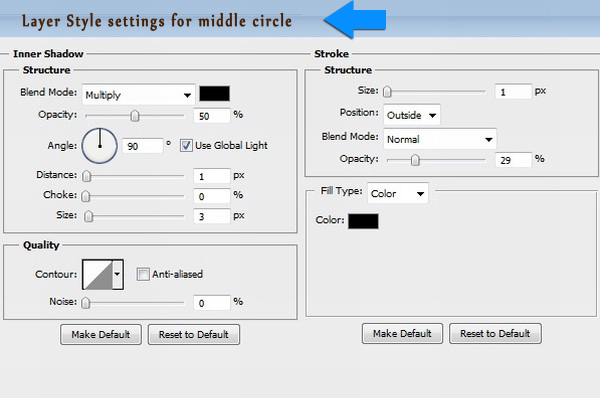
Use the following layer style settings for the middle circle.
Step 7
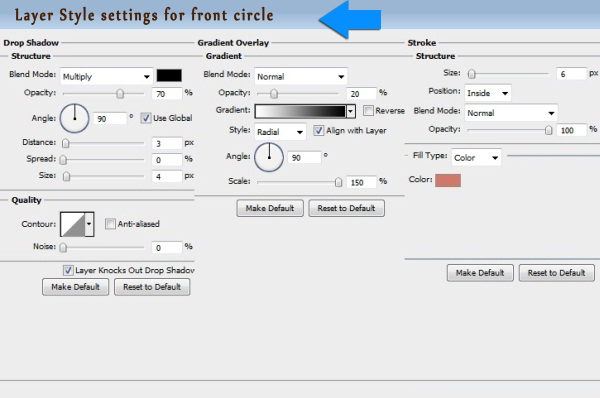
For the front circle, use the displayed values.
Step 8
Now we are going to create a stitched circle to make our badge more attractive. Use #d36b42 color for this. Select the ‘brush tool’ and open the ‘brush panel’. Then use the setting displayed below to make stitches.
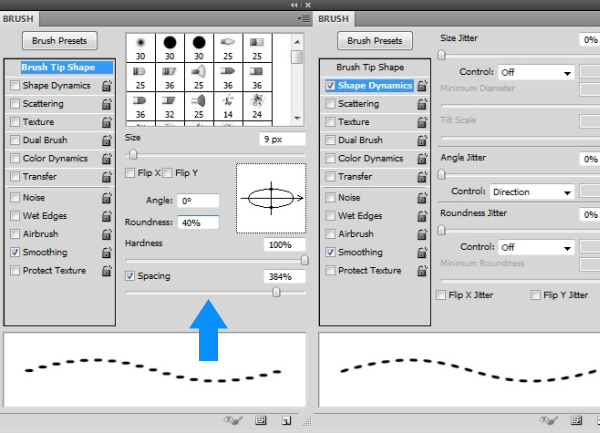
After that, create a new layer, select the ‘pen tool’ and draw a circle using ‘pen tool’, then Right click> Stroke path> Brush and then again ‘right click’ and select the option of ‘delete path’. Now click Layer> Layer style> Drop shadow. We’ll get a nice stitched circle by doing so.

Step 9
It’s time to add text to our badge. So, type in your text using ‘type tool’ in the font and color of your choice. Play a little bit with the blending options to give more character to the text.
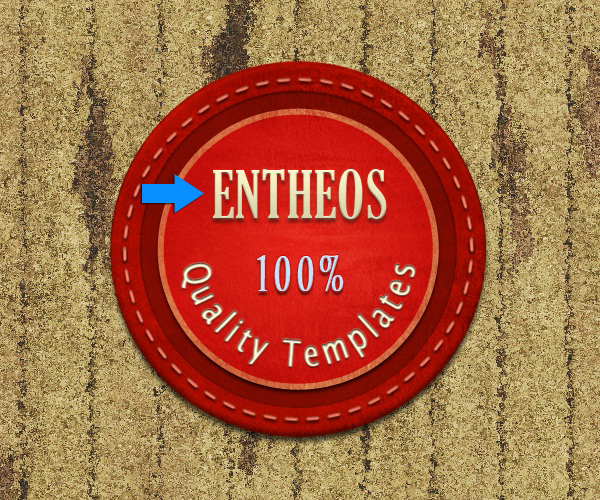
I wrote ‘Quality Template’ text in a circle. To do that, select ‘ellipse tool’ and click on ‘path’ option from the top tool bar and then draw a circle. Now select ‘type tool’ and take it to the circle we have just drawn; now whatever you type would be in a circle. For having the text written in the lower half of the circle as displayed, select the ‘path selection tool’, take it to the text and simply drag it inside the circle. We will notice 2 points on the circle, a ’x’ and a ‘?’. Here ‘x’ shows the starting point of text and ‘?’ means your text would end here. so, drag ‘?’ first to the end of lower half of circle and then drag ’x’ to the start of lower half of circle. That’s it. Additionally, I made stars and a line to enhance text display.Step 10
Now we’ll make ribbon for our badge. Select the ‘pen tool’ to draw ribbon. Then right click on it and select “Stroke path”.

Now again, right click on the path and select “Make selection” and fill it with color # 024678.
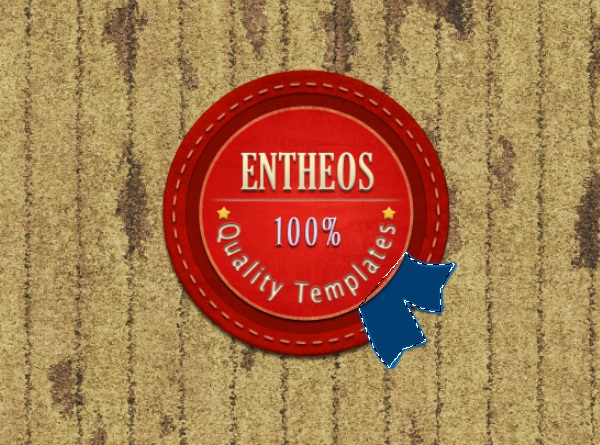
Step 11 Now add grunge texture to it using the same technique as explained in step 4 and use the settings displayed below for layer styling.

After that, add stitches to it in the same way as explained in step 8. But here you already have required stitch brush settings. So, just draw borders for your ribbon using ‘pen tool’ and apply brush. We are all done.

Hope you enjoyed this tutorial. Don’t forget to share your thoughts. We’ll be back soon with something interesting.
No portion of these materials may be reproduced in any manner whatsoever, without the express written consent of Entheos. Any unauthorized use, sharing, reproduction or distribution of these materials by any means, electronic, mechanical, or otherwise is strictly prohibited.
