In this tutorial, we will learn how to create a gorgeous Christmas card in Photoshop using brushes and images. Learn how to create a cool snowfall effect & a snowman.

Program: Photoshop CS5
Estimated Completion Time: 40 Minutes
The following assets were used during the creation of this tutorial.
Now we have everything we need, so let’s start.
Step 1
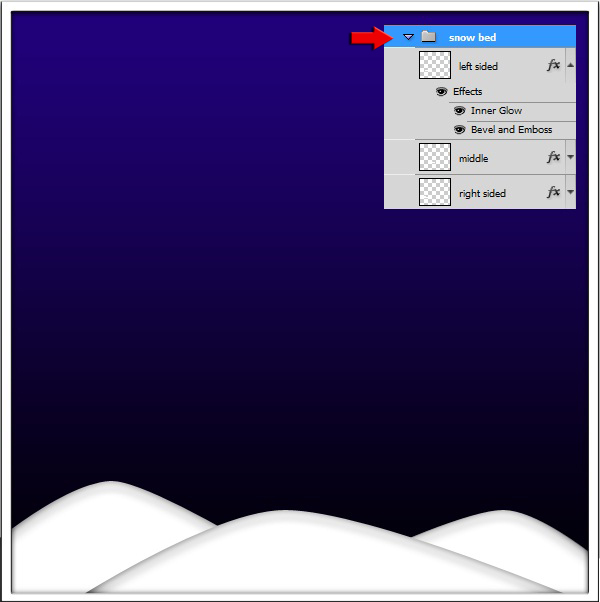
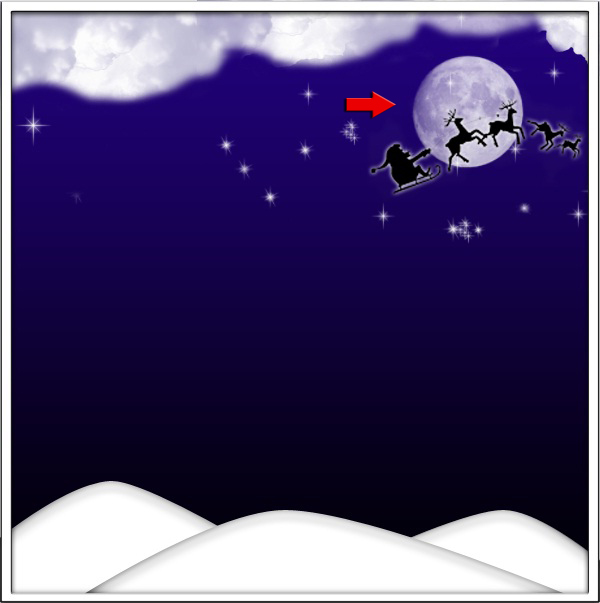
Create a new document with Width 1400px and Height 1200px. Create a new layer by going to Layer> New> Layer. Select the ‘gradient tool’, set linear gradient and deep blue to blue color gradient. Now drag the gradient tool from bottom to the top of this layer to get the gradient as shown below.

Step 2
Next, we’ll create snow bed. Select ‘pen tool’ for this, draw a mountain shape on left side of the canvas in a new layer. Right click and select ‘fill path’ option and fill it with #ffffff color. Repeat the same process to create middle and right sided snow elevations.

Step 3
Now we’ll add some character to the snow bed. Click on the left sided snow elevation layer and double click to open the’ layer style window’. Here use the following settings.
After that, right click on this layer and select ‘copy layer style’ and then right click on the middle and right sided layers one by one and choose the option of ‘paste layer style’ to get the effects on the whole snow bed.
Step 4
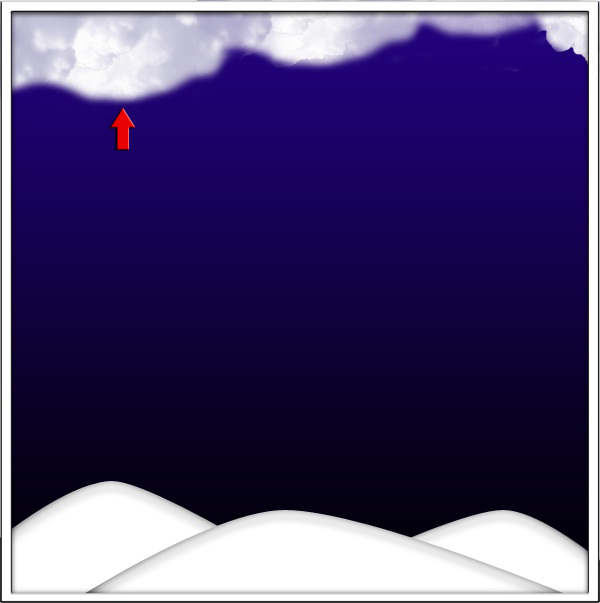
Next, we’ll add clouds. For this, open the clouds image and select the clouds portion using the ‘Quick selection tool’ or ‘Magic wand tool’. Click the ‘Shift’ key while using ‘selection tool’ to select the entire cloudy area. You can deselect any unwanted part by clicking on ‘Alt’ key. After you are done with the selection of clouds, simply go to Edit> Copy and then come back to your document, and go to Edit and click Paste. By doing so, clouds would be pasted on a new layer. Click ‘Ctrl+T’ to resize them. Select the ‘eraser tool’ to erase some clouds as we don’t need much here.
Step 5
Create a new layer and select the ‘brush tool’ and # ffffff color. Now draw moon and few stars using the moon and star shape brushes.
Open the image of the ‘Santa with reindeers’. Select, copy and paste them in the same way as explained in step 4.Then double click on this ‘Santa layer’ to open the layer style window and select ‘Color overlay’ and set # 000000 to turn them black as we want to show just their shadow. Select the ‘Move tool’ to place Santa with reindeers in front of the moon.
Step 6
Now we’ll create snow fall effect. Create a new layer; fill it with # 000000 color using the ‘paint bucket tool’. Then go to Filter> Artistic> Sponge and use the following settings and set the blending mode of this layer to ‘screen’.

Step 7
Create a new layer, set #ffffff as foreground color and select ‘brush tool’. Use the brush as shown below to create snow fall effect. This brush is in the same ‘moon and star brush set’.
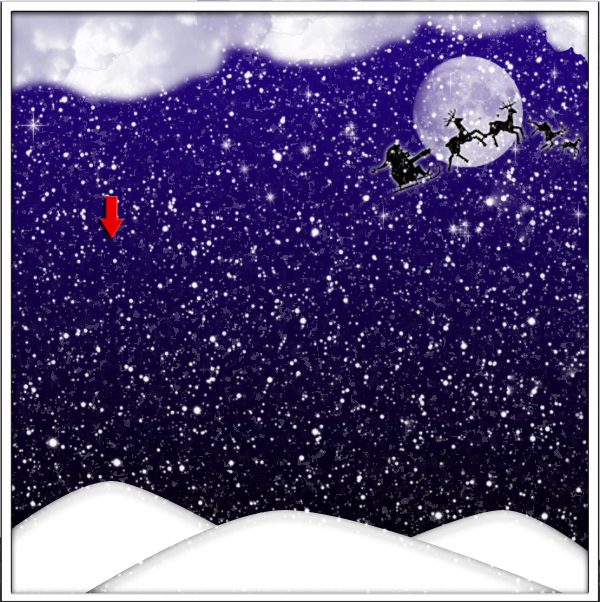
After that, go to Layer> Duplicate. Do it twice as we want 3 layers of snow fall. Label these as 1, 2, and 3. Reduce the opacity of layer 1 till 20%, layer 2 to 40% and layer 3 to 60%.

Step 8
Next, we’ll create a cute snow man here. Select ‘elliptical marquee tool’ and draw a circle in a new layer, fill it with #ffffff color. Now draw an oval shape in a new layer as belly and fill it with #ffffff color. After that, create a new layer and draw right and left hand shape using the ‘pen tool’. Then draw bottom of the snow man in a new layer to get the shapes as shown below.

Click on any of the shape drawn and go to Layer> Layer style> Inner glow. Use the settings as shown below. Copy and paste the ‘layer style’ in the rest of the shapes. After that, bring the parts closer using ‘move tool’.

Step 9
Now we’ll create face of our snow man. Create a new layer, set # d0d0d0 color as foreground, select ‘soft round brush’ and draw shades of face features. Then select the ‘elliptical marquee tool’ to make the features of snow man and fill them with #000000.
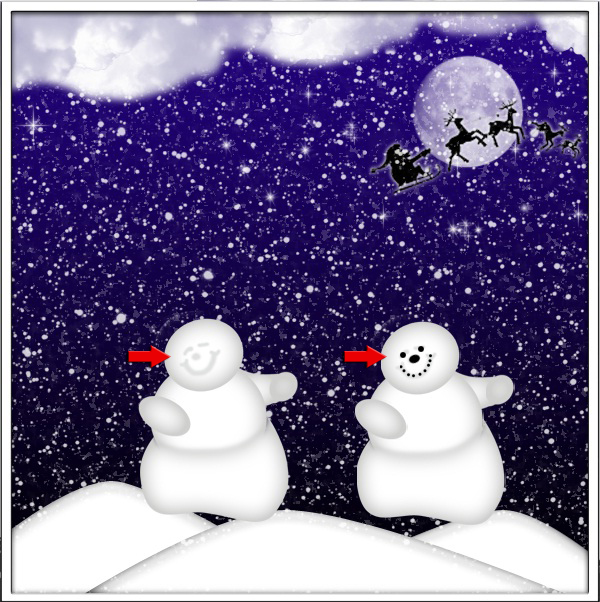
If you want, you can add cap and scarf to the snow man. Click ‘Shift’ key and select all the layers of snow man and collect them in a group. Drag the snow man to the left side, place it over the snow. Open the gifts image and paste few gifts over the snow in a separate layer in the same way as we did for clouds.Step 10
Now we’ll add text to this Christmas card. Use the following settings of blending options for the text. You can use any color you want.
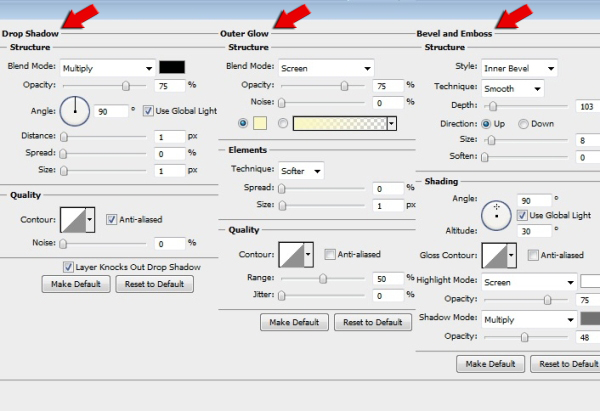
Lastly, you can add swirls at the side borders, erase the unwanted parts using ‘eraser tool’ and use the same layer style settings as used for text but here also use the ‘color overlay’ to give dark green(#1a5801) color.

That’s it. Hope you learned something new. Do share your thoughts.
No portion of these materials may be reproduced in any manner whatsoever, without the express written consent of Entheos. Any unauthorized use, sharing, reproduction or distribution of these materials by any means, electronic, mechanical, or otherwise is strictly prohibited.
