In this tutorial we are going to create a Fantasy Bottle World Photo Manipulation in Photoshop CS5. You will learn how to create a beautiful collage of images to design a World in a Bottle photo montage.

Program: Photoshop CS5
Estimated Completion Time: 30 Minutes
The following assets were used during the production of this tutorial.
Now that we have everything we need, so let’s start!
Step 1 – Open your Photoshop and create a new file with 700px width and 1000px Height.

Step 2 – Now open the sky image mentioned above and paste it on our file.

Step 3 – Create a new layer, for this click on Layer> New> Layer. Now select the Rectangular Marquee Tool and create a rectangle in the middle. Then click on the Paint Bucket Tool and fill the rectangle with color # ffffff.

Step 4 – Now click on Filter> blue> Gaussian Blur.

Step 5 – Create a new layer and select soft round brush. Now simply use it to create a simple rainbow. You can use the colors of your choice. Once that is done change the blending mode of the layer to “Vivid Light”.

Step 6 – Now open the bottle image and paste it in the middle.

Step 7 – Now open the waterfall image and paste it over the bottle.

Step 8 – Now select the Eraser Tool and remove the edges of the image. So it can fit our bottle.

Step 9 – Now create a new layer and color the empty area under the waterfall with # 63bdf1. Now add the fish.

Step 10 – Open the Rock image and paste it on our bottle.

Step 11 – Select the Eraser Tool and Remove the edges of the rock image.

Step 12 – Open the city image and paste it on out bottle.

Step 13 – Once again select the eraser Tool and remove the edges of the image so it can fit our bottle.

Step 14 – Now open the Road image. And use the eraser tool to create the desired shape.

Step 15 – open the traffic light image and paste it above the road on the left side of the bottle.

Step 16 – Now duplicate the traffic light layer, right click on it and select Duplicate layer. This time place it on the right side of the road.

Step 17 – Open the car image, select is and scale it down.

Step 18 – Now duplicate the car layer and then click on Image> Adjustments> Hue/Saturation to change the color.

Step 19 – Repeat the same process and add another car.

Step 20 – Now select the Ellipse Tool and create a round. Fill it with # 63bdf1. Then change the blending mode to Overlay.

Step 21 – Click on Layer> Layer style> Pattern Overlay and add a bit of water pattern on it. Then click on Outer glow.

Step 22 – Now add the gold fishes.

Step 23 – Now simply duplicate the layer then scale them using Command/Ctrl + T and place them randomly around our bottle.

Step 24 – Create a new layer and place it under the bottle layer. Then select the soft round brush and use it on the top with color # 000b11.

Step 25 – Now select the galaxy and cloud brushes mentioned above and use them randomly on the dark area. Use colors # ffffff and # 002234 for this.
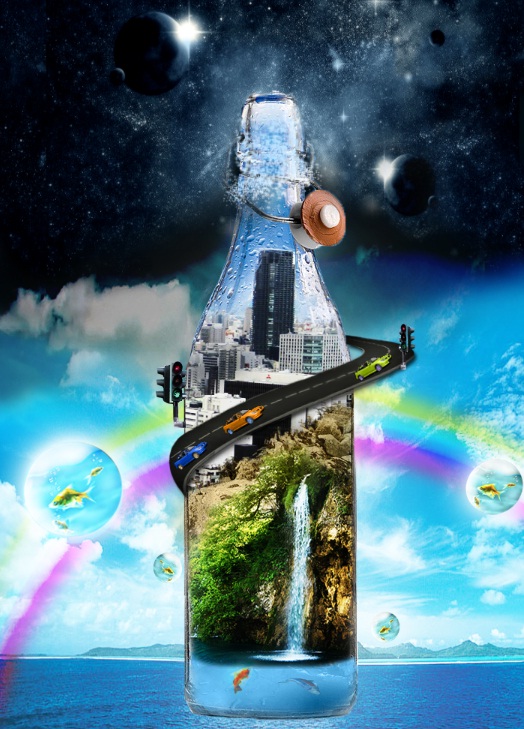
Step 26 – Now select thee eraser tool and remove the clouds from the bottle opening. And we are done.
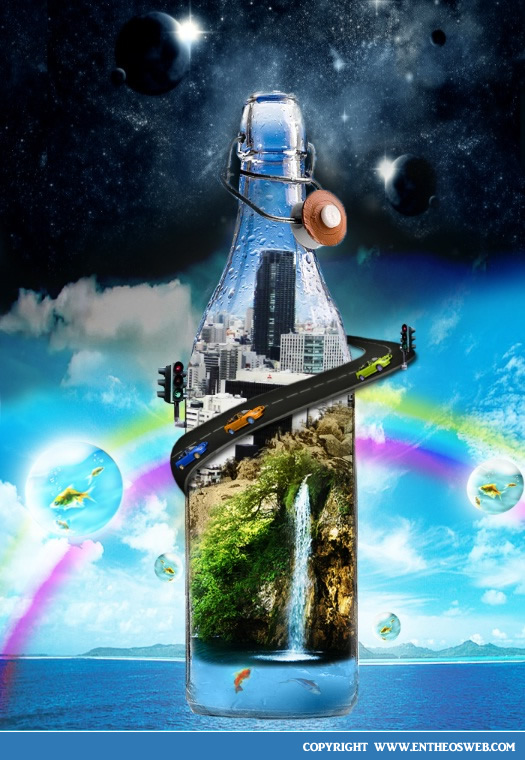
Our “A Dream in a Bottle” photo manipulation is done, hope you guys enjoyed the tutorial and learn something new.
No portion of these materials may be reproduced in any manner whatsoever, without the express written consent of Entheos. Any unauthorized use, sharing, reproduction or distribution of these materials by any means, electronic, mechanical, or otherwise is strictly prohibited.
