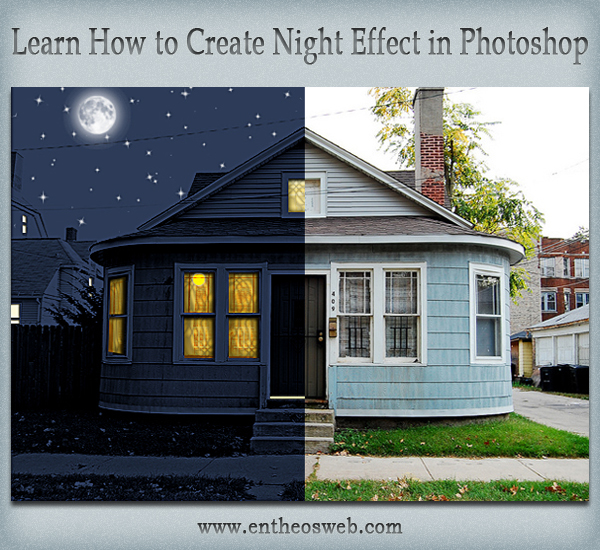
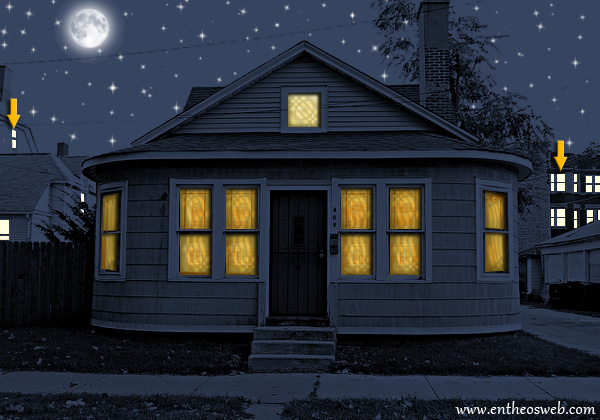
In this tutorial, you will learn how to create a night effect in Photoshop using hue and sturation, adjustment layers, filters, brushes, blending modes and layer styles.
Program: Photoshop CS5
Estimated Completion Time: 20-25 Minutes
The following assets were used in the creation of this tutorial.
* Moons Stars Sparkles Brushes
Step 1
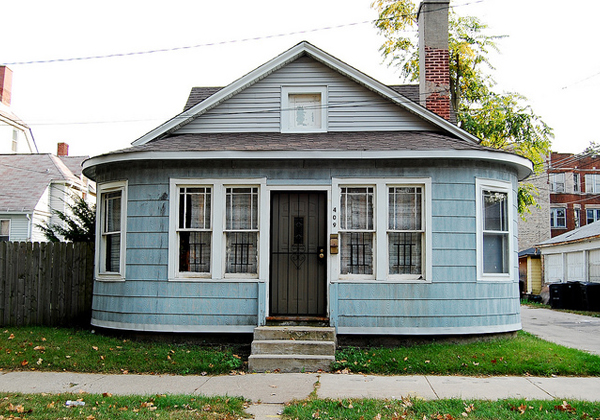
Open the image file on which you want to apply night effect. Then duplicate the image by going to Layer > Duplicate layer.
Step 2
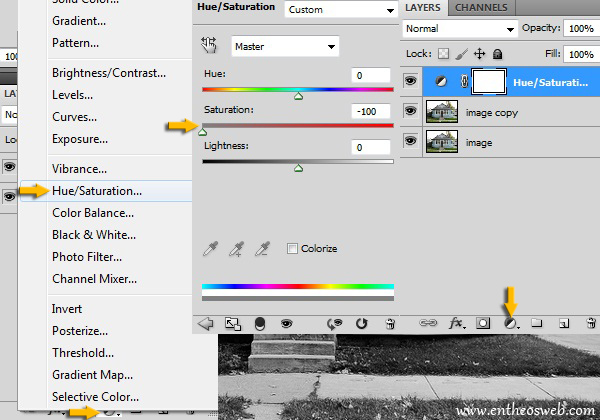
We’ll desaturate the image now. Click on the icon of ‘create new fill or adjustment layer’ present at the bottom of the layers pallete and select the option of ‘Hue/Saturation’. Use the given settings.
Step 3
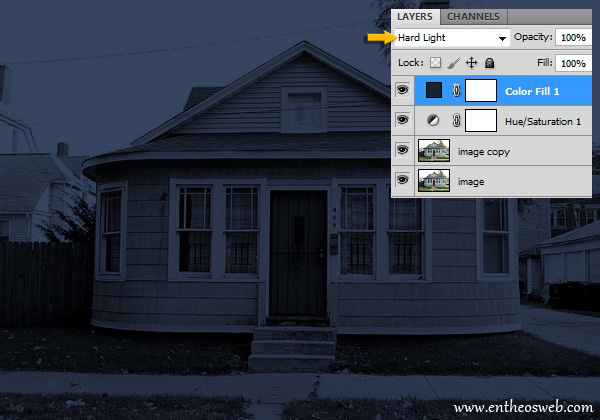
Once again click on the icon of ‘create new fill or adjustment layer’ and select ‘solid color’. Select # 1b2230 color to create the night effect. Change the blending mode of this solid color layer to ‘Hard light’ to get the effect as shown below.
We need to sharpen the image. So, click on the image layer to select it and go to Filter > Sharpen > Unsharp mask. Use the given values.

Step 4
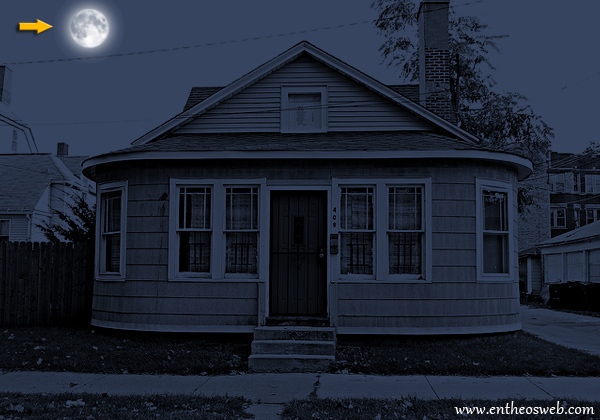
Create a new layer by going to Layer > New layer. Select brush tool and # ffffff color. Choose ‘moon 1 Falln-Brushes’, 70 px size and apply it on this new layer.
Step 5
Create another new layer and select ‘sparkles 5 Falln-Brushes’ this time. Now use the given settings for this brush.
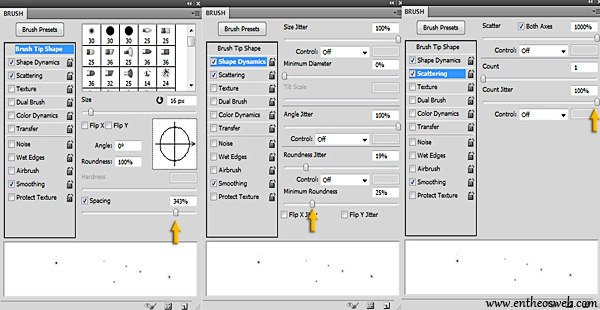
Now apply the sparkles brush over the sky area on this new layer. You can erase the stars from the unwanted areas using ‘eraser tool’.

Step 6
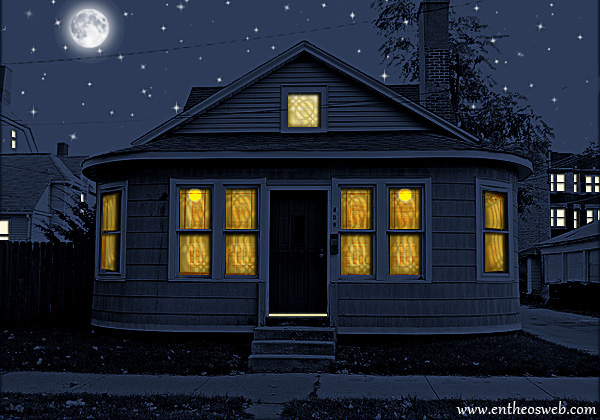
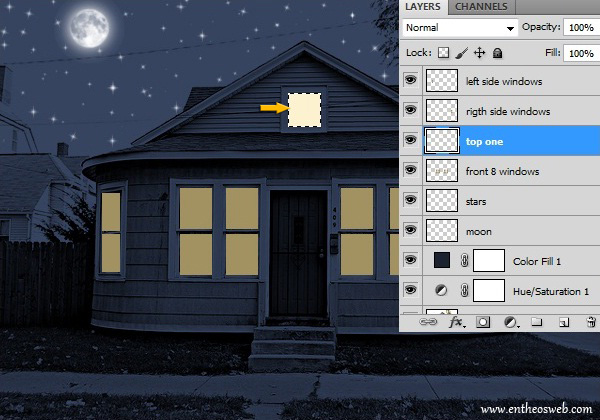
Next, we’ll give the effect of light reflecting from windows. Create a new layer and select the ‘rectangular marquee tool’ to make selection around one of the windows. Then fill this selection with # a29262 color using ‘paint bucket tool’.

Repeat this process to cover 8 front windows. Whereas fill the side 4 windows on 2 separate layers as we will change their shape a bit. Fill the top most glass with a lighter color. We are using # fffcde color for it.
Step 7
Click on right sided windows layer and go to Edit > Transform > Skew. Arrange these windows with the help of skew as shown below.

Arrange left sided windows in the same way and change the blending mode of all the windows layers to ‘Difference’.

Step 8
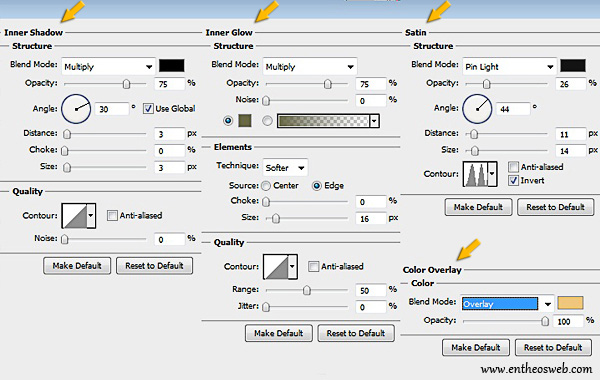
Click on front 8 windows layer and go to Layer > Layer style > Blending options. Use the given settings here.
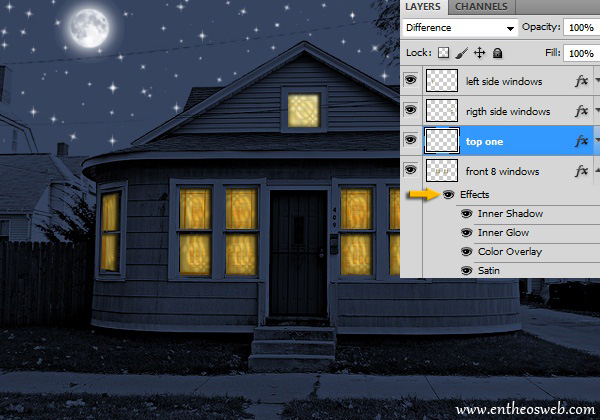
Right click on this 8 windows layer and select the option of ‘Copy layer style’. Then right click on rest of the windows layer and select ‘Paste layer style’ to get the same effects on them.
Step 9
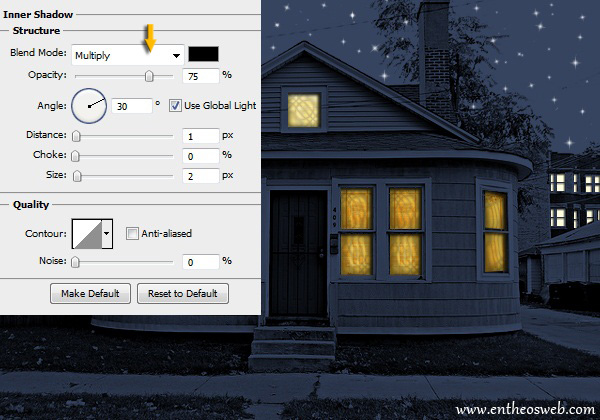
Select the windows of houses at the sides and fill them with # fffcde color.
Now go to Layer > Layer style > Inner shadow. Use the given settings for it.
Step 10
Create a new layer, select the ‘elliptical marquee tool’ and draw an ellipse over one of the front windows, fill this selection with # fff600 color. This will serve as the light source. Change the blending mode of this layer to ‘Overlay’. Duplicate this layer and drag bulb’s copy towards another window. You can add some outer glow if you want.

Create a new layer and select the ‘rectangular marquee tool’ to draw the shape below the door. Fill it with # fffc9e color and use the same outer glow settings for it as used for the bulb.