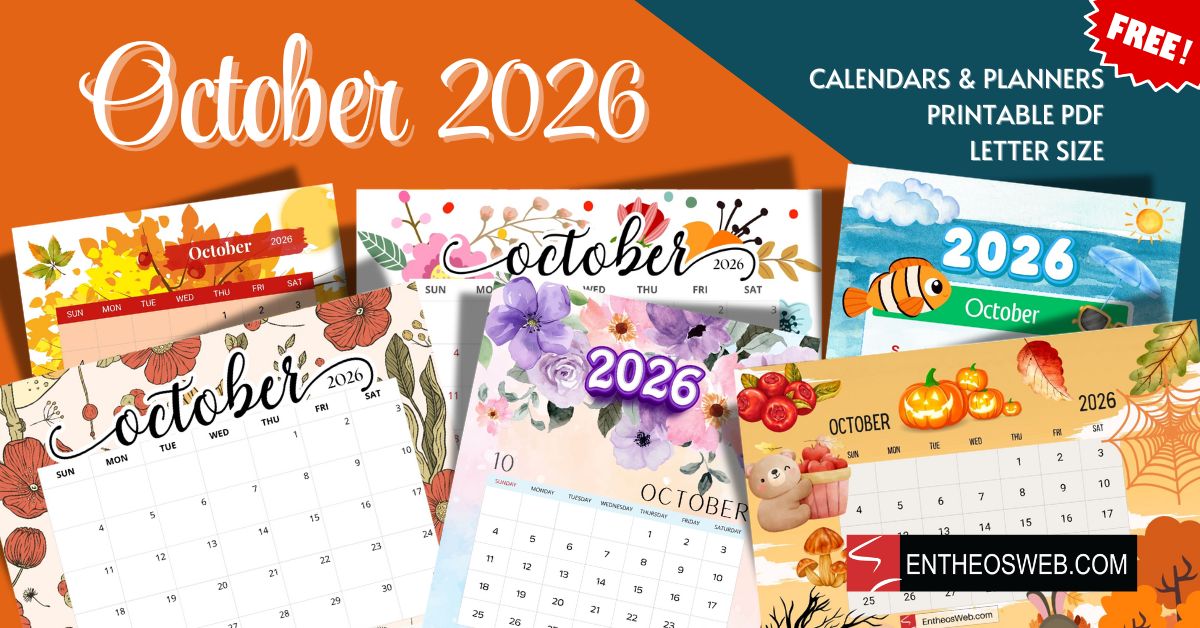
In this tutorial, we will learn how to create a wheel on fire effect in Photoshop.
Tutorial Details
Program: Photoshop CS5
Estimated Completion Time: 30-35 Minutes
Tutorial Assets
The following assets were used in the creation of this tutorial.
Step 1
Create a new document with width 1200px and height 1000px.Fill your background with # 110500 color using ‘paint bucket tool’.

Step 2
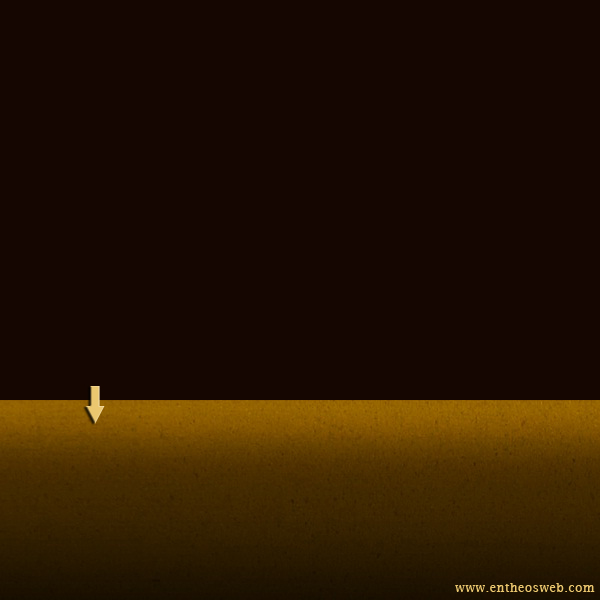
Create a new layer, select the bottom 1/3rd of the document and fill the selection with # 2e1800 color. This will serve as the floor.
Step 3
Open the ‘concrete texture’ file, press Ctrl+ A to select it, and then press Ctrl+ C to copy the selection. Come back to your document and press Ctrl+ V to paste the texture here. Drag it downward to place it over that lower 1/3rd making the floor. Change the blending mode of this layer to ‘overlay’ and reduce its opacity to 50%.

Step 4
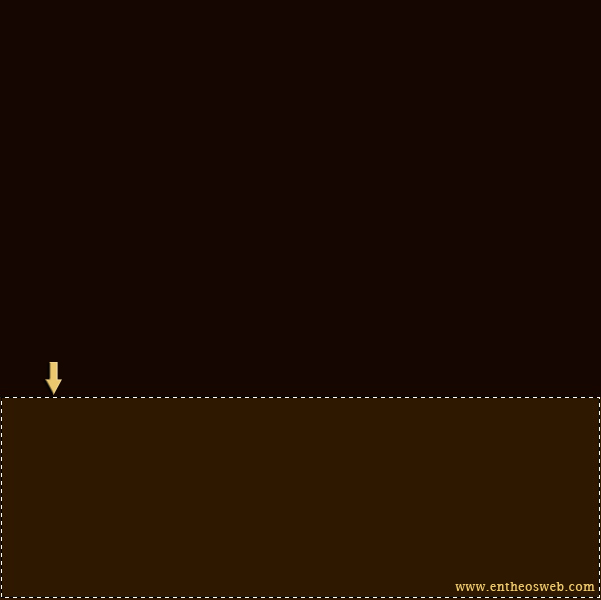
Click on the ‘floor’ layer and go to Layer > Layer style > Gradient overlay. Use the given settings here.
Step 5
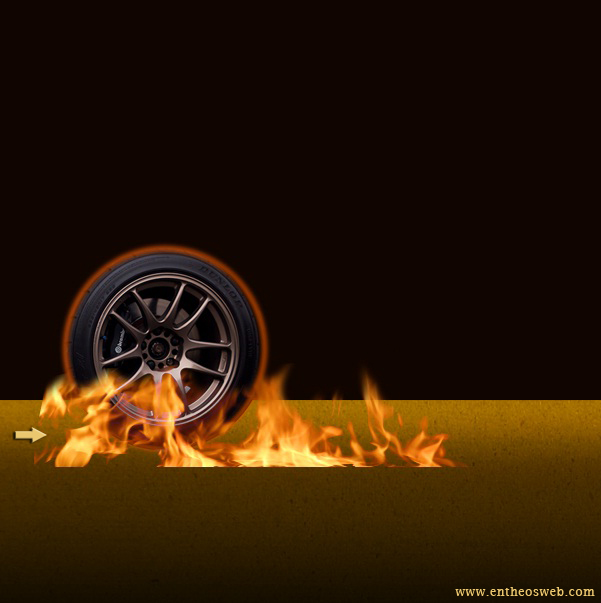
Open the ‘car image’ now and paste it in your document in the same way as explained in step 3. Now select the ‘elliptical marquee tool’ to select the wheel, press Ctrl+ C to copy it and then paste this selection on a new layer by pressing Ctrl+ V. Label this layer as ‘wheel’.

Now duplicate ‘wheel’ layer by going to Layer > Duplicate layer. Now we’ll work on this copy, press Ctrl+ thumbnail of wheel copy layer to select it. After that, go to Select > Modify > Contract. Use 5px value here and hit ‘delete’ button. It will form a circular frame. Press Ctrl+ Thumbnail of this frame layer to select it and fill this selection with # f35b00 color using ‘paint bucket tool’.

Step 6
Reduce the size of wheel and frame using ‘Free transform tool’. To activate ‘Free transform tool’, press Ctrl+ T. Now click on the ‘frame’ layer and go to Filter > Blur > Gaussian blur. Use the given values.

Step 7
Open the fire image and paste it in your document. Resize it using ‘Free transform tool’. Select the ‘rectangular marquee tool’ to select a portion of fire, copy and paste it on a new layer.

Change the blending mode of this new fire layer to ‘Lighten’. Now go to Edit > Transform > Warp. Arrange it as shown below to give it the desired look.

Erase the fire layer a bit, to form the proper flame shape using ‘soft round eraser tool’.
Step 8
Duplicate the flame modified layer and drag this copy to the right side of wheel to form fiery path.

Step 9
Create a new layer, and select the fire brushes, # fc9b24 and apply it as shown below. Try to use different fire brushes on separate layers, so you can edit them easily. You can play with your creativity to use these brushes to get a different effect. It’s totally up to you how you use it.

Collect all these fire brush layers in a new group and place this group below the real fire image layers to get the effect as below.

Step 10
Now we’ll make few fiery sparks. You can use these fire brushes in smaller sizes to make them.
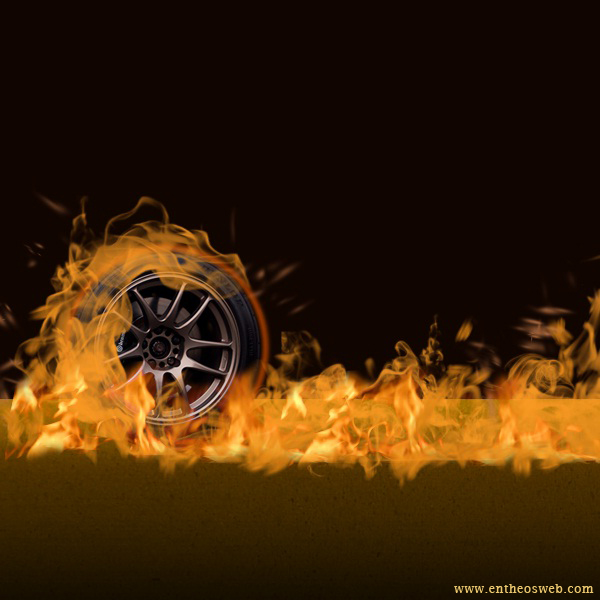
Create a new layer just above the floor layers, select soft round brush 50% opacity, # 000000 and apply it gently to form a soft shadow.

Step 11
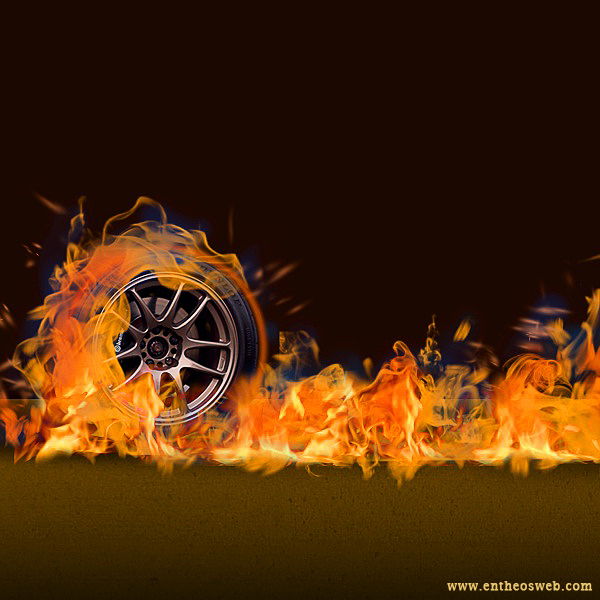
Create a new layer below the real fire layer and apply few brush stroke using ‘soft round brush’ and # c54a00 color to give fire more reddish look. Set the blending mode of this layer to ‘Overlay’.
Apply few soft round brush strokes on fire on a new layer in # 083ca5 color. Place this layer below the red stroke layer to get the effect as shown below.

Step 12
To enhance the fire effect, click on the icon of ‘create new fill or adjustment layer’ and select ‘Hue/ Saturation’. Use the given settings.

Once again, click on the icon of ‘create new fill or adjustment layer’ and choose ‘Level’s. Apply the following settings for it.

That’s it guys. Hope you enjoyed the creation of this fiery effect and learned something useful. Do share your thoughts.